GPRS Wiki
Table of Contents
Table of Contents
a
test
To connect to the GPRS platform, type gprs.gr in the address bar of your browser and press Enter. You will be redirected to the following home page.
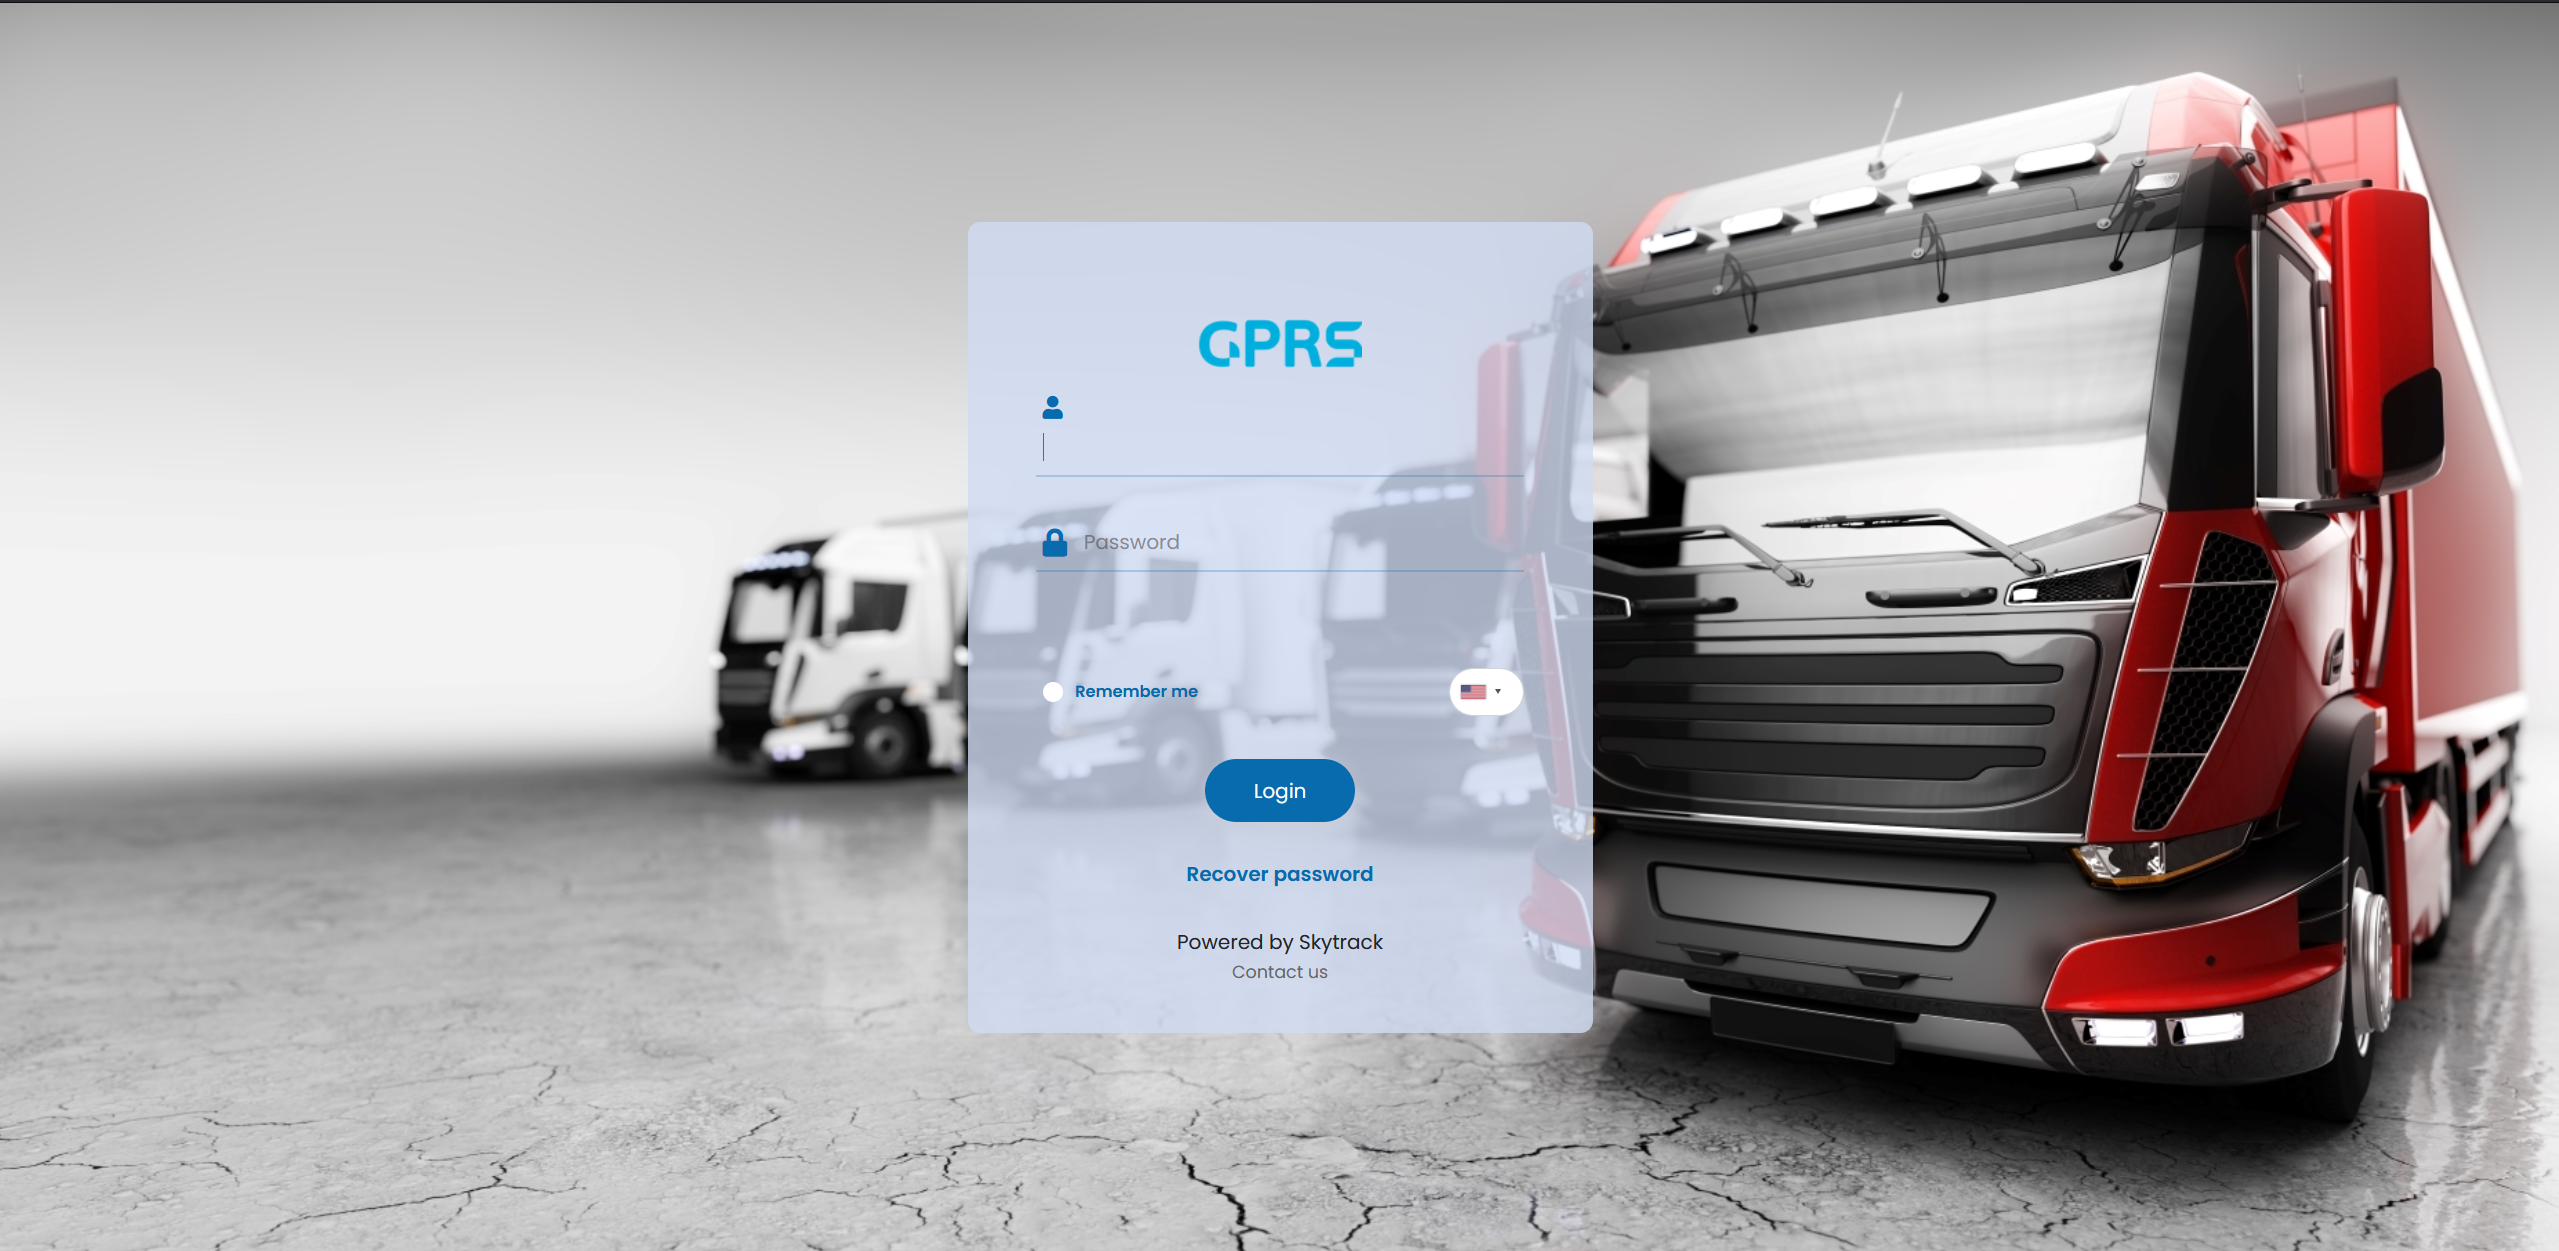
Enter your username and password in the corresponding fields and click the "Log In" button.
Tick the Remember me option to automatically login to your account next time you visit the website.
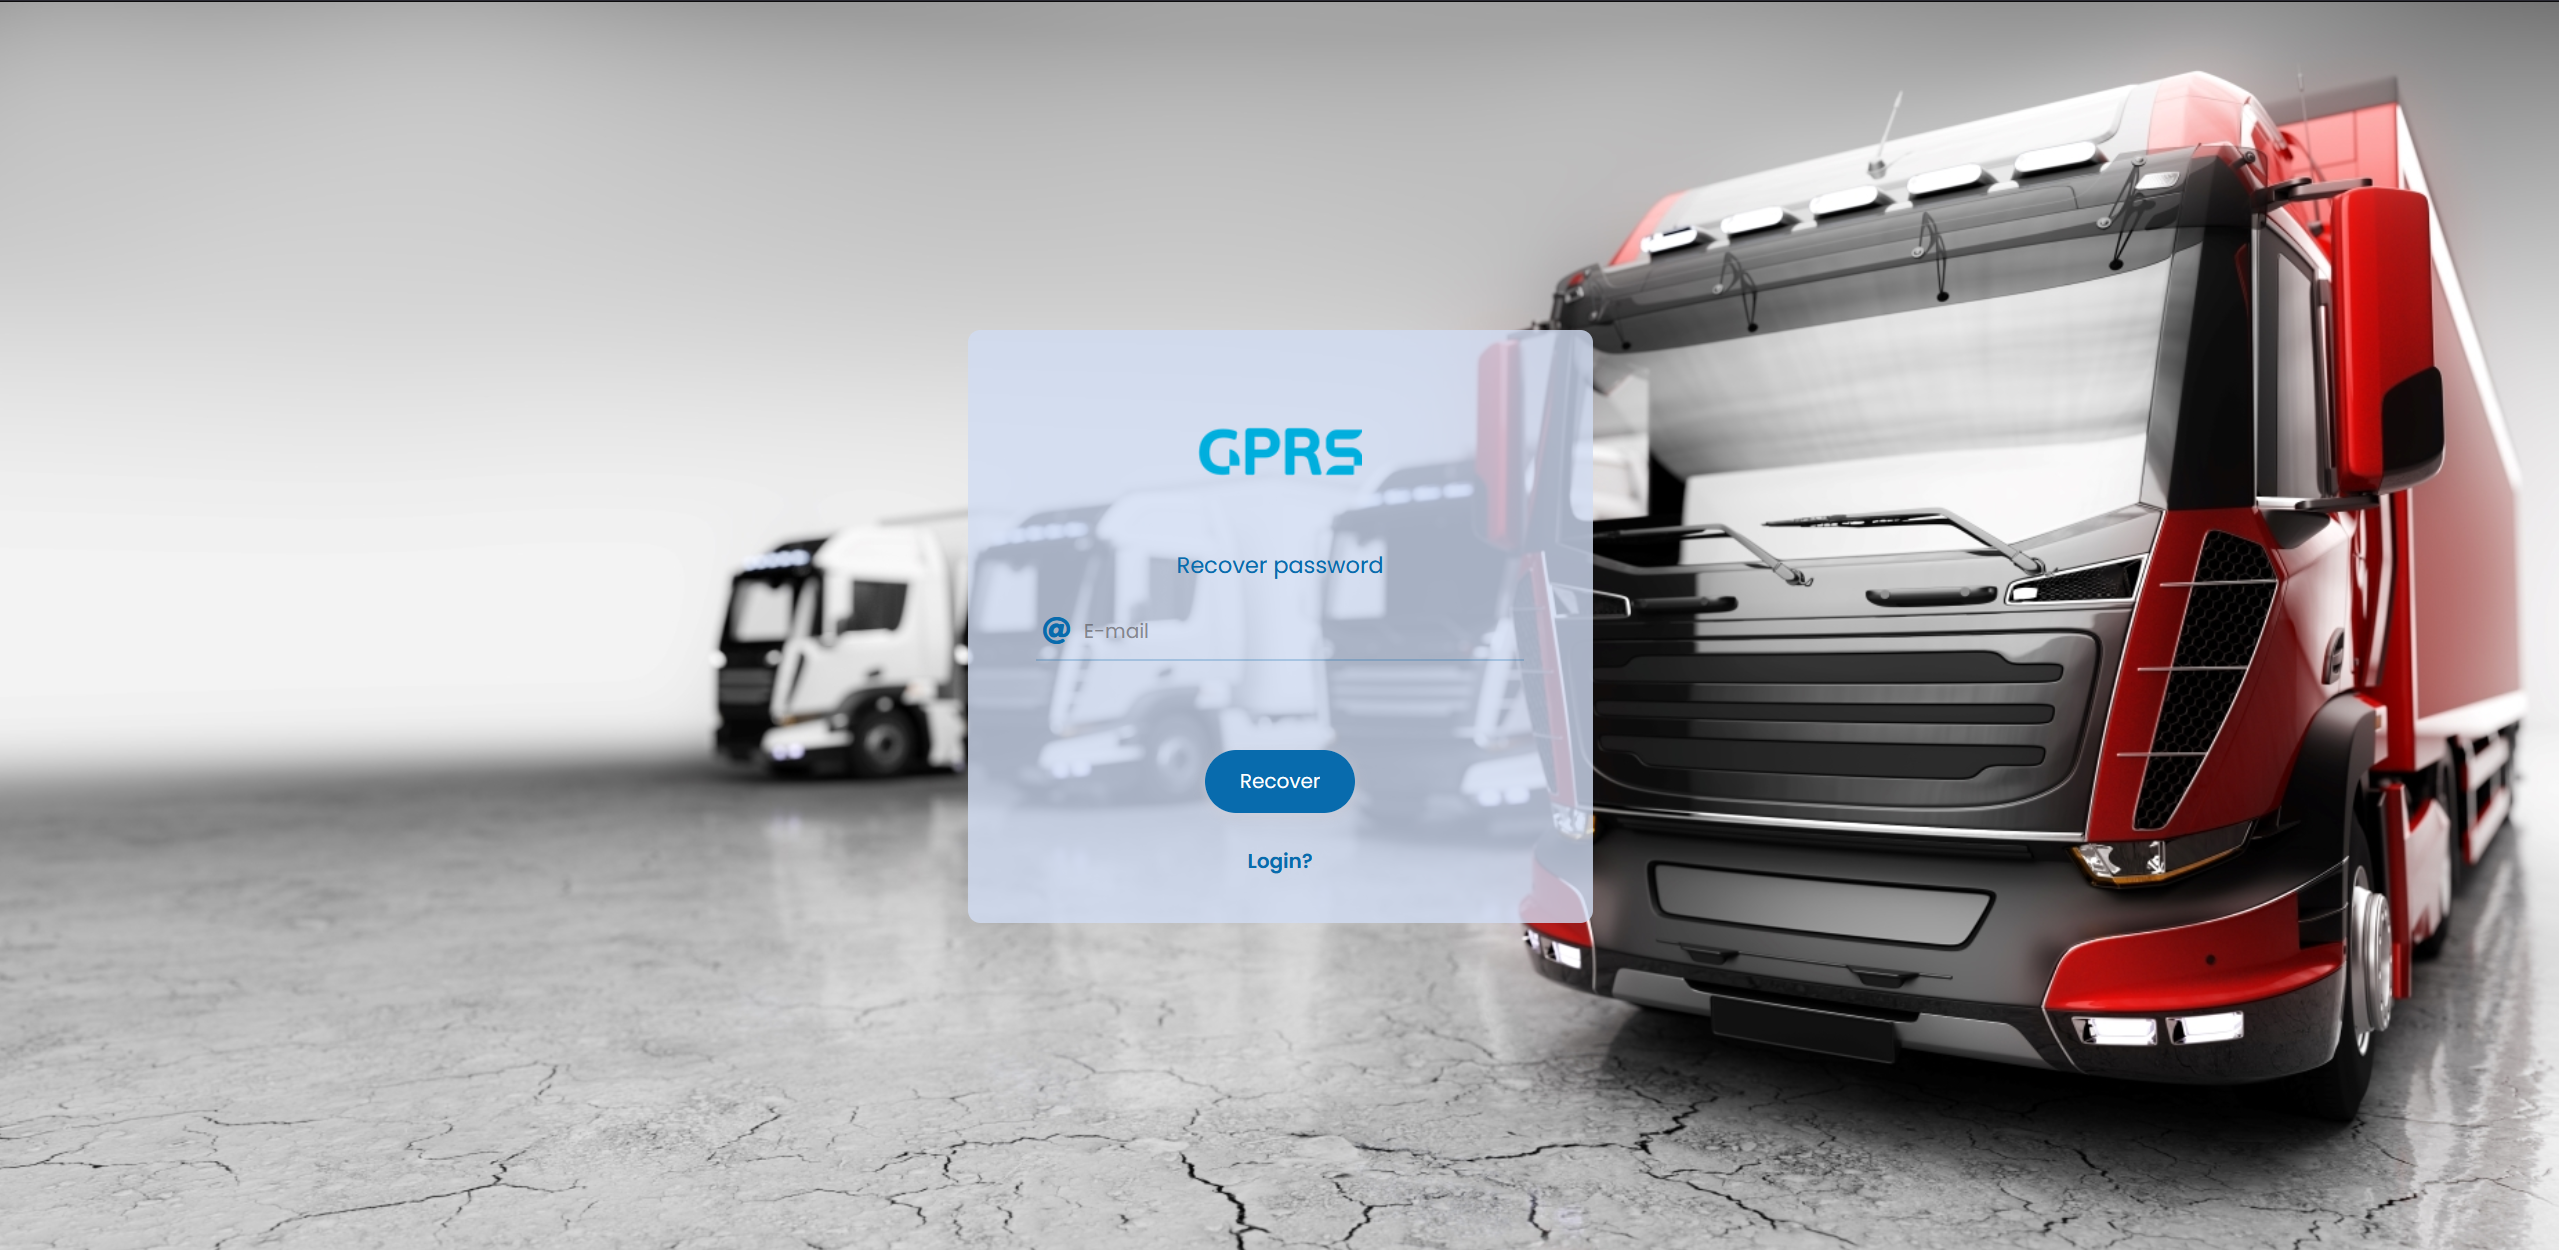
If you forget your user password, you can click the "Recover password" option.
Enter your username and click the Recover button. You will shortly receive an automated email which asks you to confirm the procedure.

The email will look like below
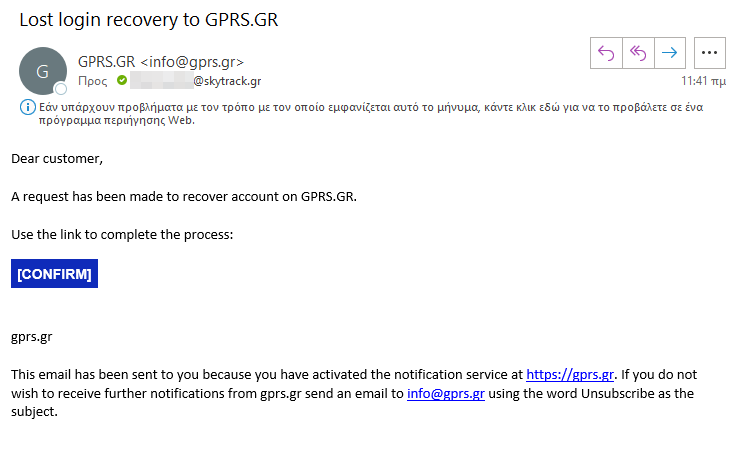
Click the blue CONFIRM button.
The GPRS platform will generate a new password which will be emailed to you along with your username. Please keep the new password safe, or use it to change it to something memorable.
As soon as you login to the GPRS platform, you will see the main screen:

The interface has buttons, menus and submenus that allow us to carry out multiple types of work.
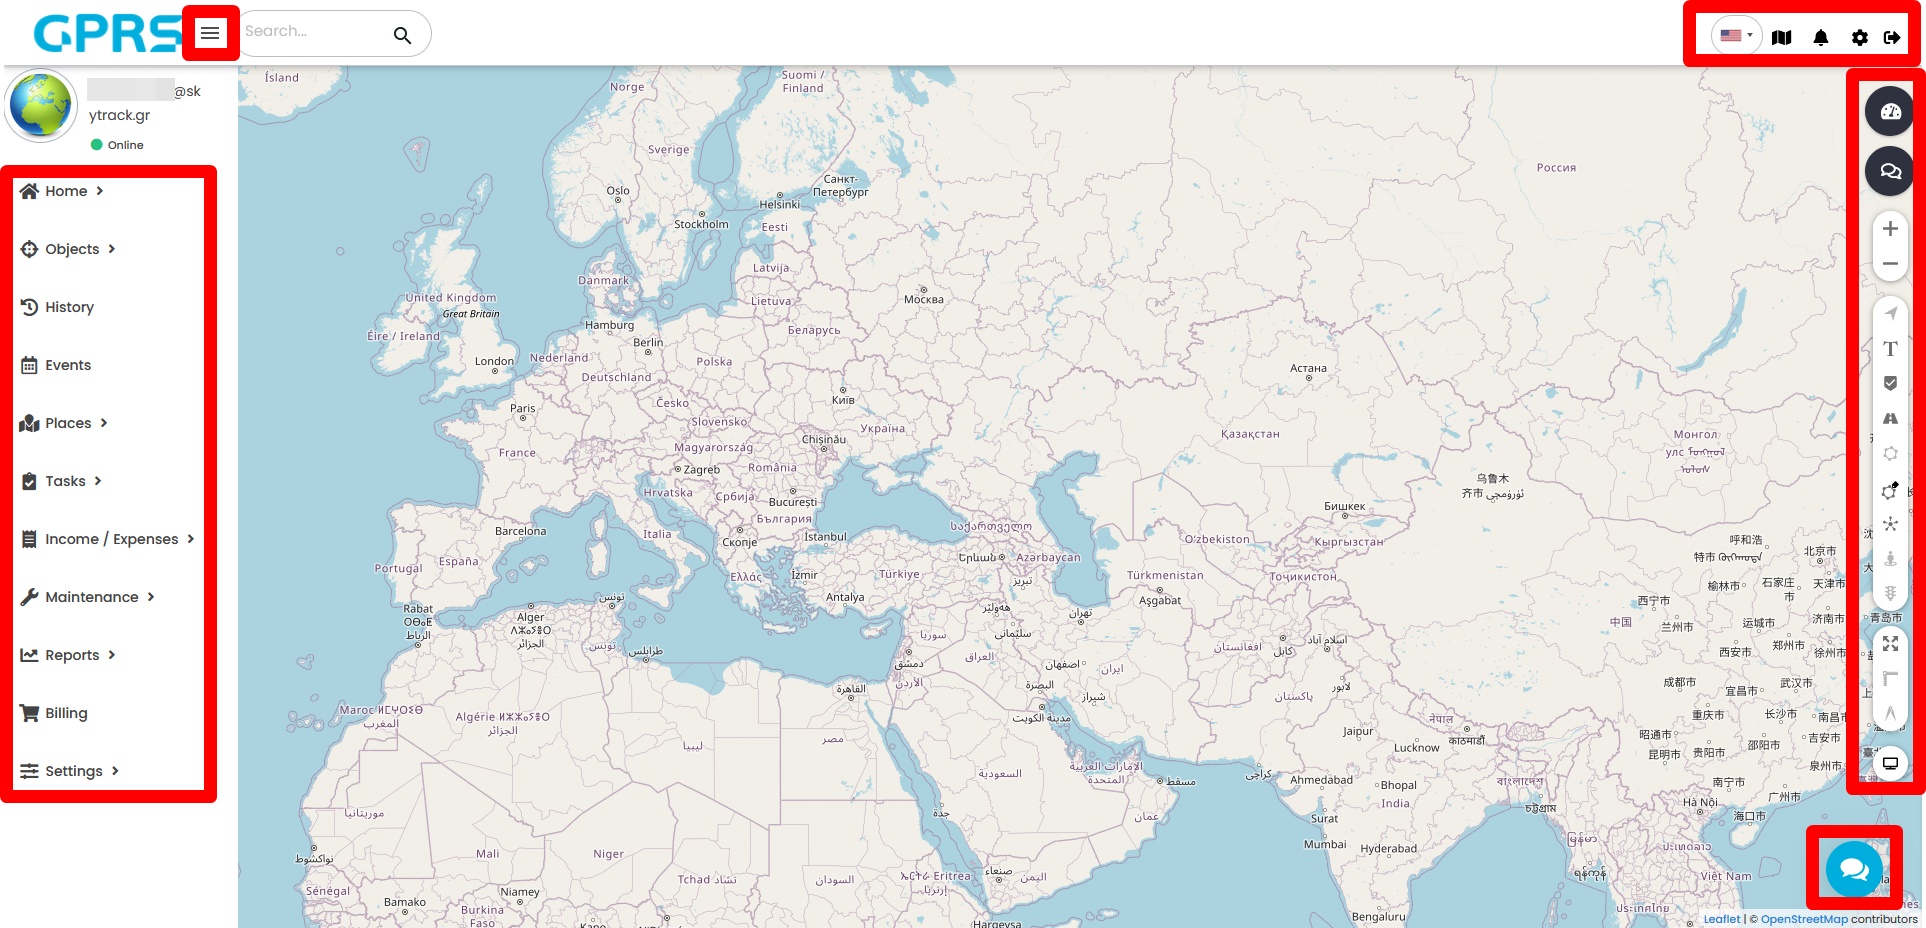
Clicking the highlighted symbol next to the GPRS logo, will collapse the menu on the left. This allows us to have a broader view of the map.
At the top right we see the following icons:

Clicking the flag icon, ![]() gives us the option to change the displayed language. The page will reload automatically to reflect all changes.
gives us the option to change the displayed language. The page will reload automatically to reflect all changes.
The languages that are currently supported are English, Greek, Bulgarian and Albanian.
Clicking on ![]() (Maps) allows us to change the displayed map type. There is a variety of options, This is especially handy in the rare occasion a service is down.
(Maps) allows us to change the displayed map type. There is a variety of options, This is especially handy in the rare occasion a service is down.
The current options are:
- Open Street Maps
- Open Sea Maps
- Open Streets Bicycle
- Open Streets Dark
- Bing Road
- Bing Aerial
- Bing Hybrid
- Google Steets
- Google Satellite
- Google Hybrid
- Google Terrain
- Mapbox Streets
- Mapbox Satellite
Clicking "Notifications",![]() will show any relevant notification our account has received. This depends to the account's personalised settings, and varies from Ignition events and Overspeeding, to Alarms
will show any relevant notification our account has received. This depends to the account's personalised settings, and varies from Ignition events and Overspeeding, to Alarms
Clicking Logout ![]() will log you of the account. It is strongly recommended if you are using a shared computer.
will log you of the account. It is strongly recommended if you are using a shared computer.
On the right side of the screen, the indicated group has the following options.
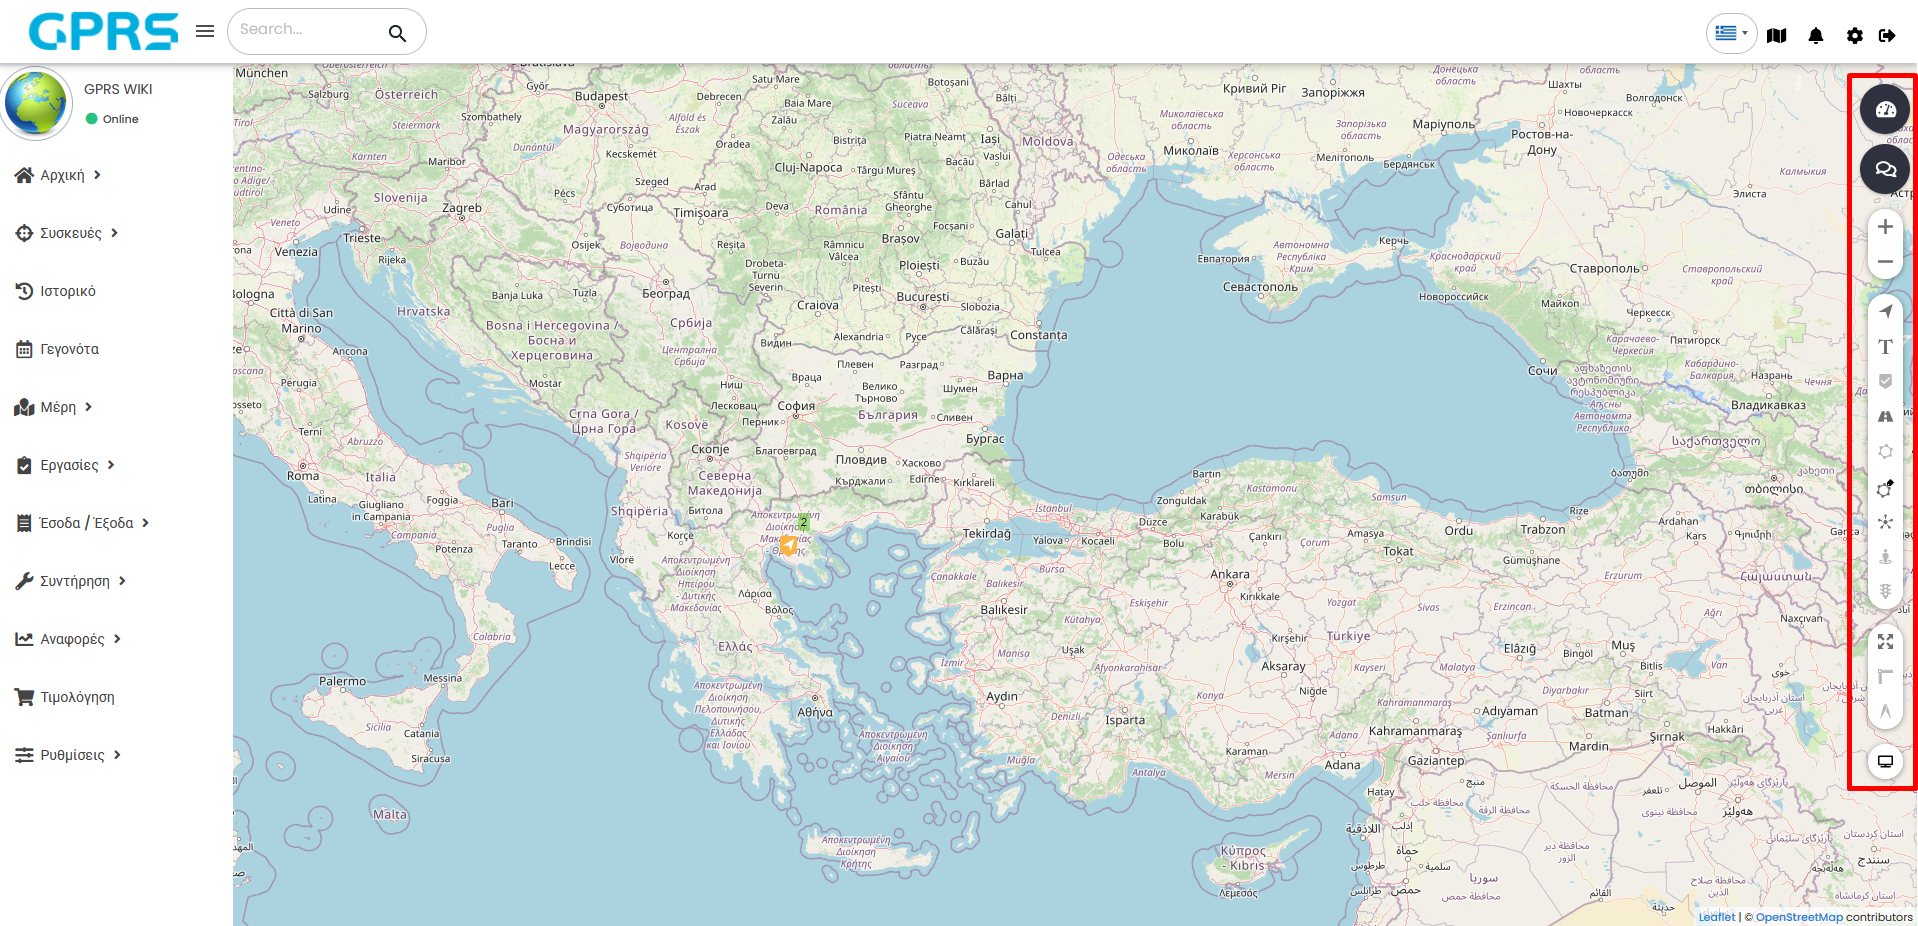
Here you will find various settings for the data and information we see on the map.
- Instruments

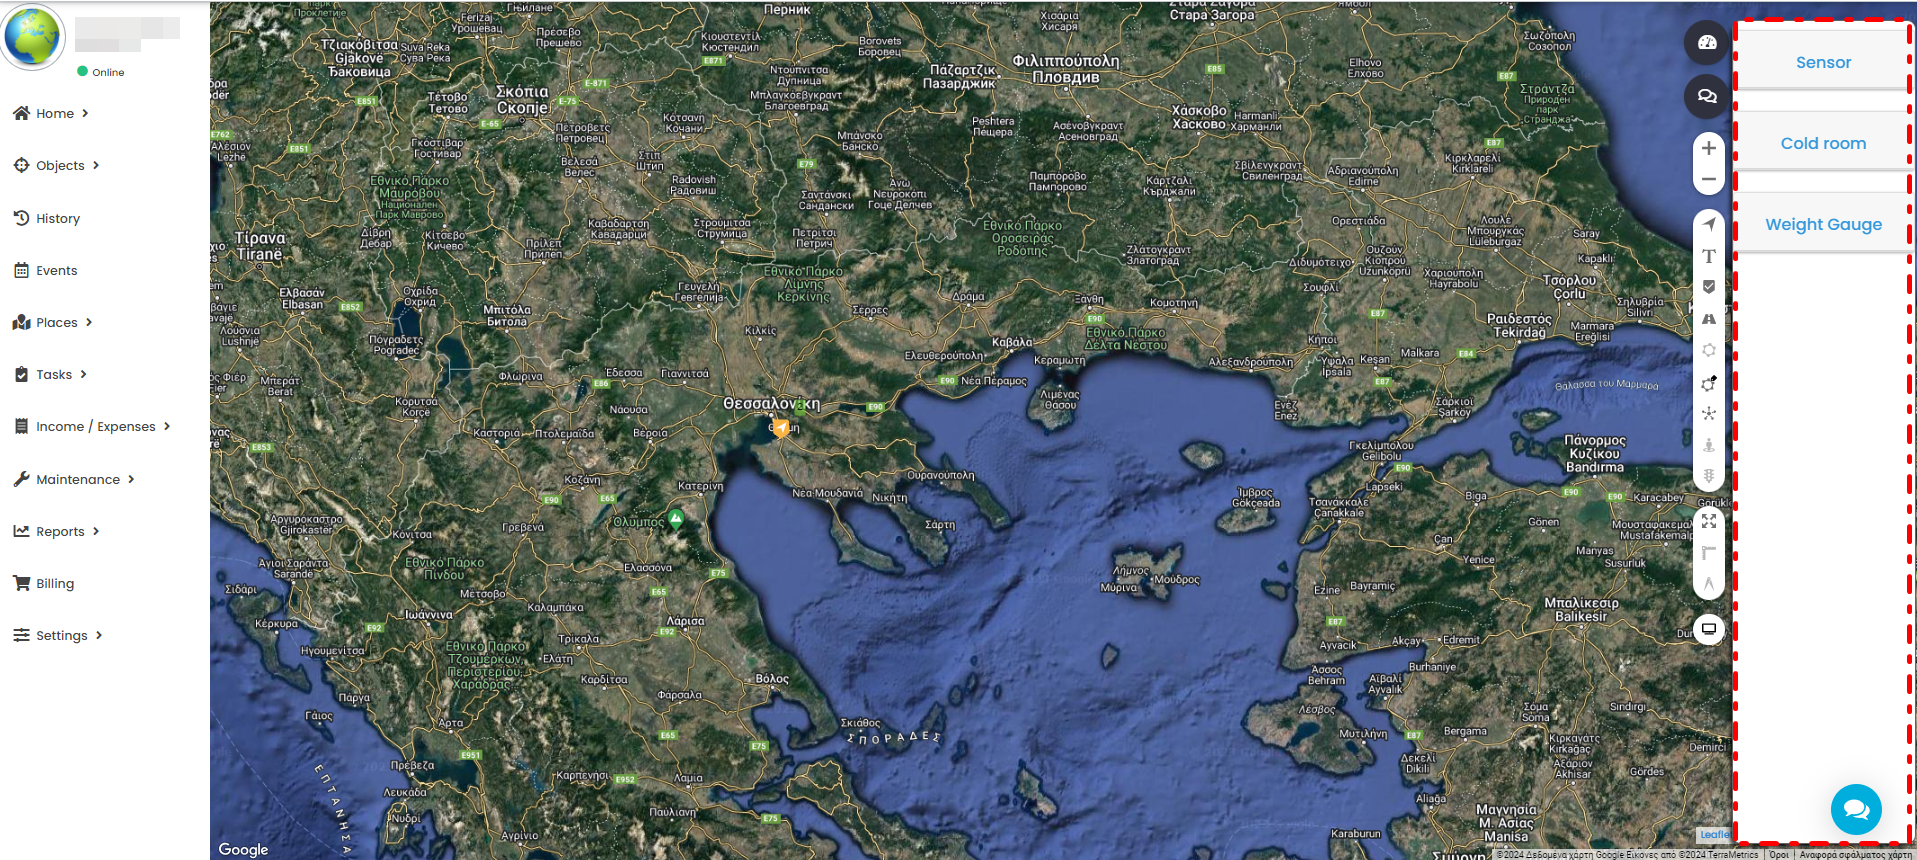
Tapping on the right of the map displays instruments where we can see data from various sensors of our vehicle.
To see data in real time, we need to select a vehicle. The type of data depends on the following:
- Vehicle type
- Device type (simple, CAN Bus, OBD II)
- Additional sensors (temperature sensor, smart fuel cap, etc.)
The sensors are divided into 3 sub-menus.
- Sensor
- Cold room
- Weight Gauge
The next menu allows us to visually enable/disable parameters suchs as:
- Activate/deactivate objects

Shows/hides all vehicles or vehicle groups on the map. - Enable/Disable object labels

Shows/hides the labels (names) of our vehicles on the map. - Activating/deactivating points of interest

Shows/hides Points of Interest the user has manually defined. - Enable/Disable routes

Shows/hides routes the user has manually defined. - Activate/deactivate zones

Shows/hides zones (geofences) - Enable/Disable zone labels

Shows/hides zones' names. - Enable/Disable groups

Enables/disables grouping (vehicles, zones etc.) - Enable/Disable Street View

Enables/disables Google Street View. Enabling it and clicking on a vehicle, will load the relevant street view, if available. - Enable/Disable traffic

Enables/disables traffic information. This module can be used only with the following maps.- Google Street
- Google Hybrid
- Google Terrain
- Fit objects on map

The map will be automatically adjusted accordingly. If the account has multiple devices active, the map will zoom in or out depending on the distance between them. This gives a broader view and makes monitoring easier. - Ruler

By pressing it and selecting at least 2 points on the map, the application will show us the distance between them. In the line that will be formed we will see 3 white squares. One at the beginning and end of the line and one more in the middle. These squares define the distance points and we can drag them wherever we want by holding down the left mouse button on them. As soon as we have finished measuring the distances we want, to stop the measurement function, press the ruler button again. The measurement is in kilometers (Km). - Measurement Area

Will measure a desired area. Initially we need to chose at least three points, including the starting point. Clicking again on the final point will finalise the measurement. Further clicking will readjust the area accordingly. After the area is finalised, we can fine tune it by using the extra anchor points provided. The area is measured in km2 or hectares (ha)
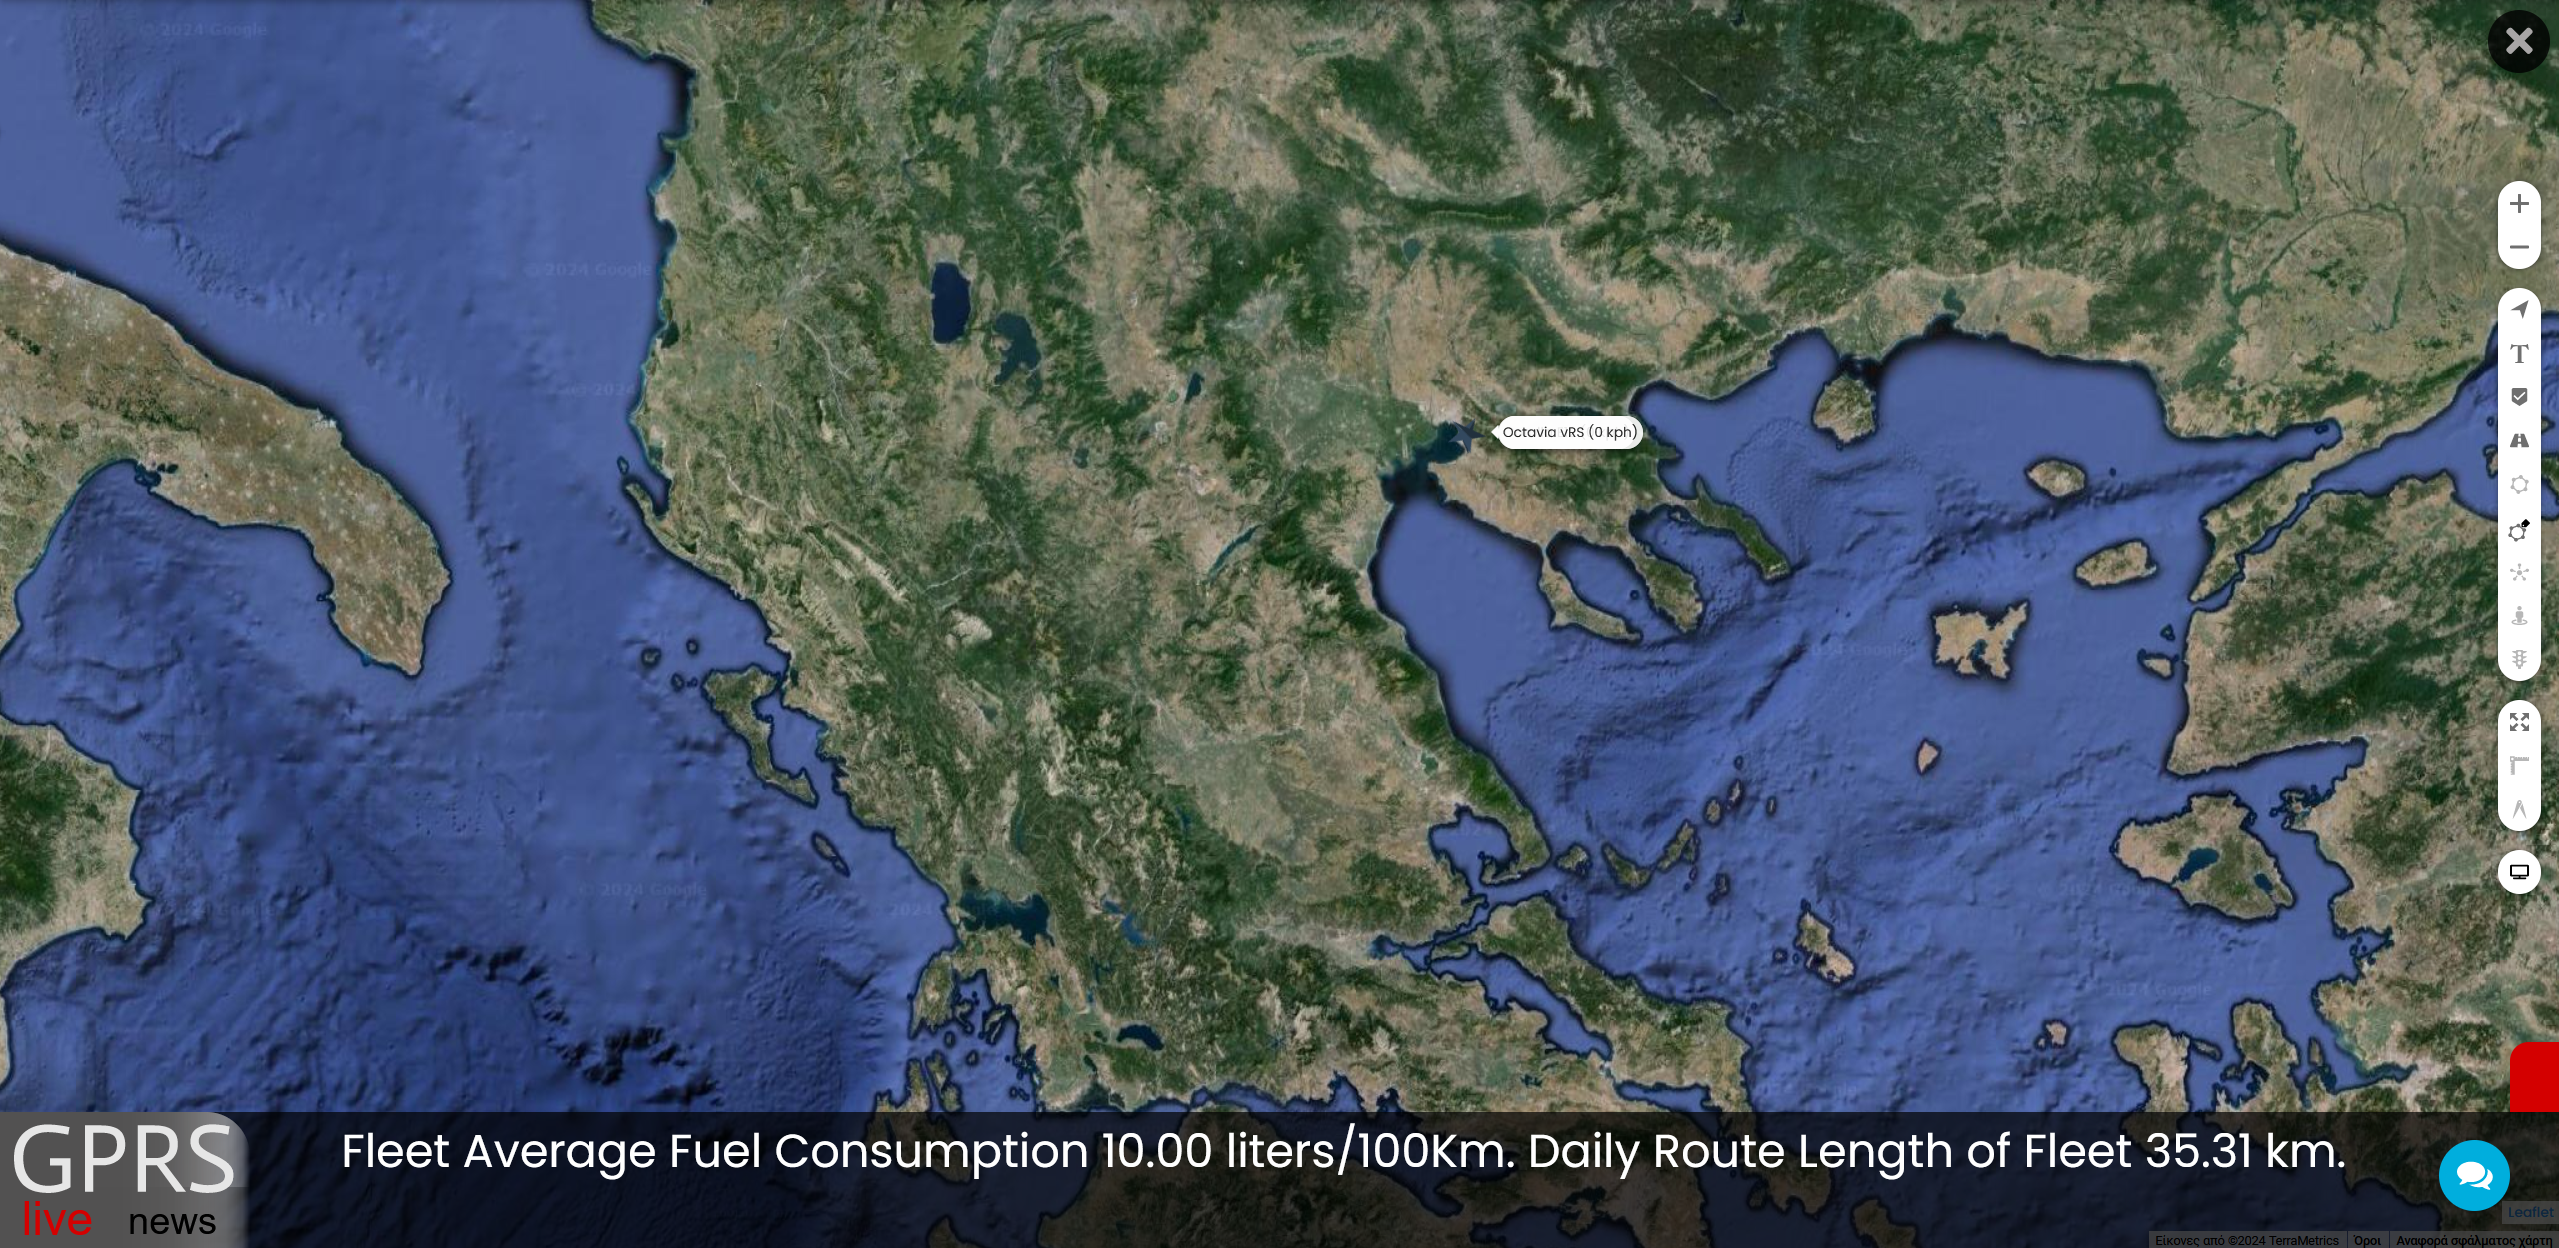
Finally, at the very end, it's the GPRS LIVE TV ![]() button. Clicking this enables a minimalistic interface which hides the header, the left panel the sensor/chat buttons on the top right side. It also enables rolling messages that show the following information:
button. Clicking this enables a minimalistic interface which hides the header, the left panel the sensor/chat buttons on the top right side. It also enables rolling messages that show the following information:
- Fleet average fuel consumption
- Daily Route length
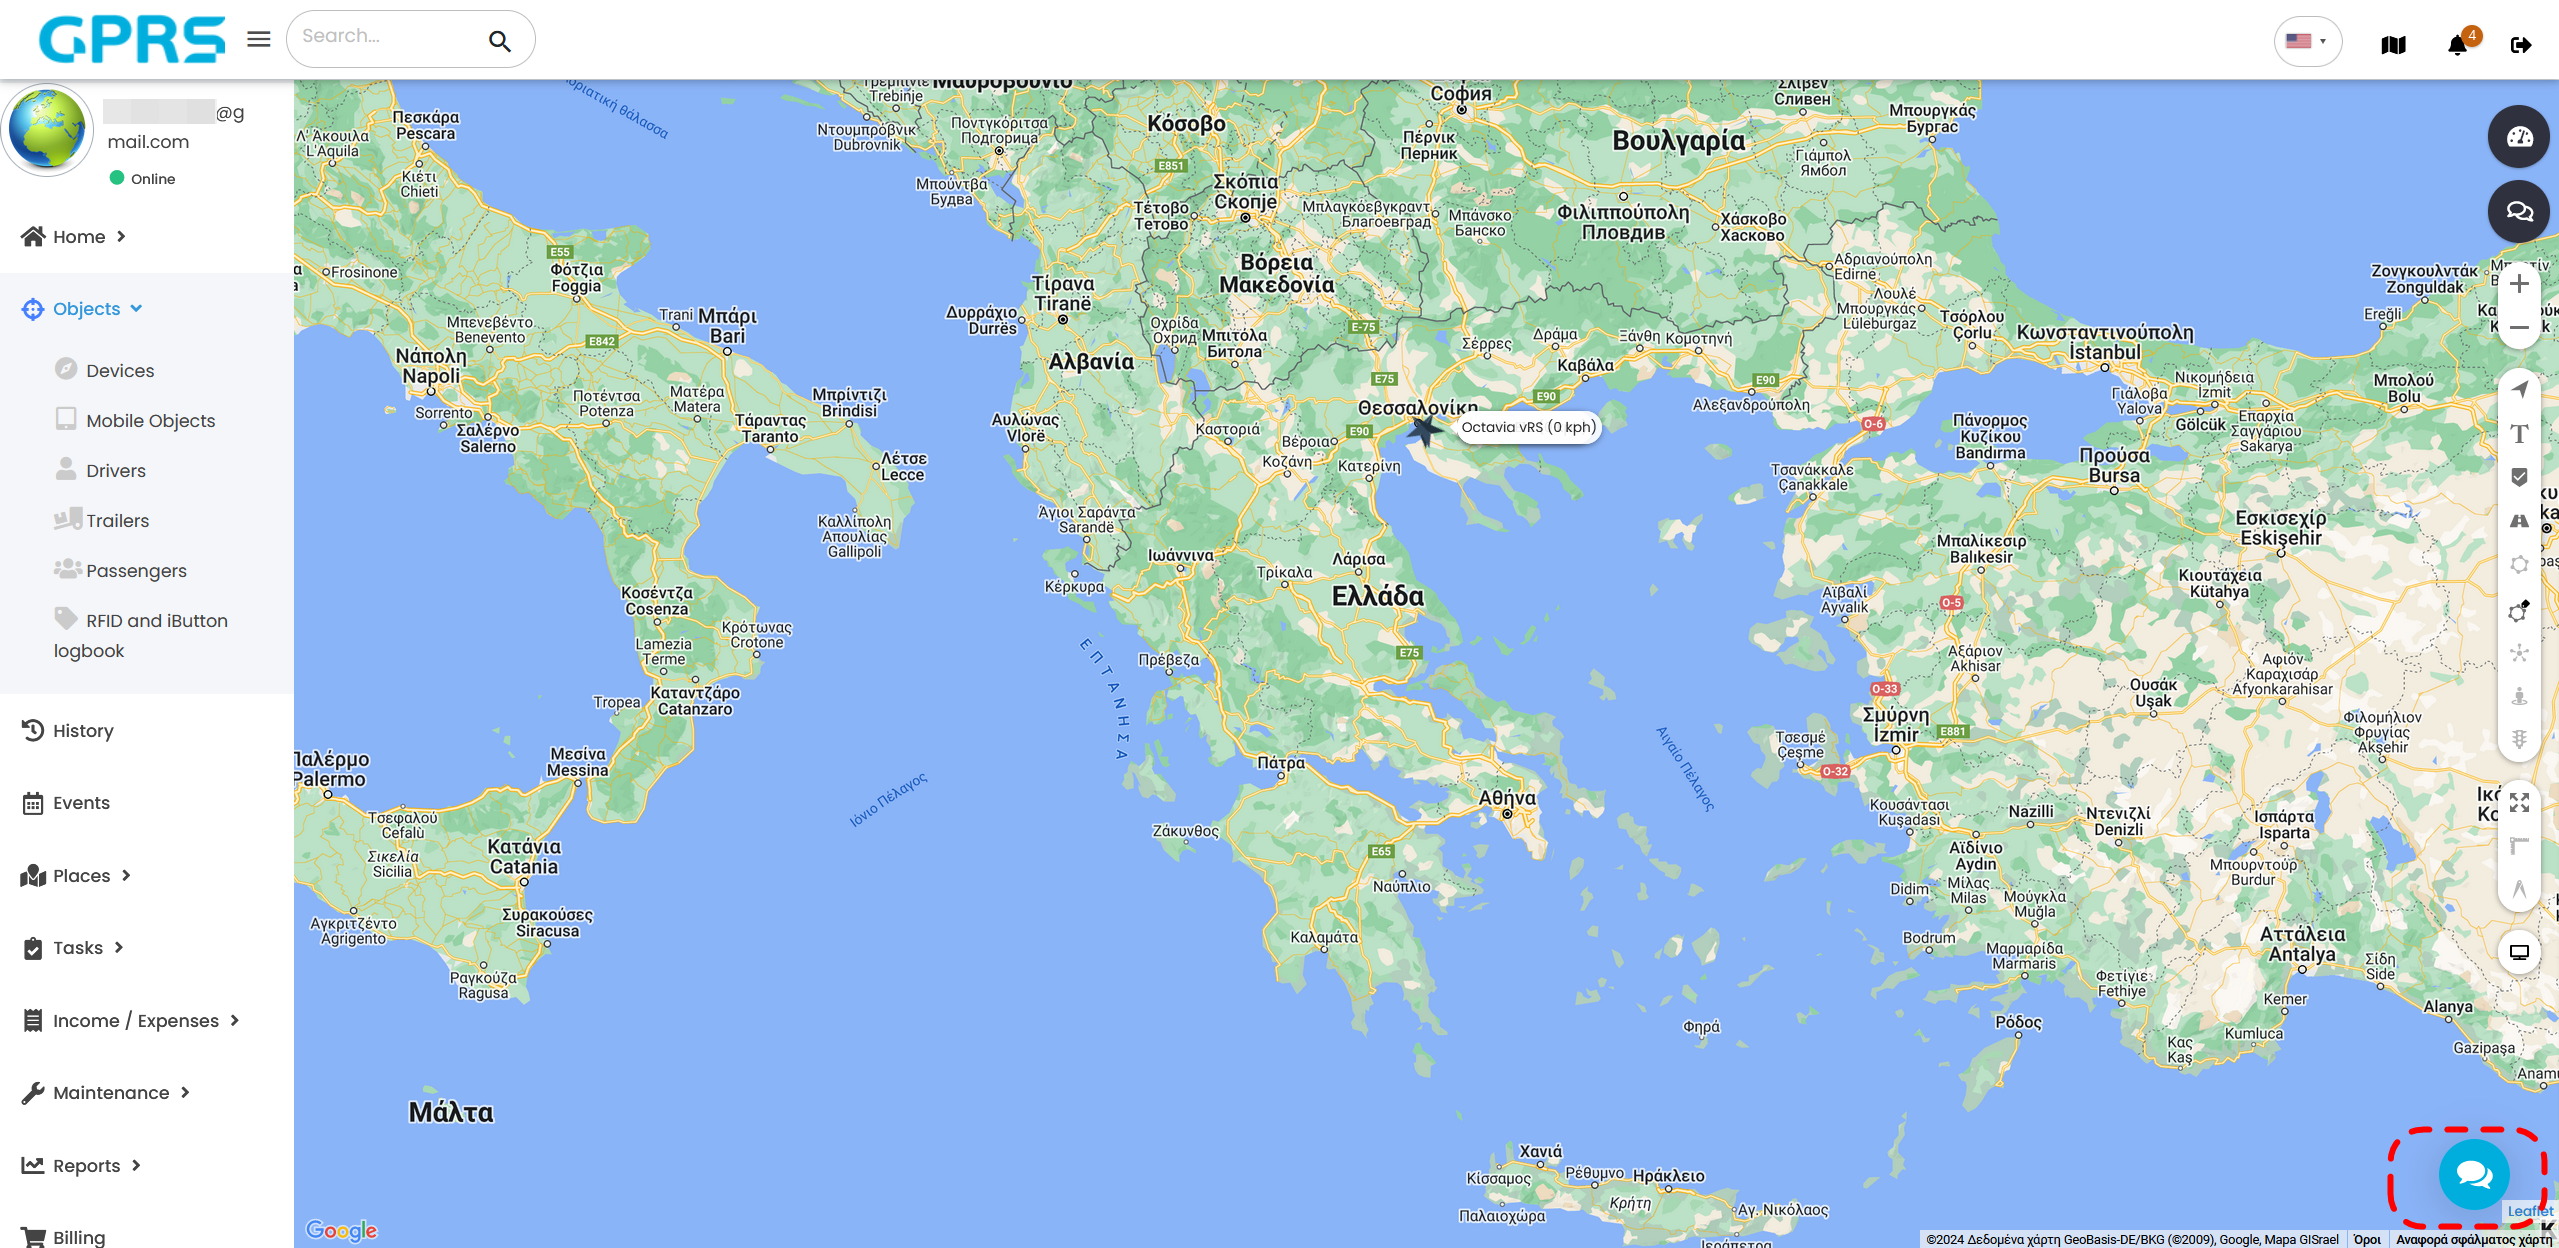
The blue button is the chat button which will load MIA, the GPRS Virtual assistant. MIA is connected to a knowledge base which is frequently updated and offers configuration guides and answers to most common queries related to the platform itself and the GPS devices.
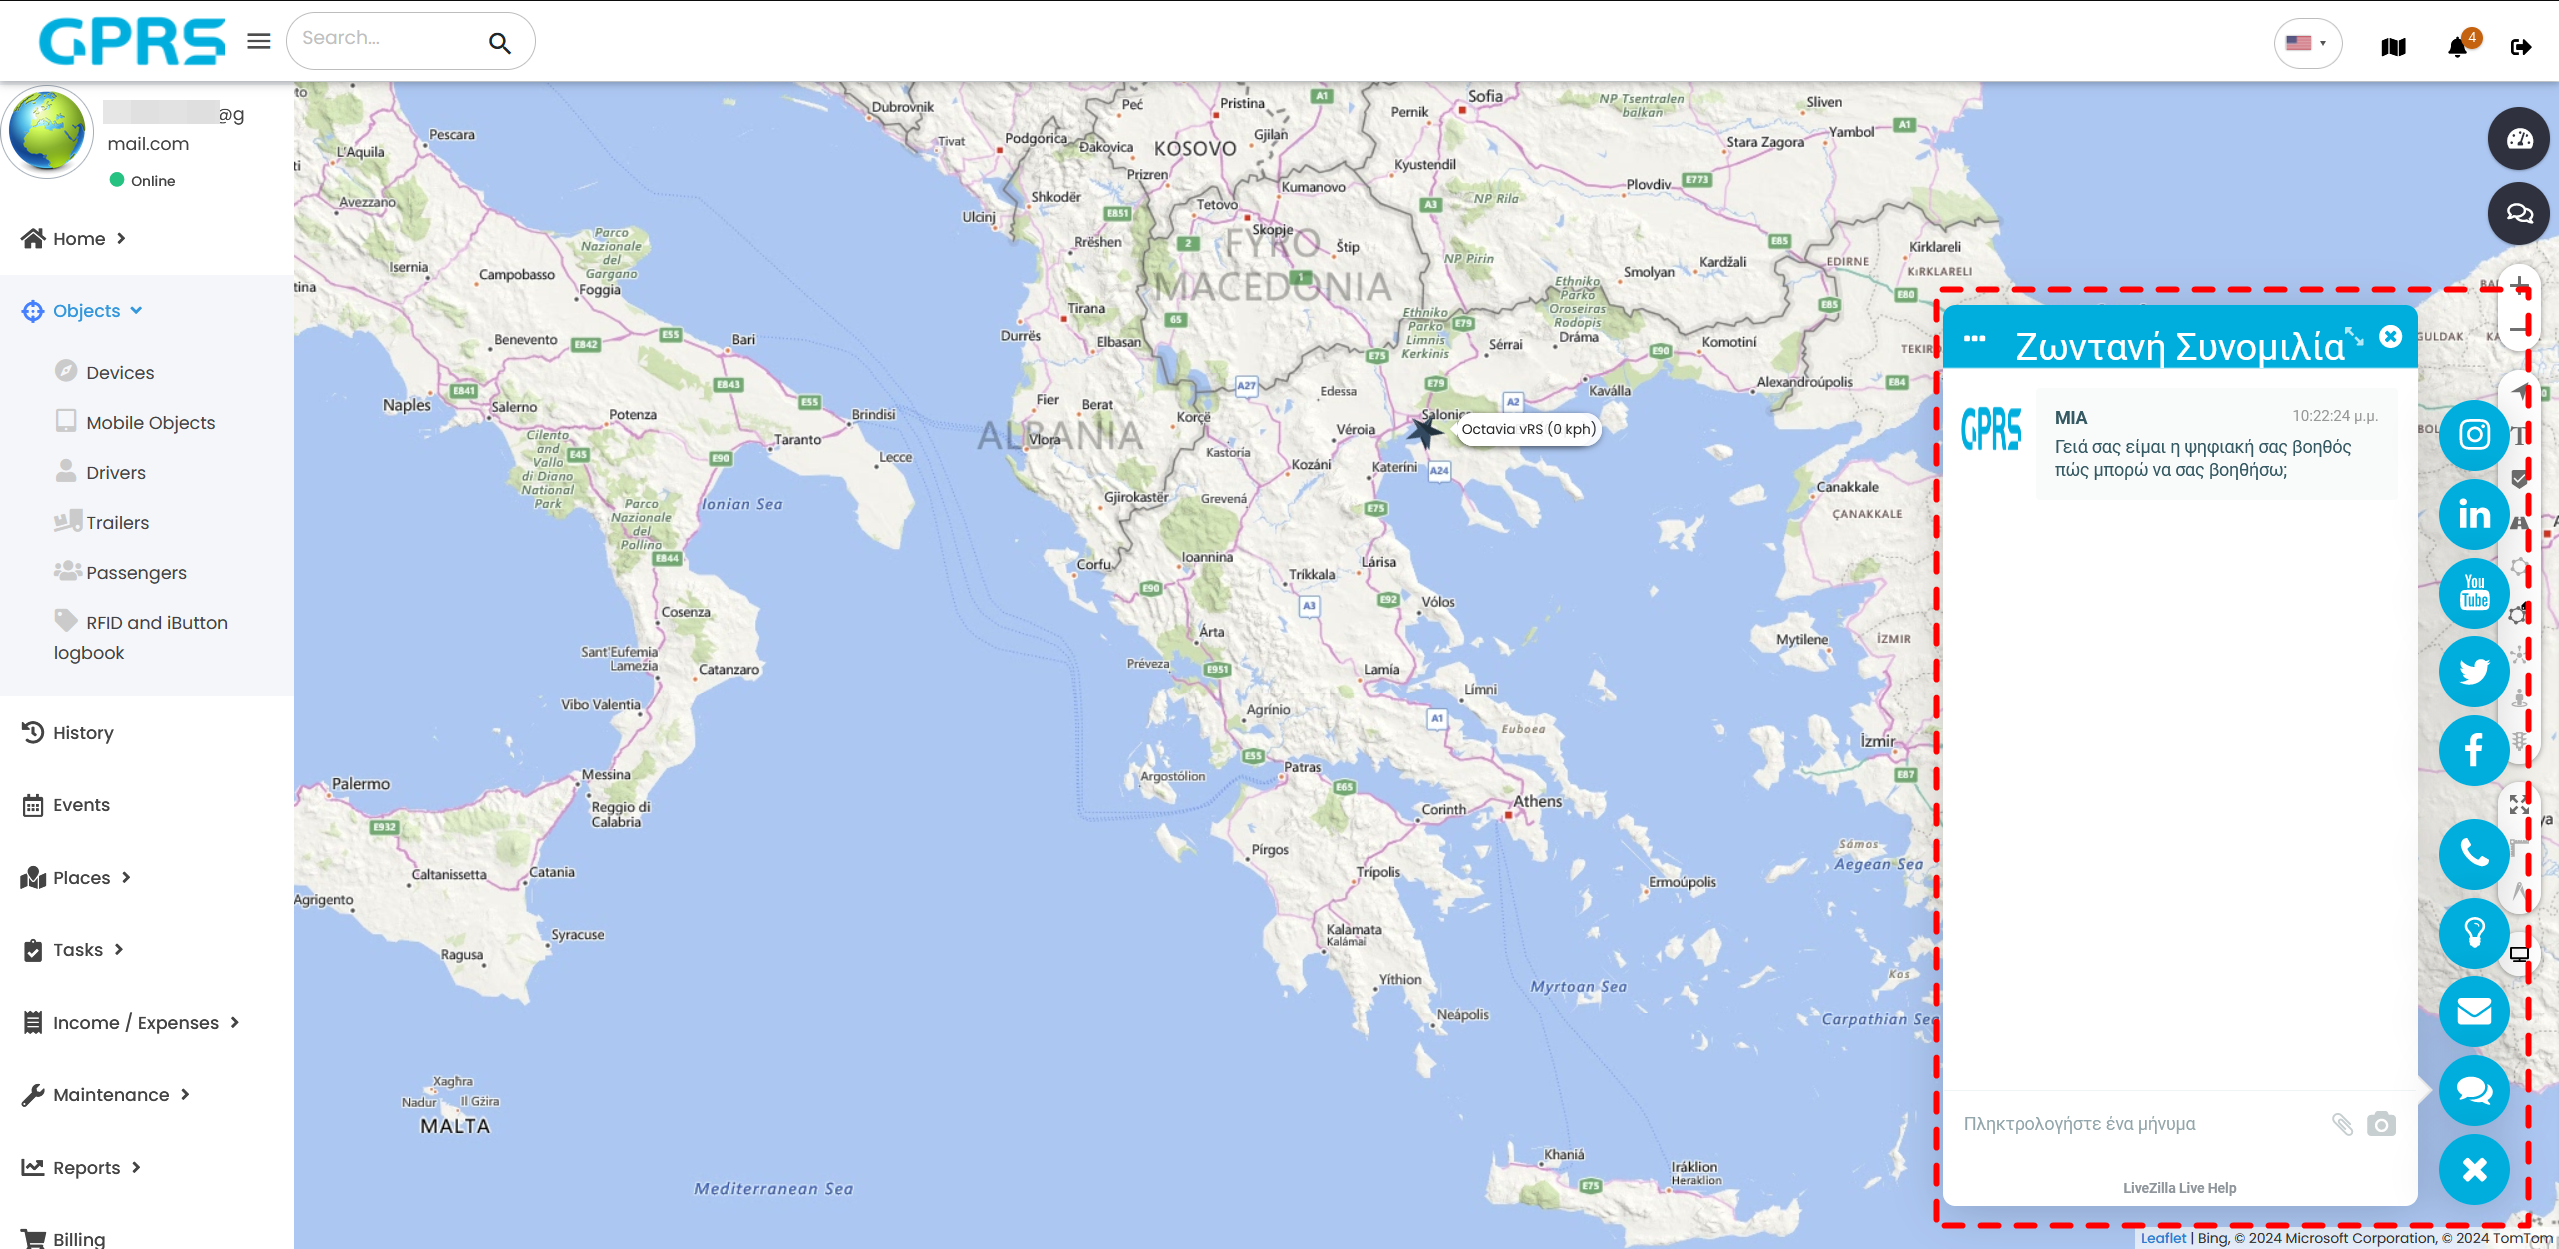
Typing a keyword (e.g. Payment) and pressing enter will fetch all related content.

Finally, clicking on the result, will open a new tab with the article.

In the event your query cannot be answered by MIA, you will be offered the option to send a message to the technical support department. Please use the form to describe your problem as accurately as possible. A representative will get back to you shortly.

A copy of the initial conversation will also be sent to your email account.

The LiveChat option allows you to quick access to our social media platforms as well, such as Instagram, LinkedIn, YouTube, X (former Twitter) and Facebook where we share news related to our services.
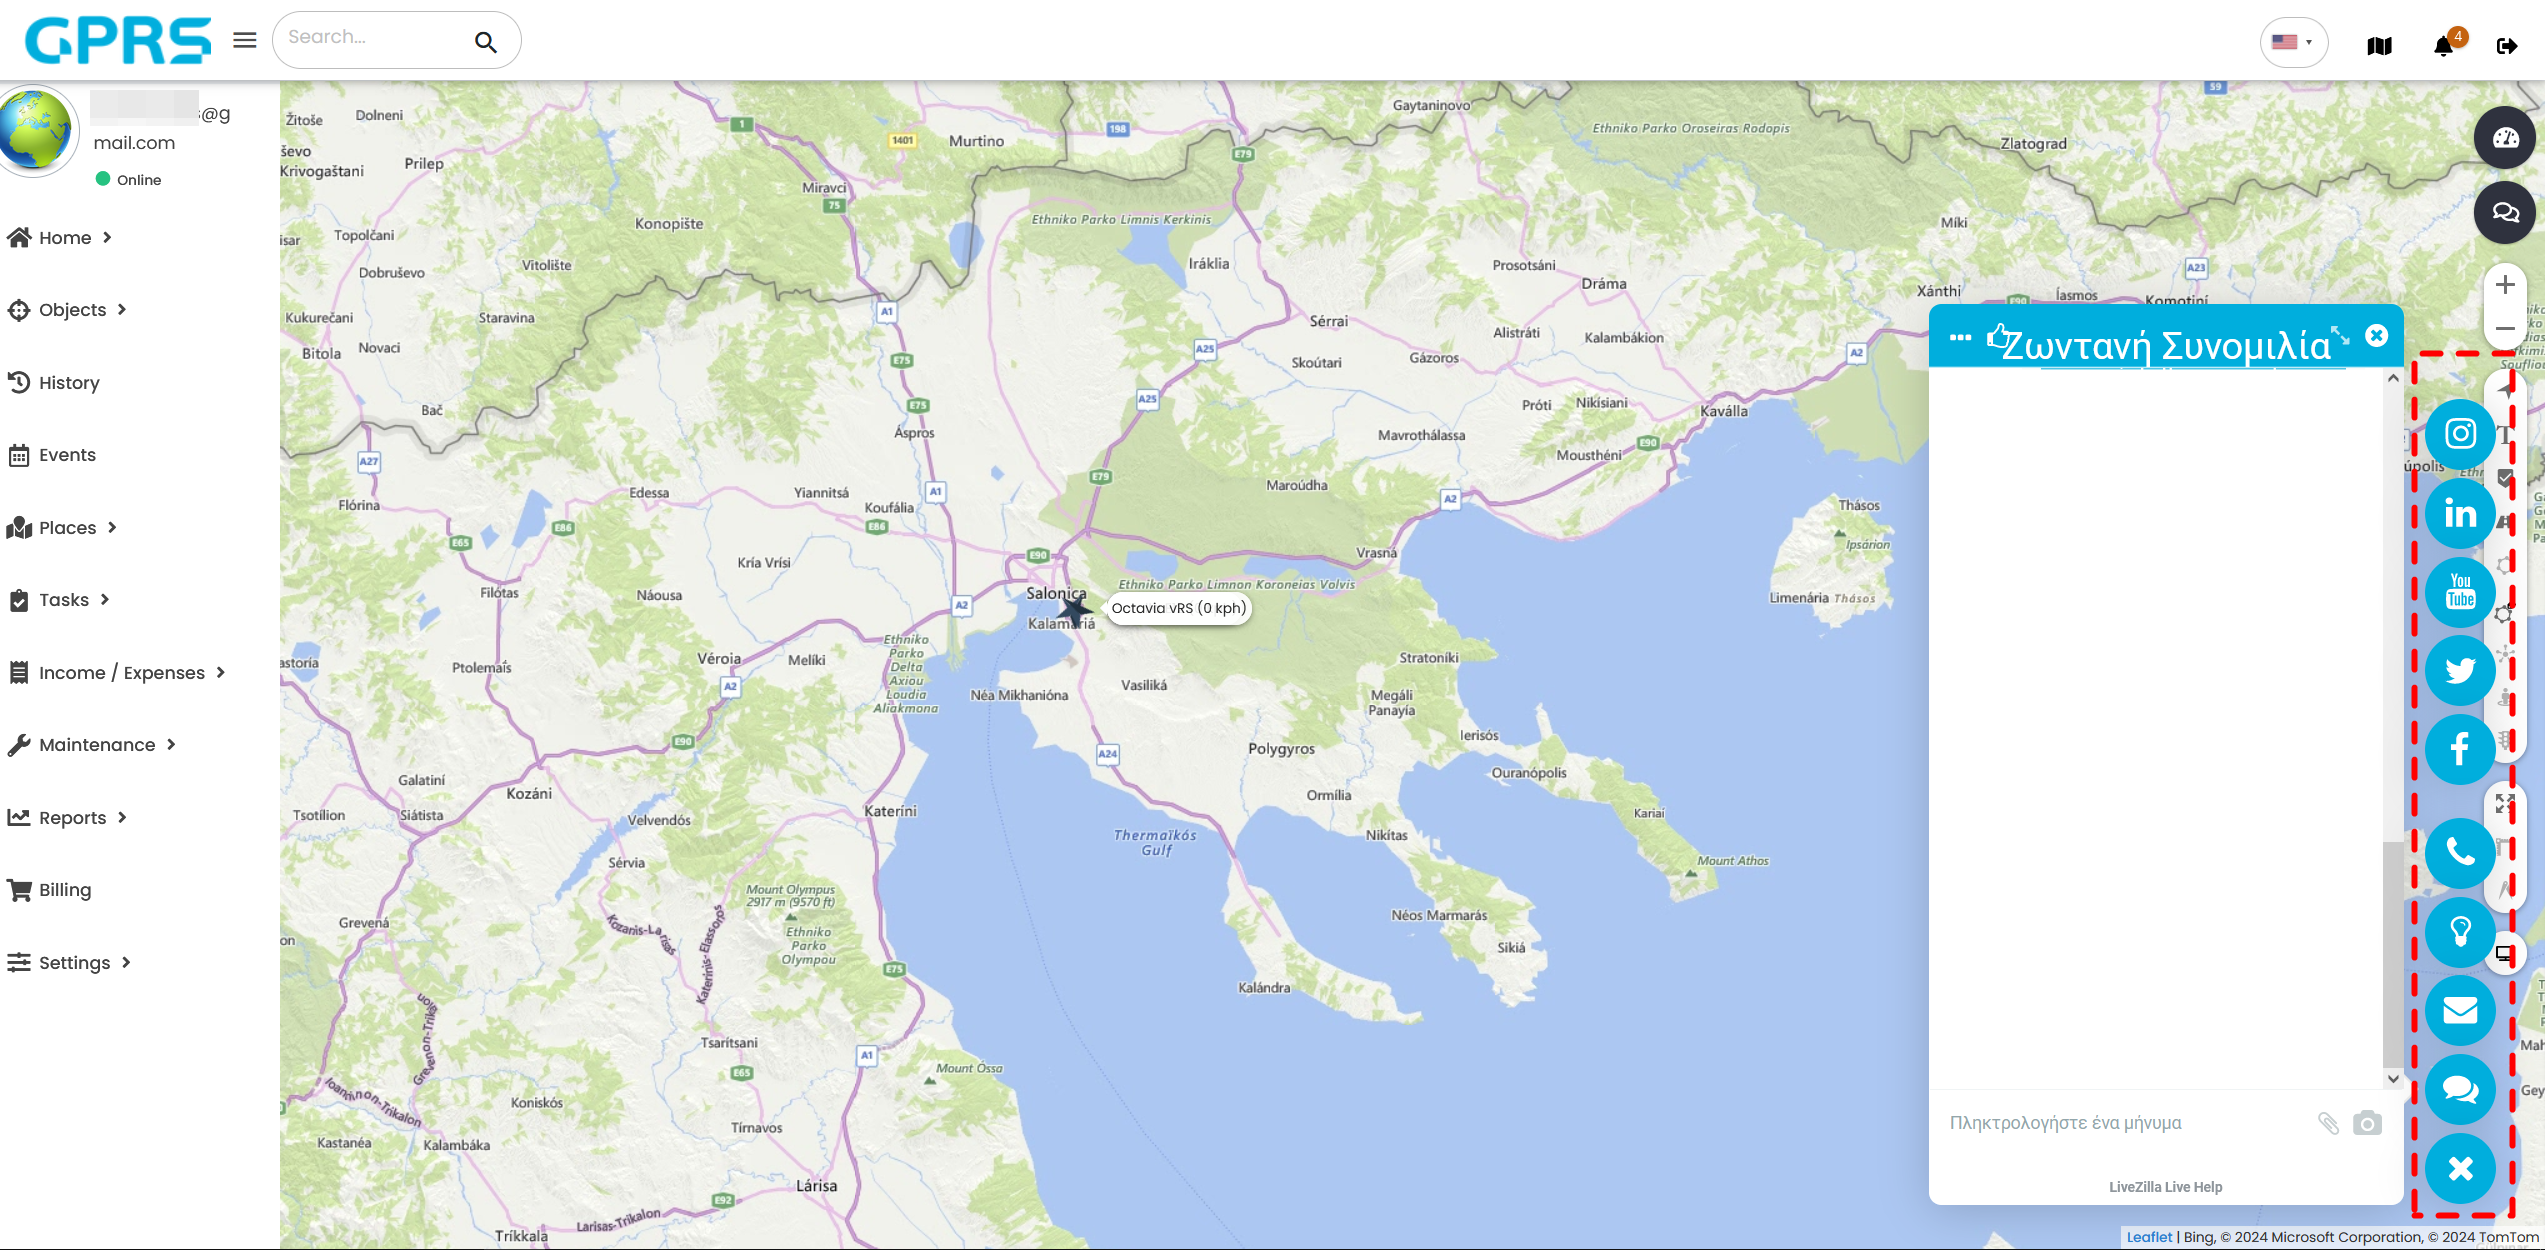
- Phone
 shows Skytrack's main phone number. You can also use the form for any query and the relevant department will get back to you as soon as possible.
 - Frequently Asked Questions
 will give you access to the full knowledge base. The most common queries are answered there in detail
 - You can click on to return to LiveChat's main screen. To fully close it, click
 .
.
test
Displays the tracking platform's copyright window.
Information about the cancellation and refund policy is displayed.
Information about the terms of use of Skytrack's services.
Information about the privacy policy that governs how we collect, use, share, transfer and store your data.
Includes the user manual of the program.
It includes the information and management of our devices, drivers and passengers.
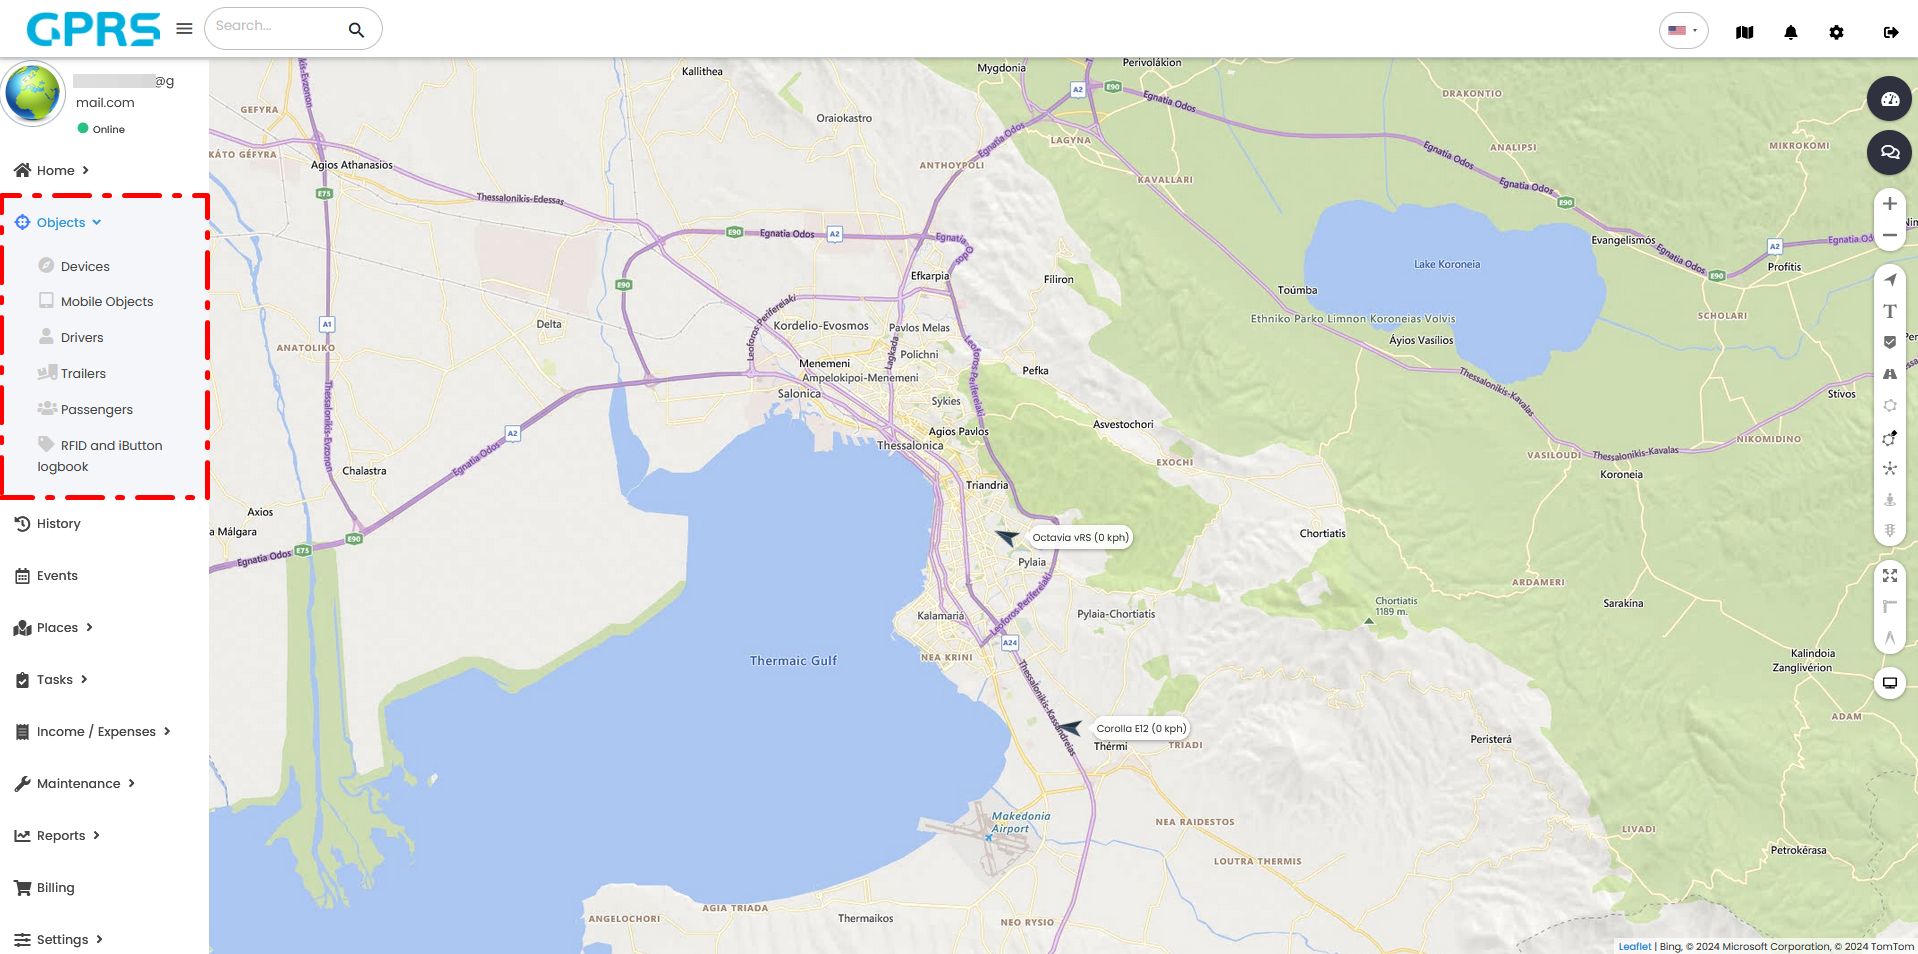
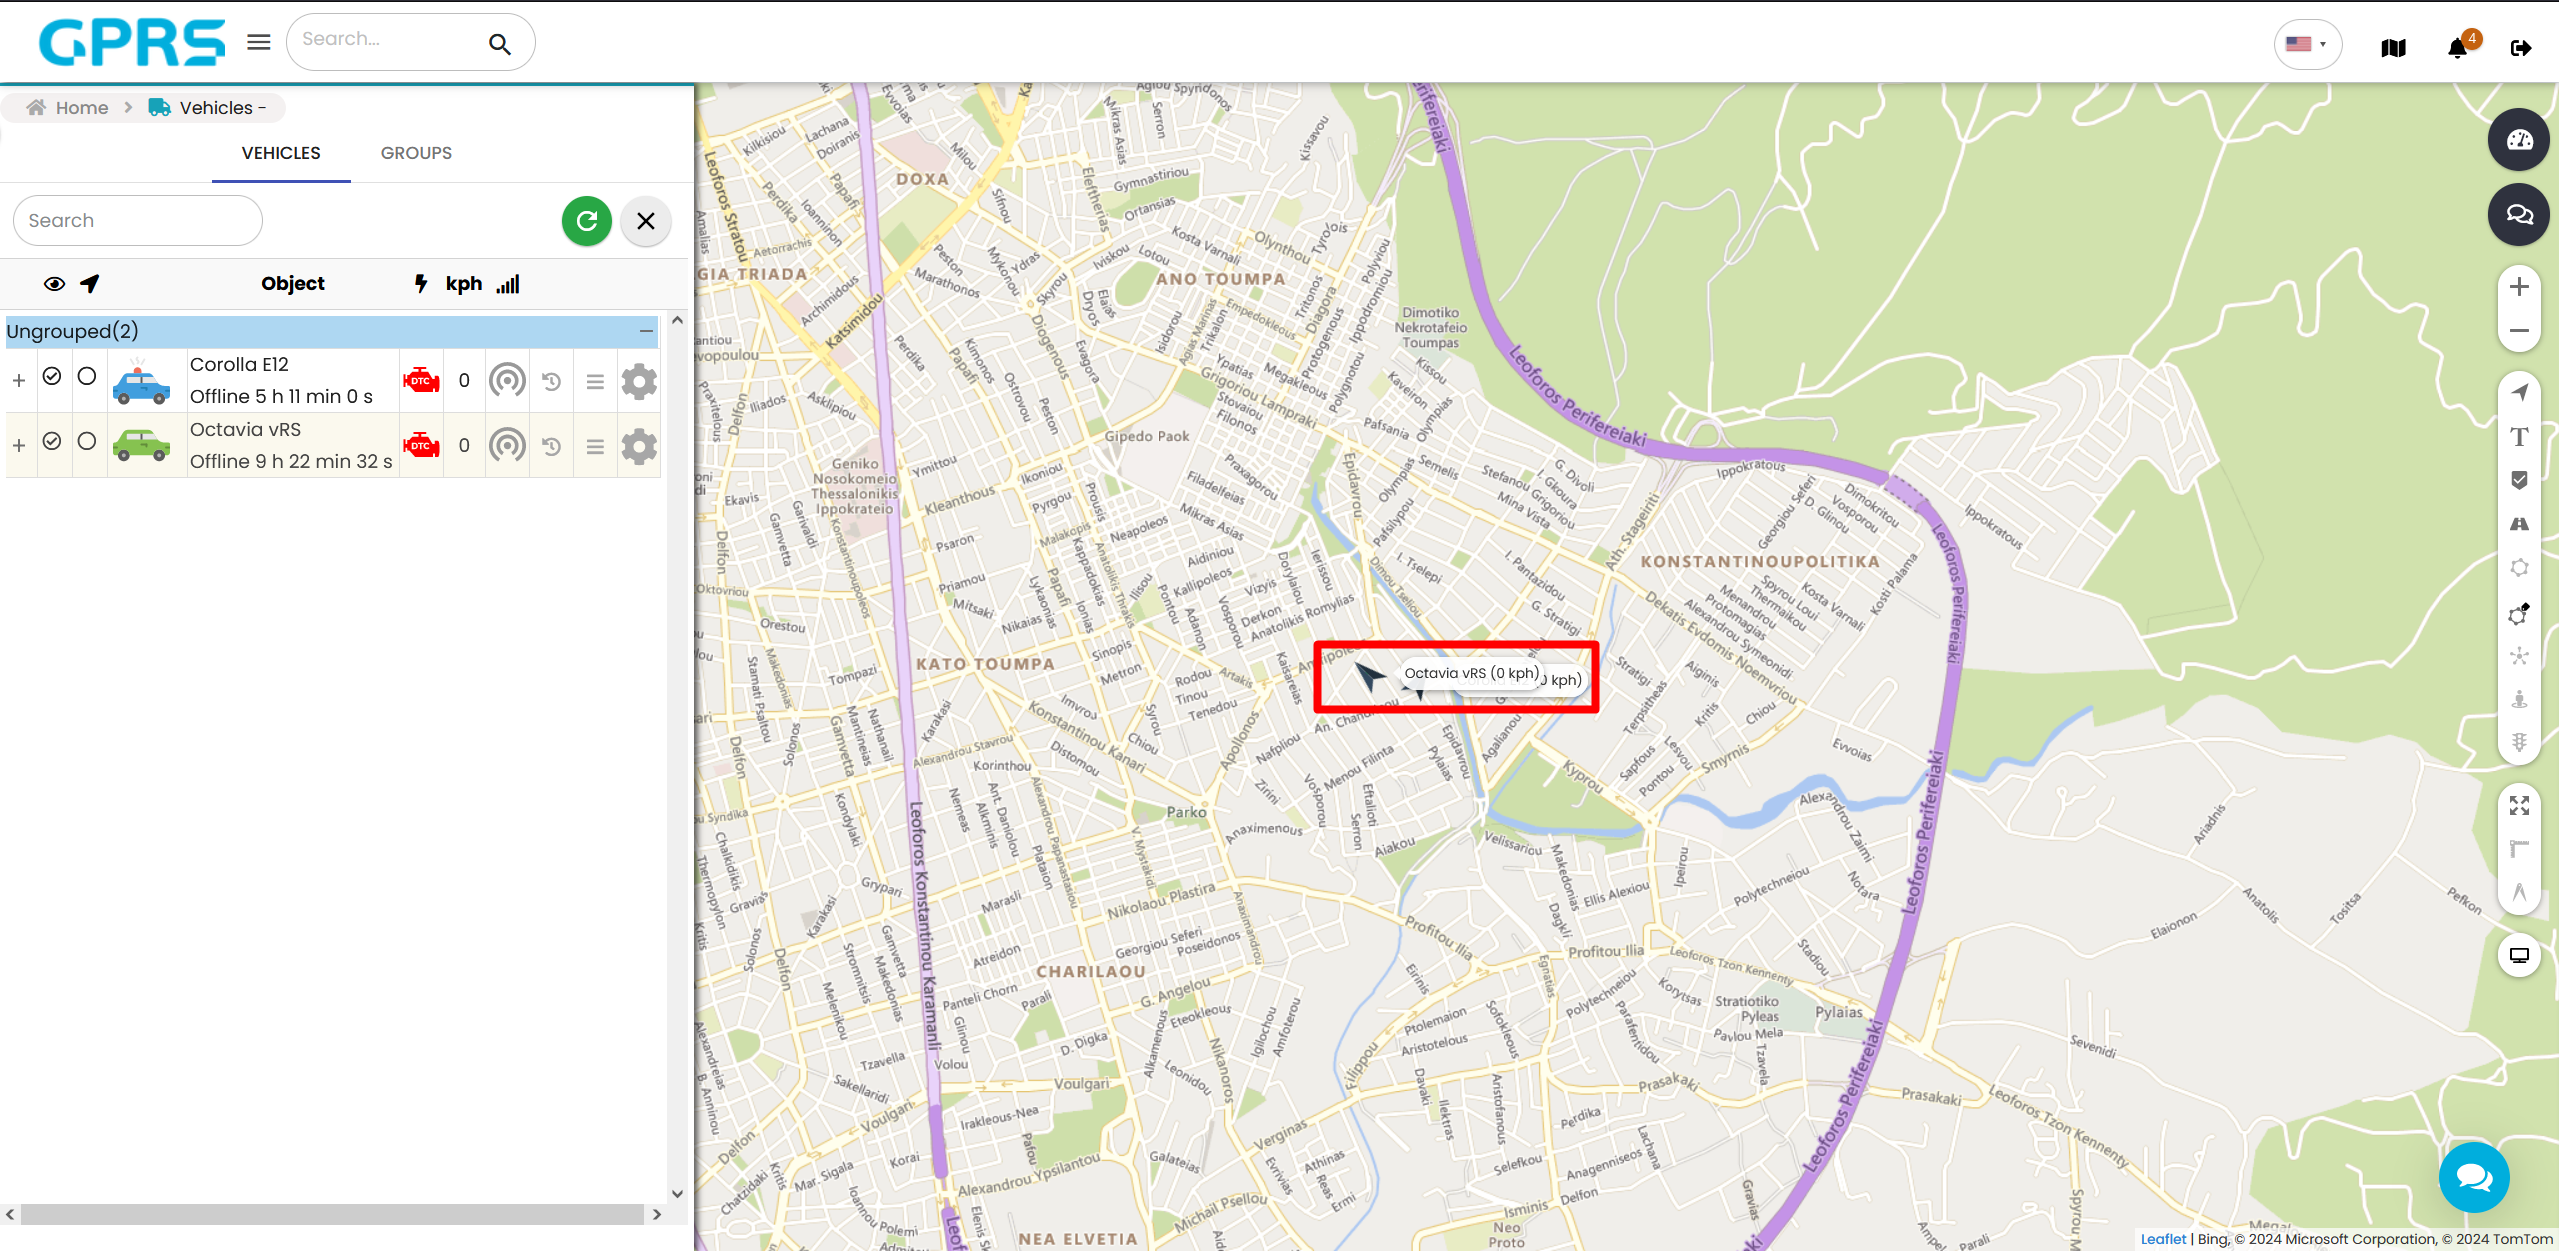
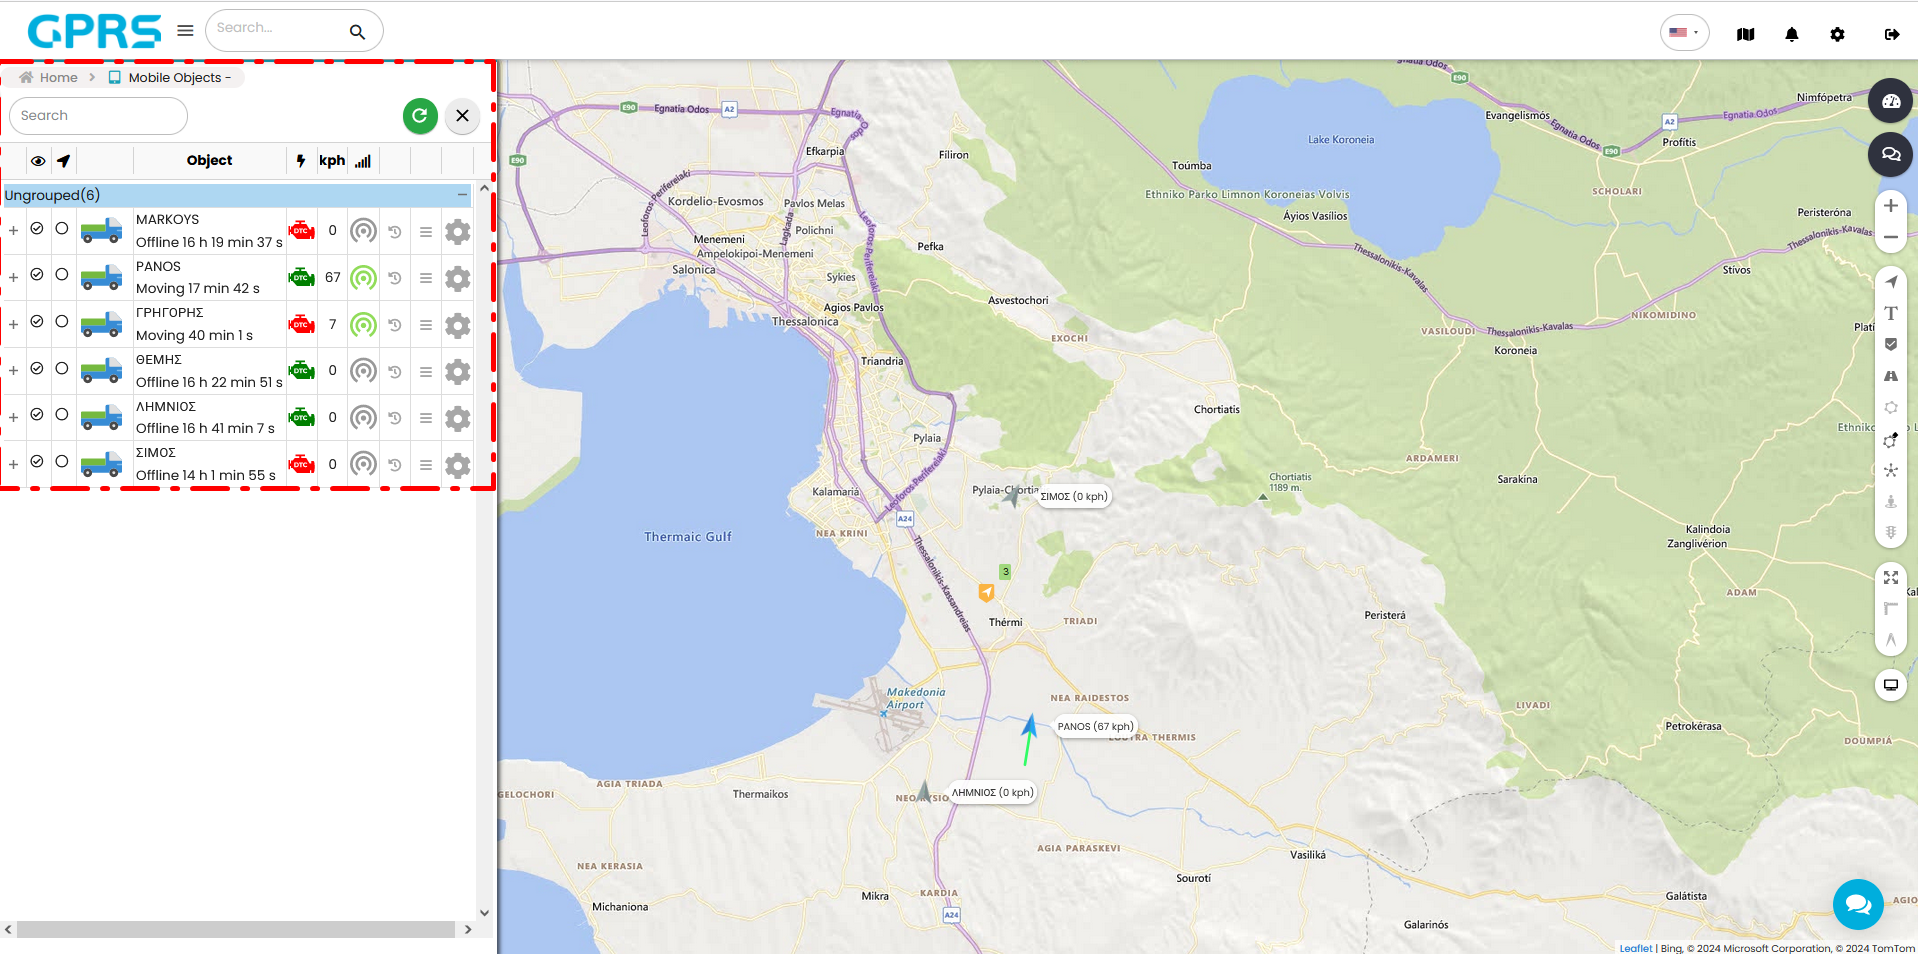
Shows a detailed list of the vehicles in your account, and additional information/actions for each of them. If you have multiple vehicles you can search for them via the Search field. Case sensitive.
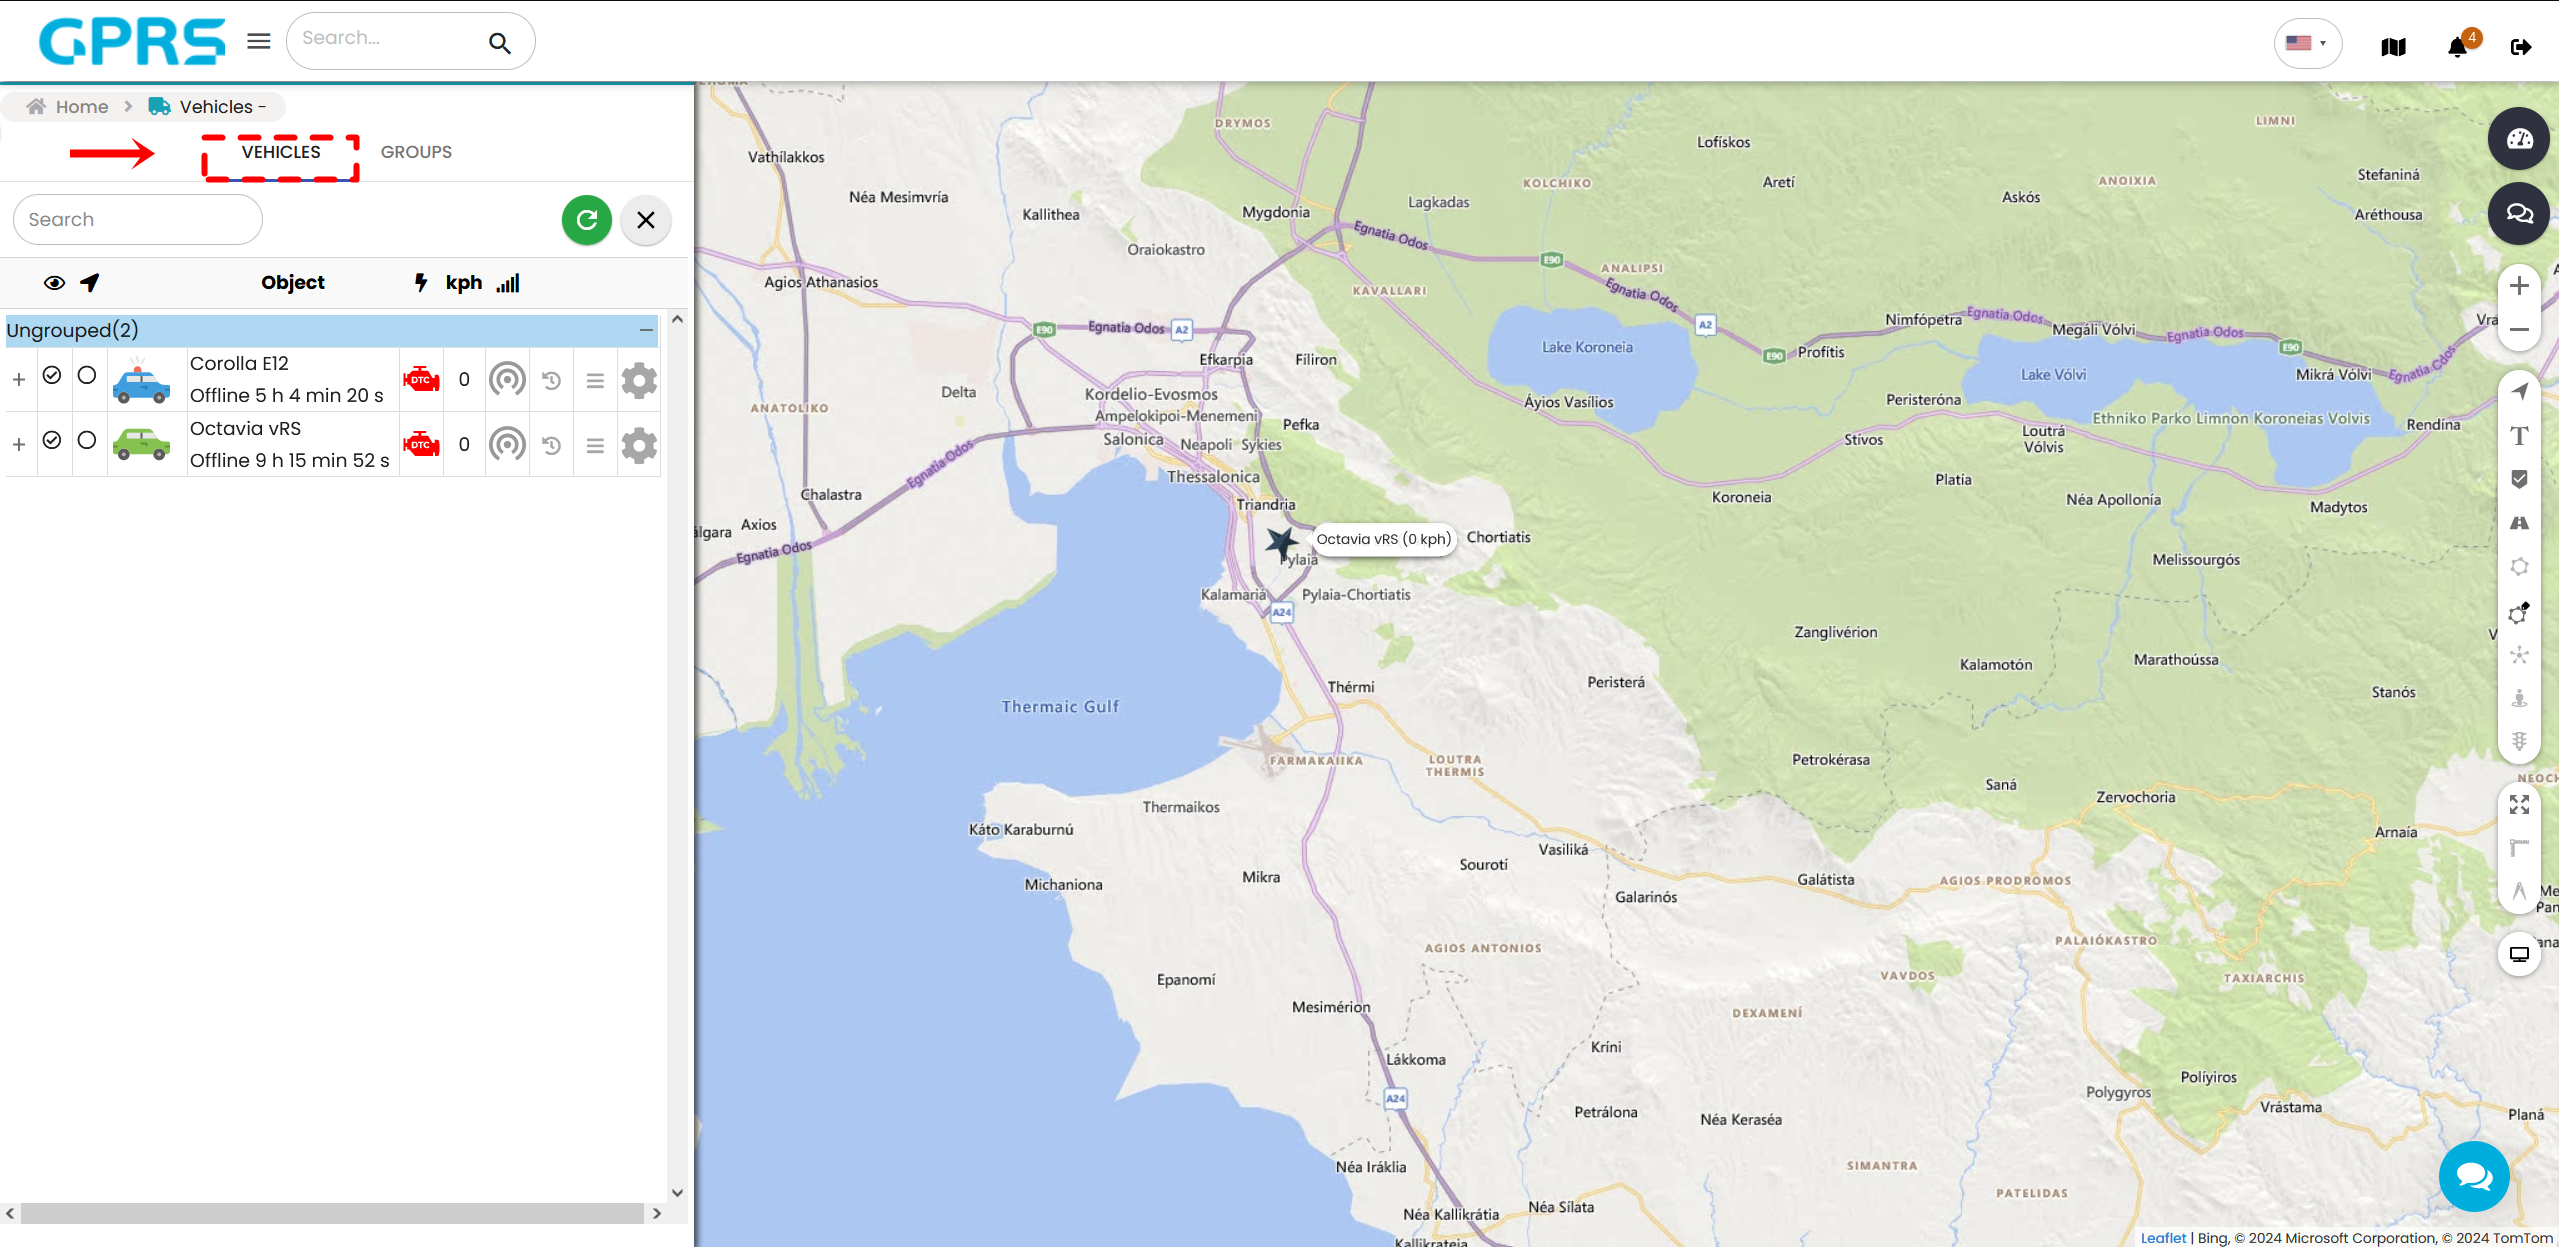
By tapping the vehicle icon or name, the map is automatically moved to the location of the vehicle. Next to the object is displayed the friendly name (if we have defined), its speed, and whether or not it is moving.
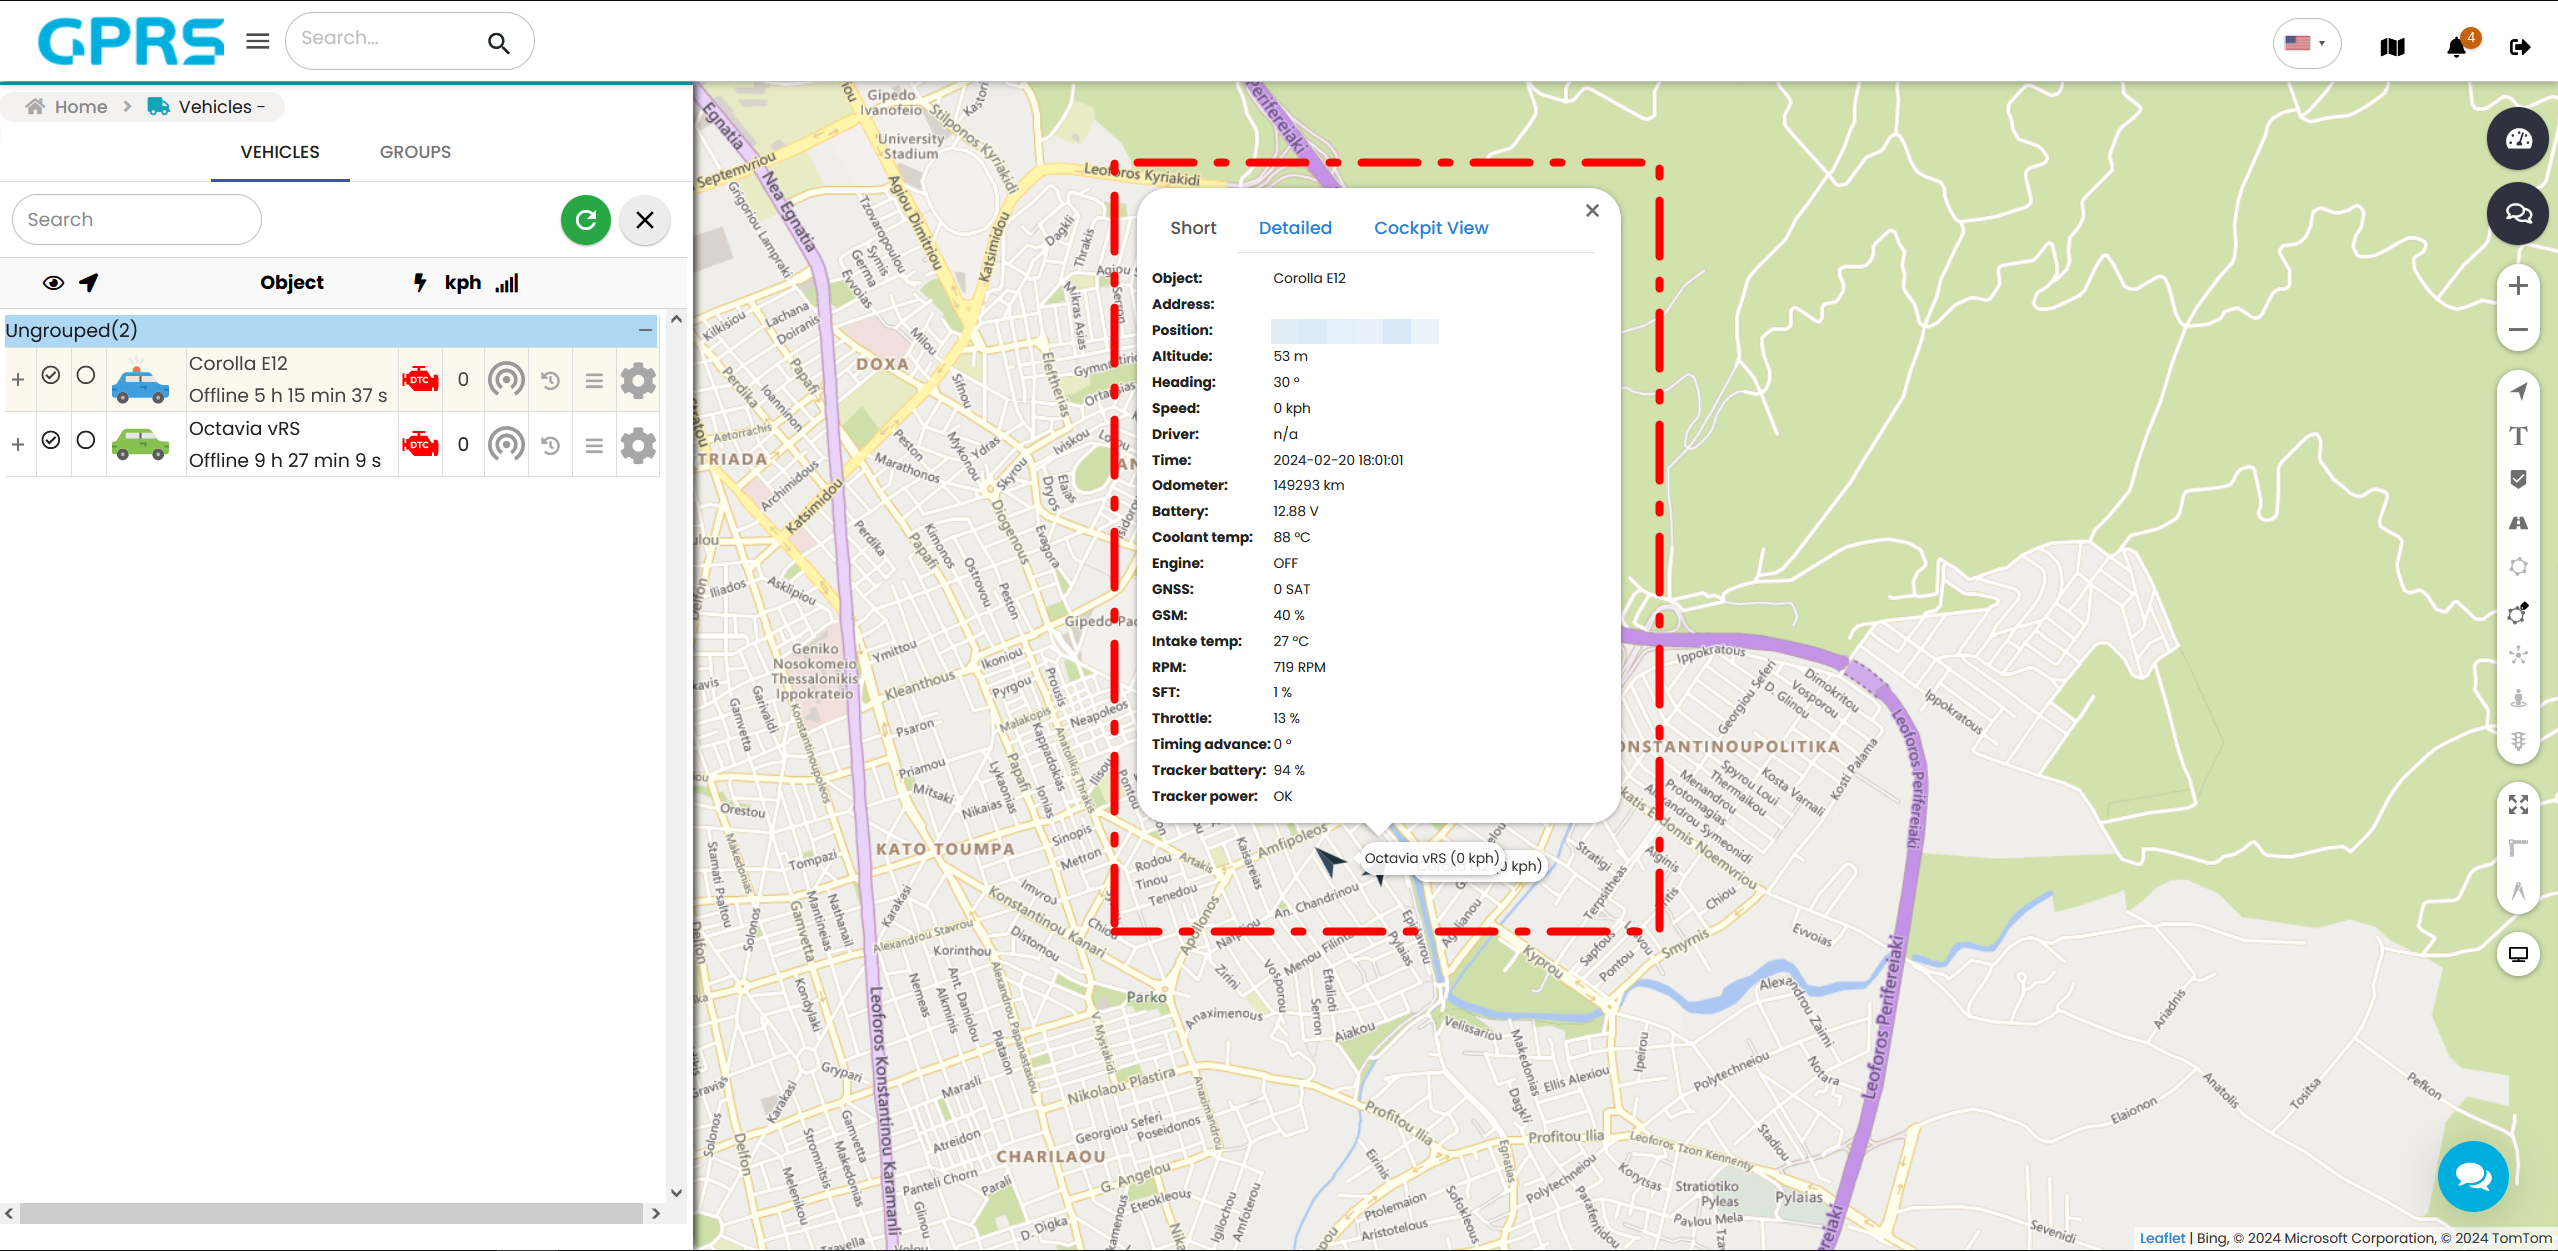
Tapping the vehicle icon on the map displays a pop-up window with information about your vehicle's status. In the Short tab it shows information about:
- Device(name)
- Address, Position
- Altitude
- Heading
- Speed
- Driver
- Time
- Odometer
- as well as extra sensors that depends on the device type (must be activated by Skytrack)

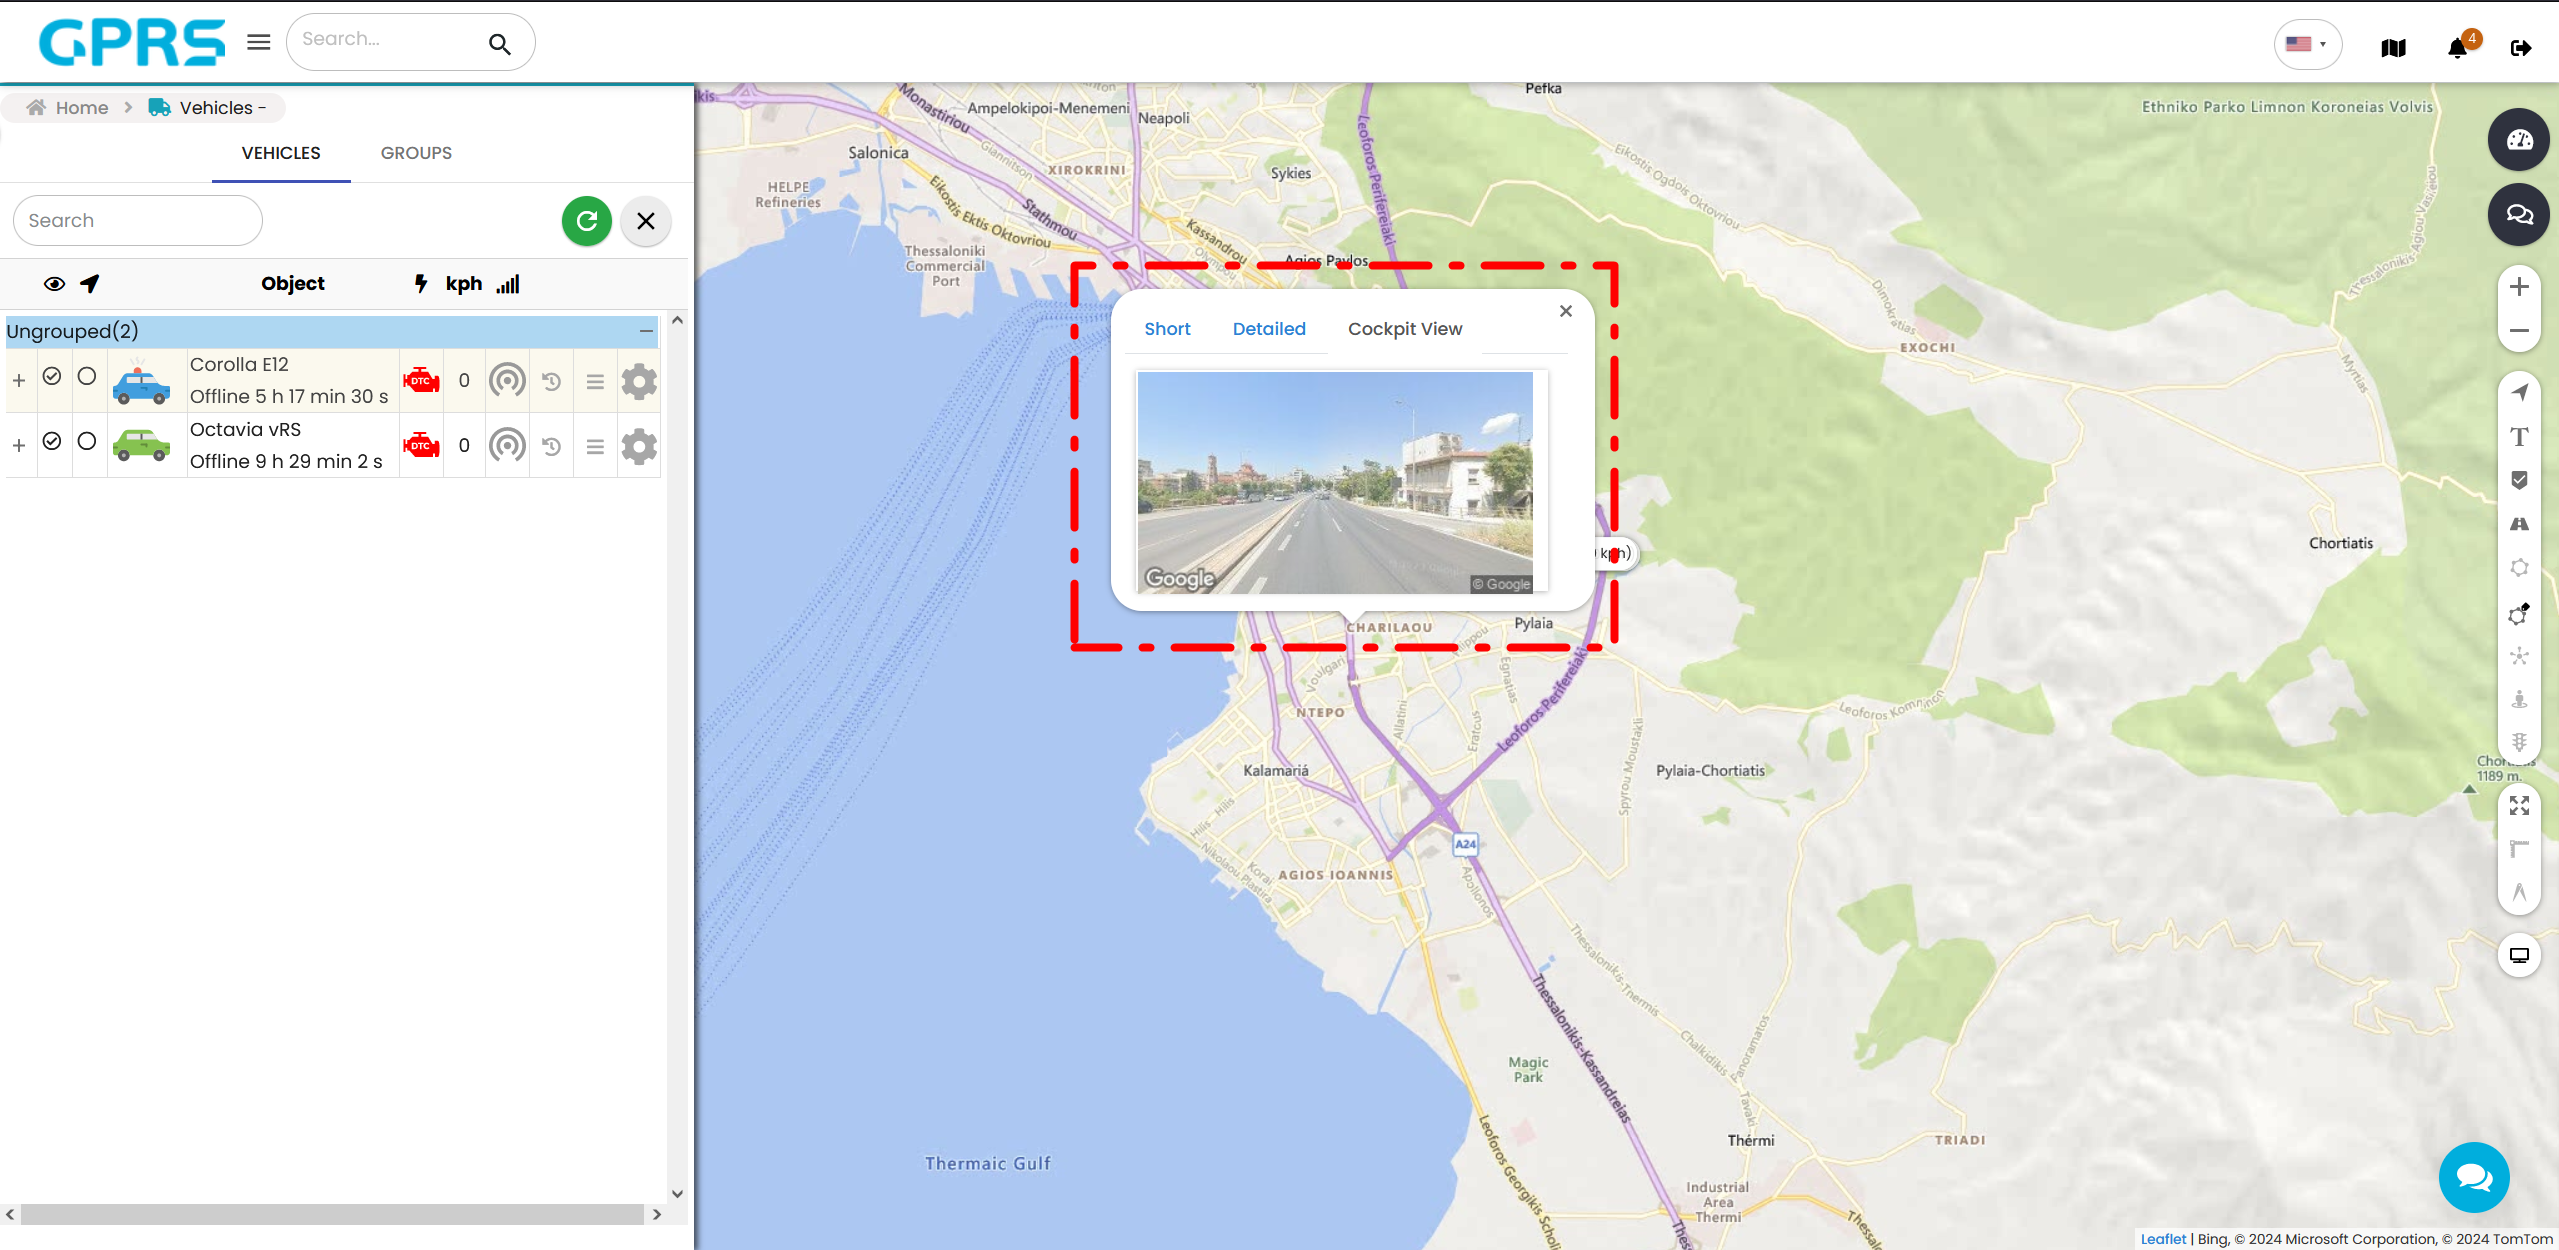
In the Cockpit View tab, we see a preview that shows the roads and surrounding location of your vehicle. By double-clicking on the window, a new tab opens in your browser with the location of your vehicle in Google Street View.
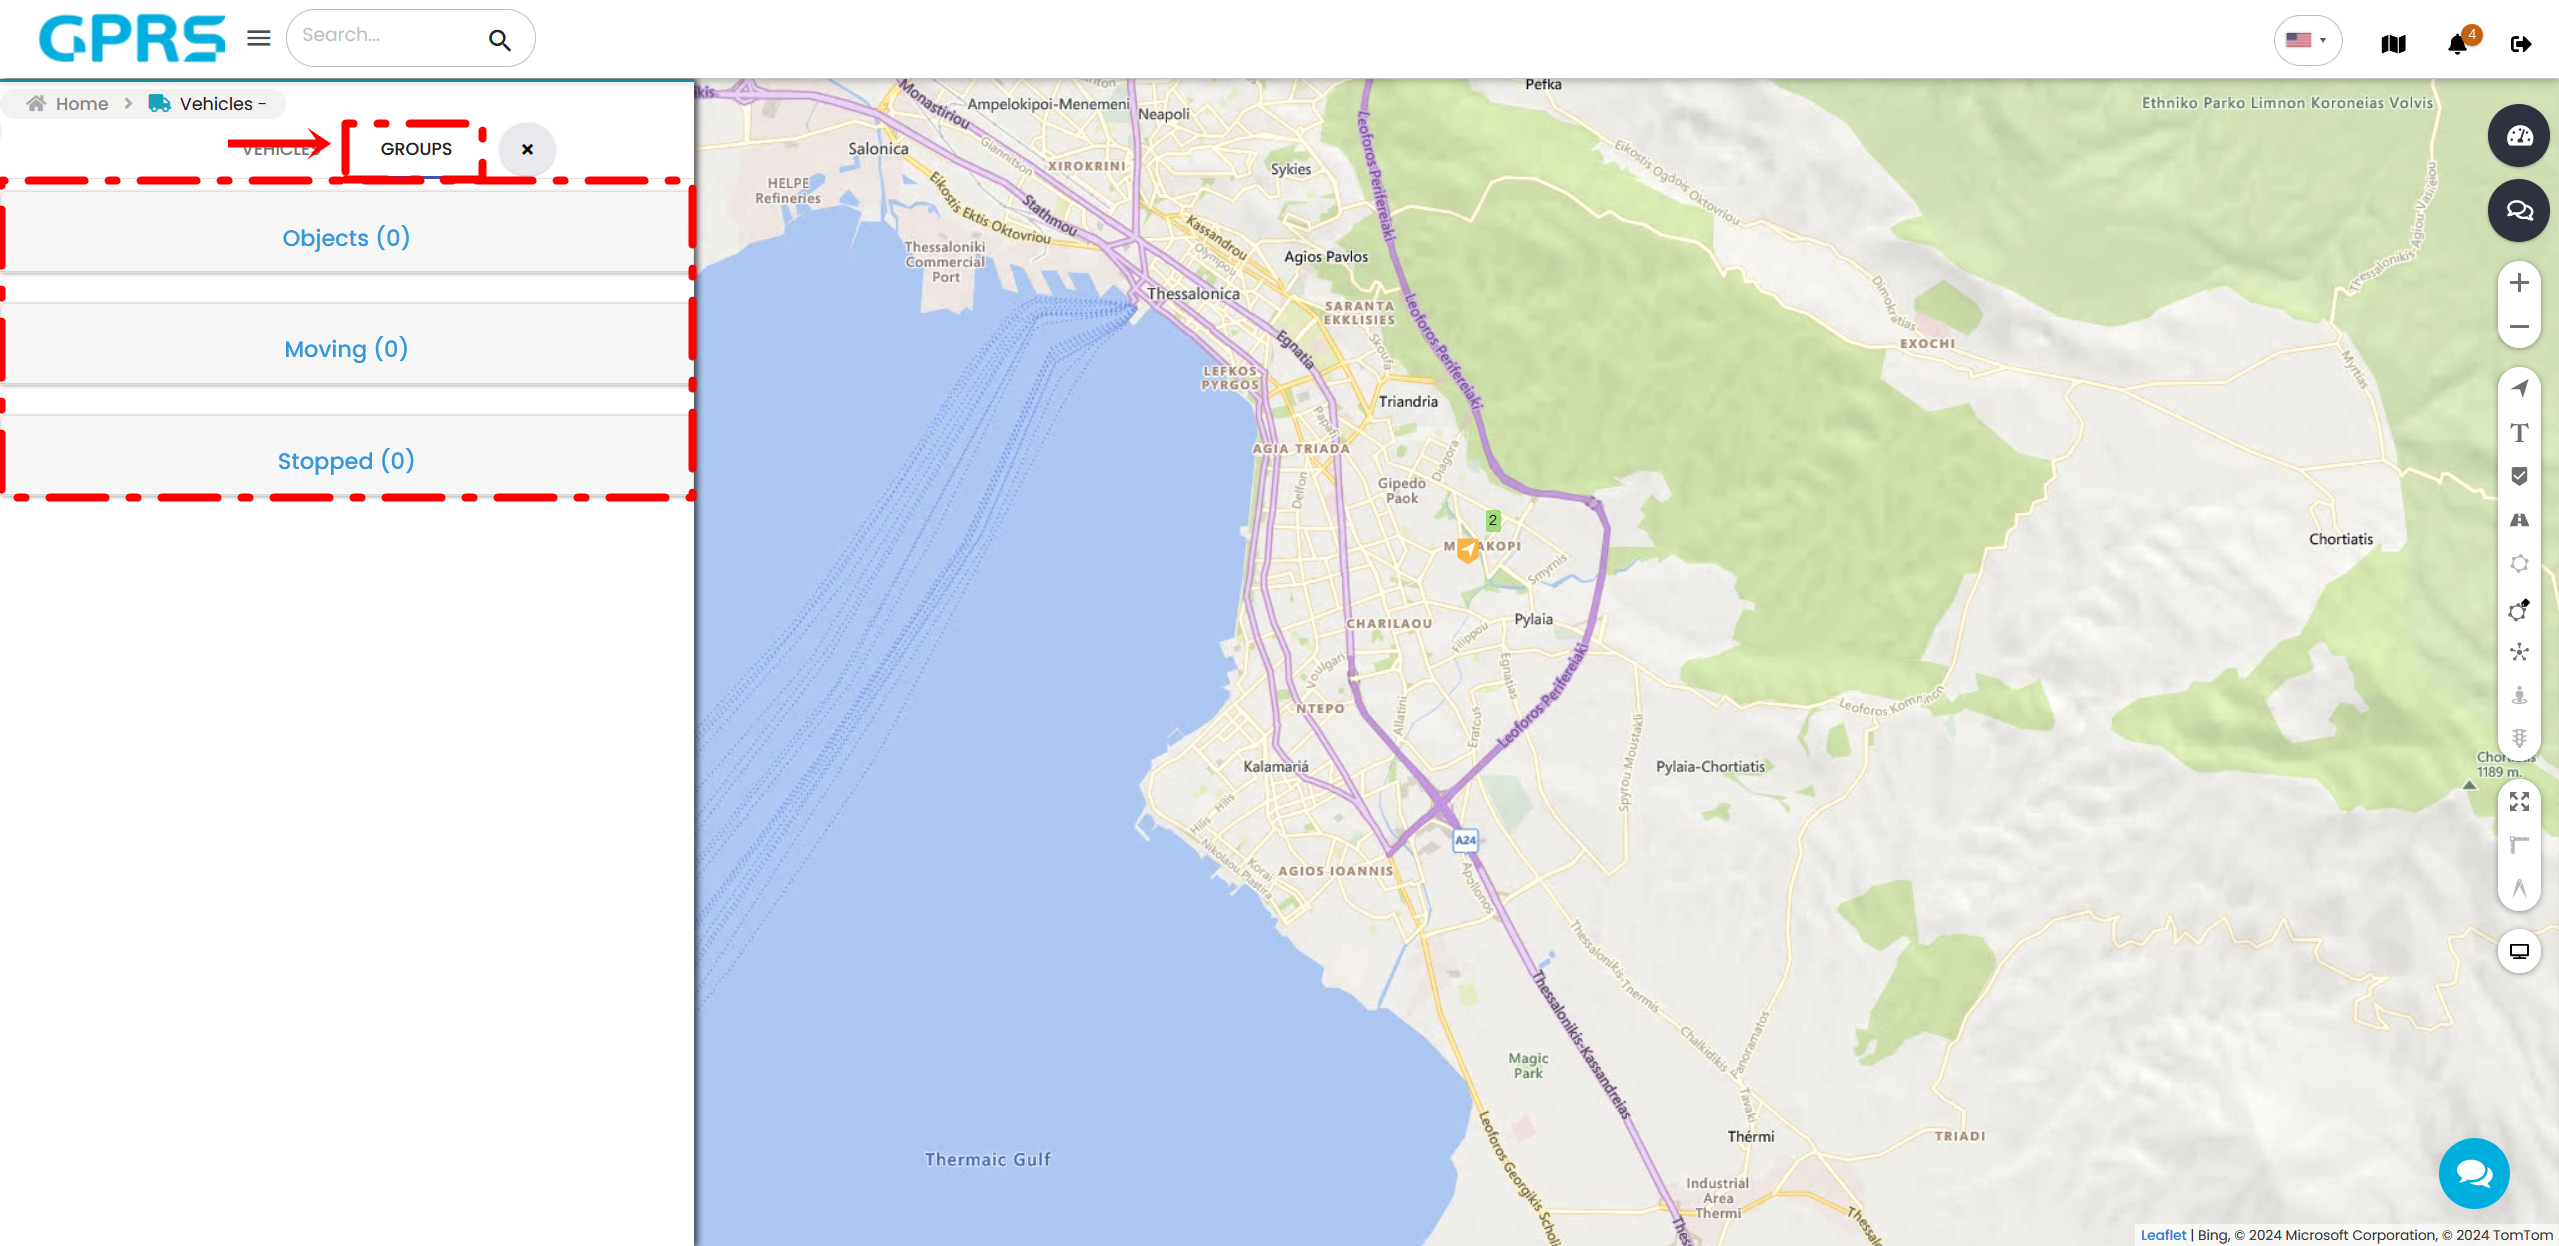
By selecting the Groups sub-tab you can see if the Devices belong to a group (Devices Category), which ones are in motion (In Motion Category) and which ones are stopped (Stopped Category).
If you have more than one vehicle next to each other, the map will display the vehicle grouping icon.
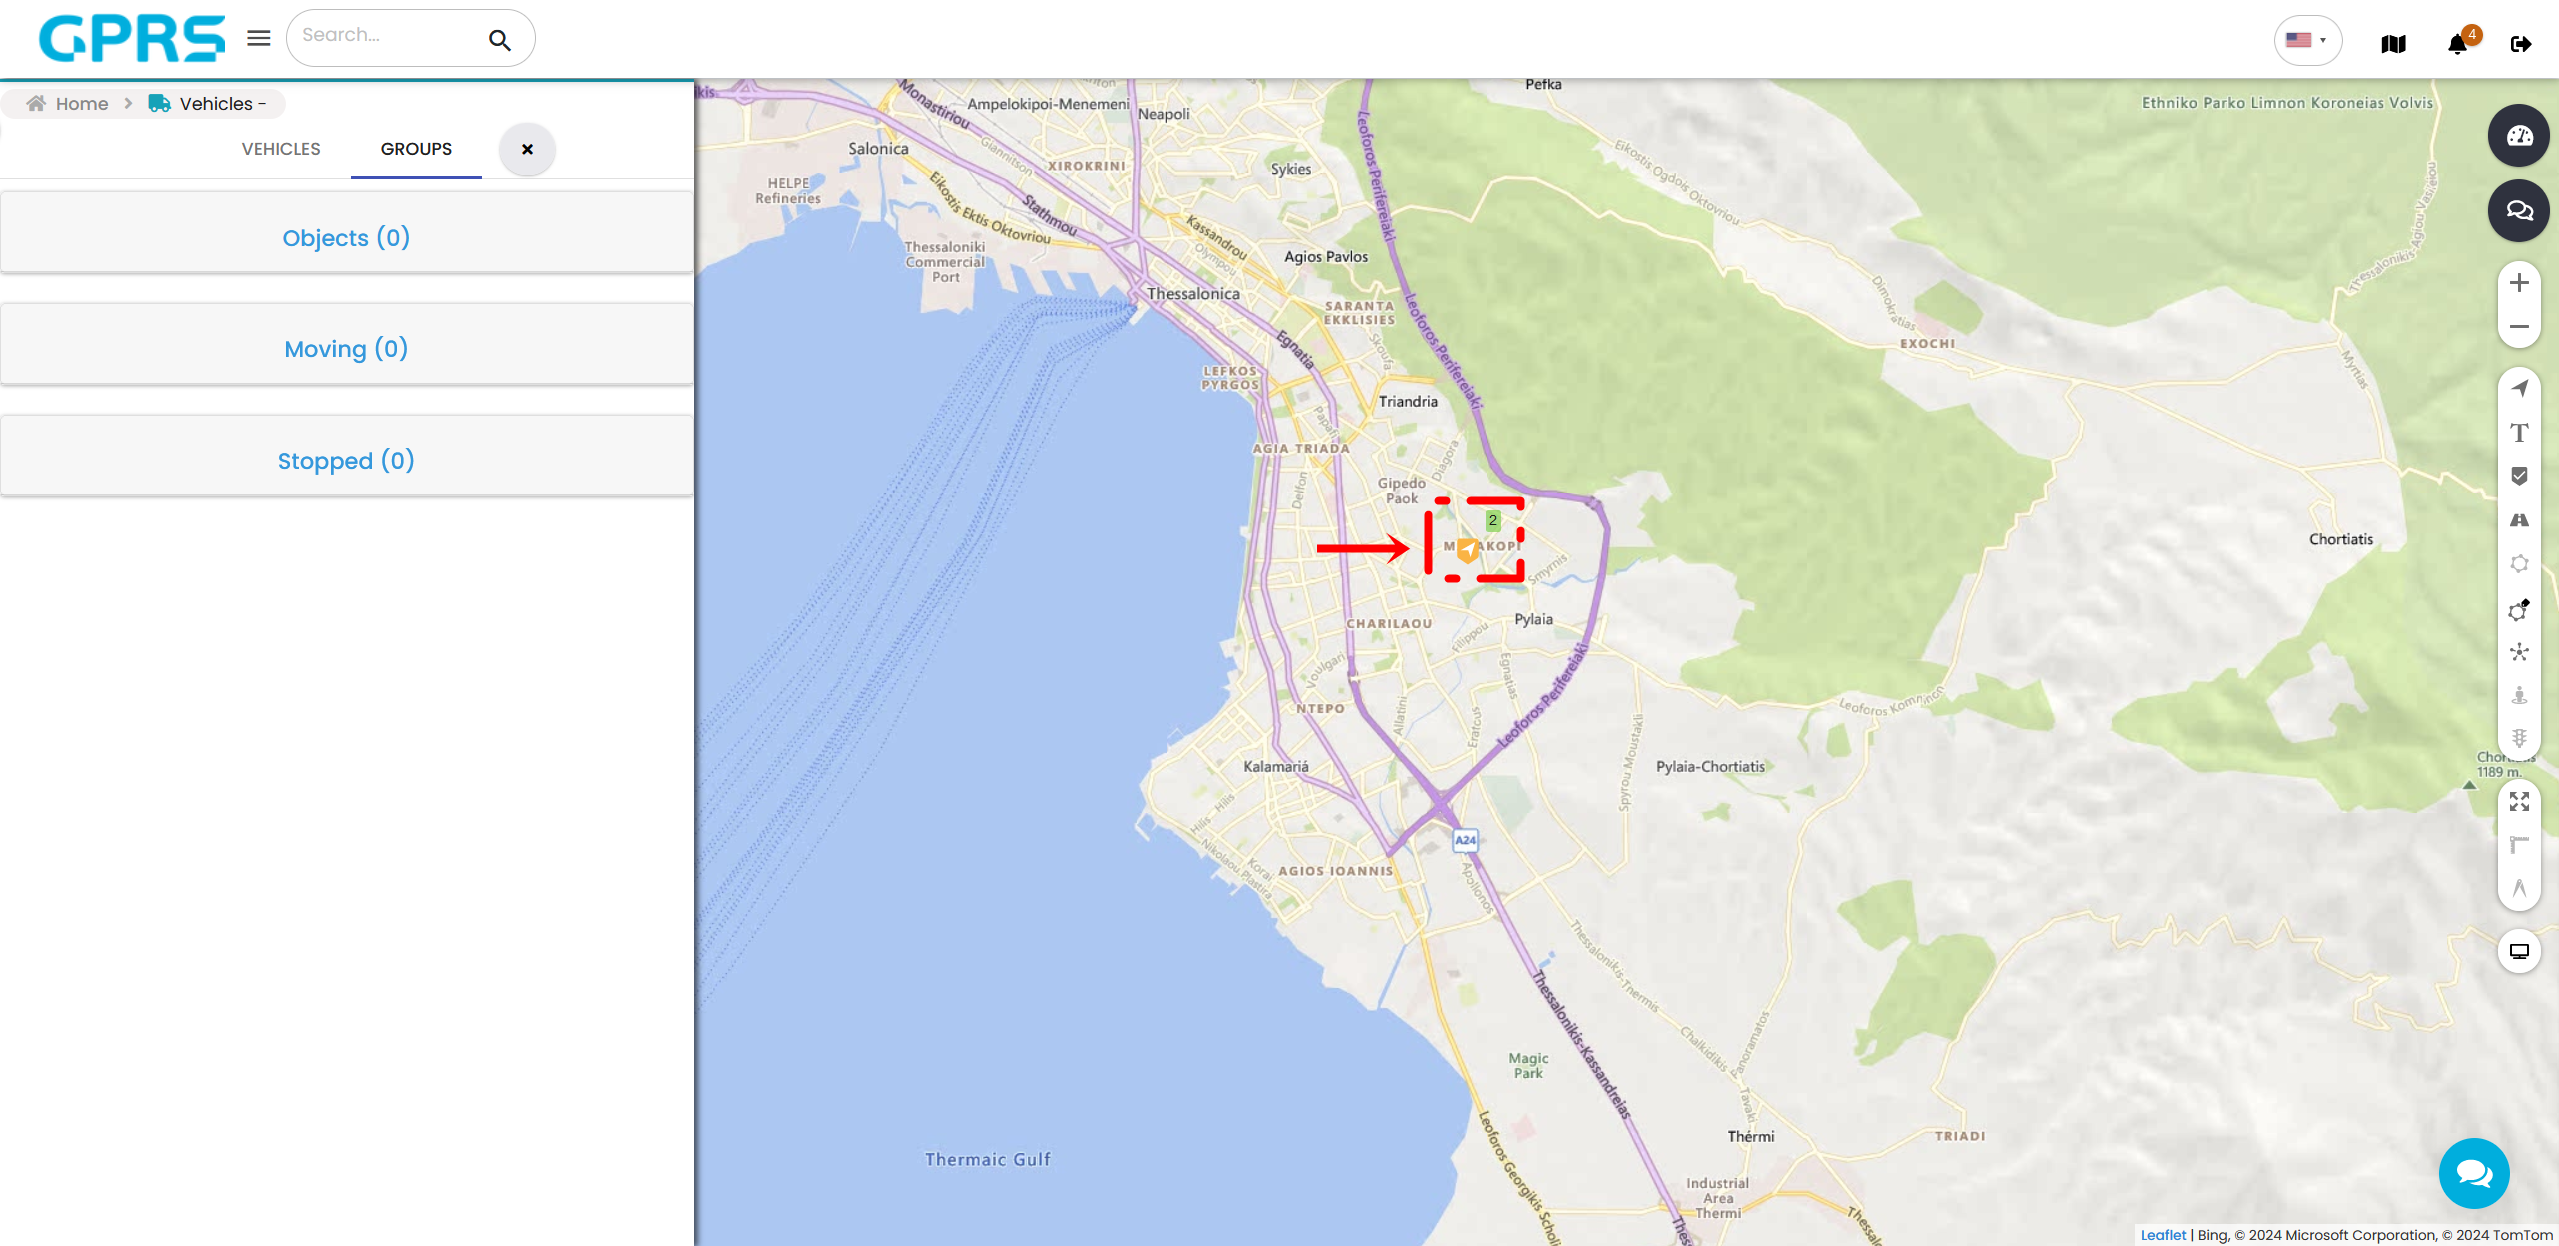

When you click on the arrow icon ![]() , the map will automatically zoom in and you will see the vehicles that make up the group. It will also open the group tab in the menu on the left.
, the map will automatically zoom in and you will see the vehicles that make up the group. It will also open the group tab in the menu on the left.

Symbol of plus (+), pressing it opens under your vehicle summary information about its current status such as altitude, odometer, nearest indicator, nearest zone (if you have defined indicators and zones), battery, inclination, engine status, geographical position, etc.
Symbol of minus (-), pressing it will shrink the vehicle information. The information you have available depends on the model of your device, how it is installed and whether you have additional sensors.
The eye icon allows you to show/hide one or more vehicles from your map.
The tracking icon allows you to find the desired vehicle on the map. By tapping this, the selected vehicle will be centered on the map and will remain centered as it moves.
Tapping the Device will alphabetically sort the devices by name. This is followed by the icon that will be used to display the vehicle on the map and the name by which it was registered in the system. Both the name and icon of your vehicle can be changed from within the vehicle tab which is available from the gear icon.
The engine symbol if green indicates a lit engine, if red indicates a switched on engine.
The speed column shows the current speed of the vehicle in km/h.
The Connection Status column will display the connection status icon. Depending on its colour it gives you some indications about the connection of the device.
![]() Green: there is a GPS and GPRS connection
Green: there is a GPS and GPRS connection
![]() Orange: there is a GPRS connection but no GPS connection
Orange: there is a GPRS connection but no GPS connection
![]() Grey: device offline (no GPRS & GPS live connection)
Grey: device offline (no GPRS & GPS live connection)
A grey icon indicating an offline device does not mean that the device is malfunctioning. Trackers usually enter a low energy mode when a vehicle is stopped, to reduce energy consumption. The mode is disengaged when one or more conditions are met.
Quick history: ![]() Helps you to quickly extract a vehicle's history for a predetermined amount of time.
Helps you to quickly extract a vehicle's history for a predetermined amount of time.
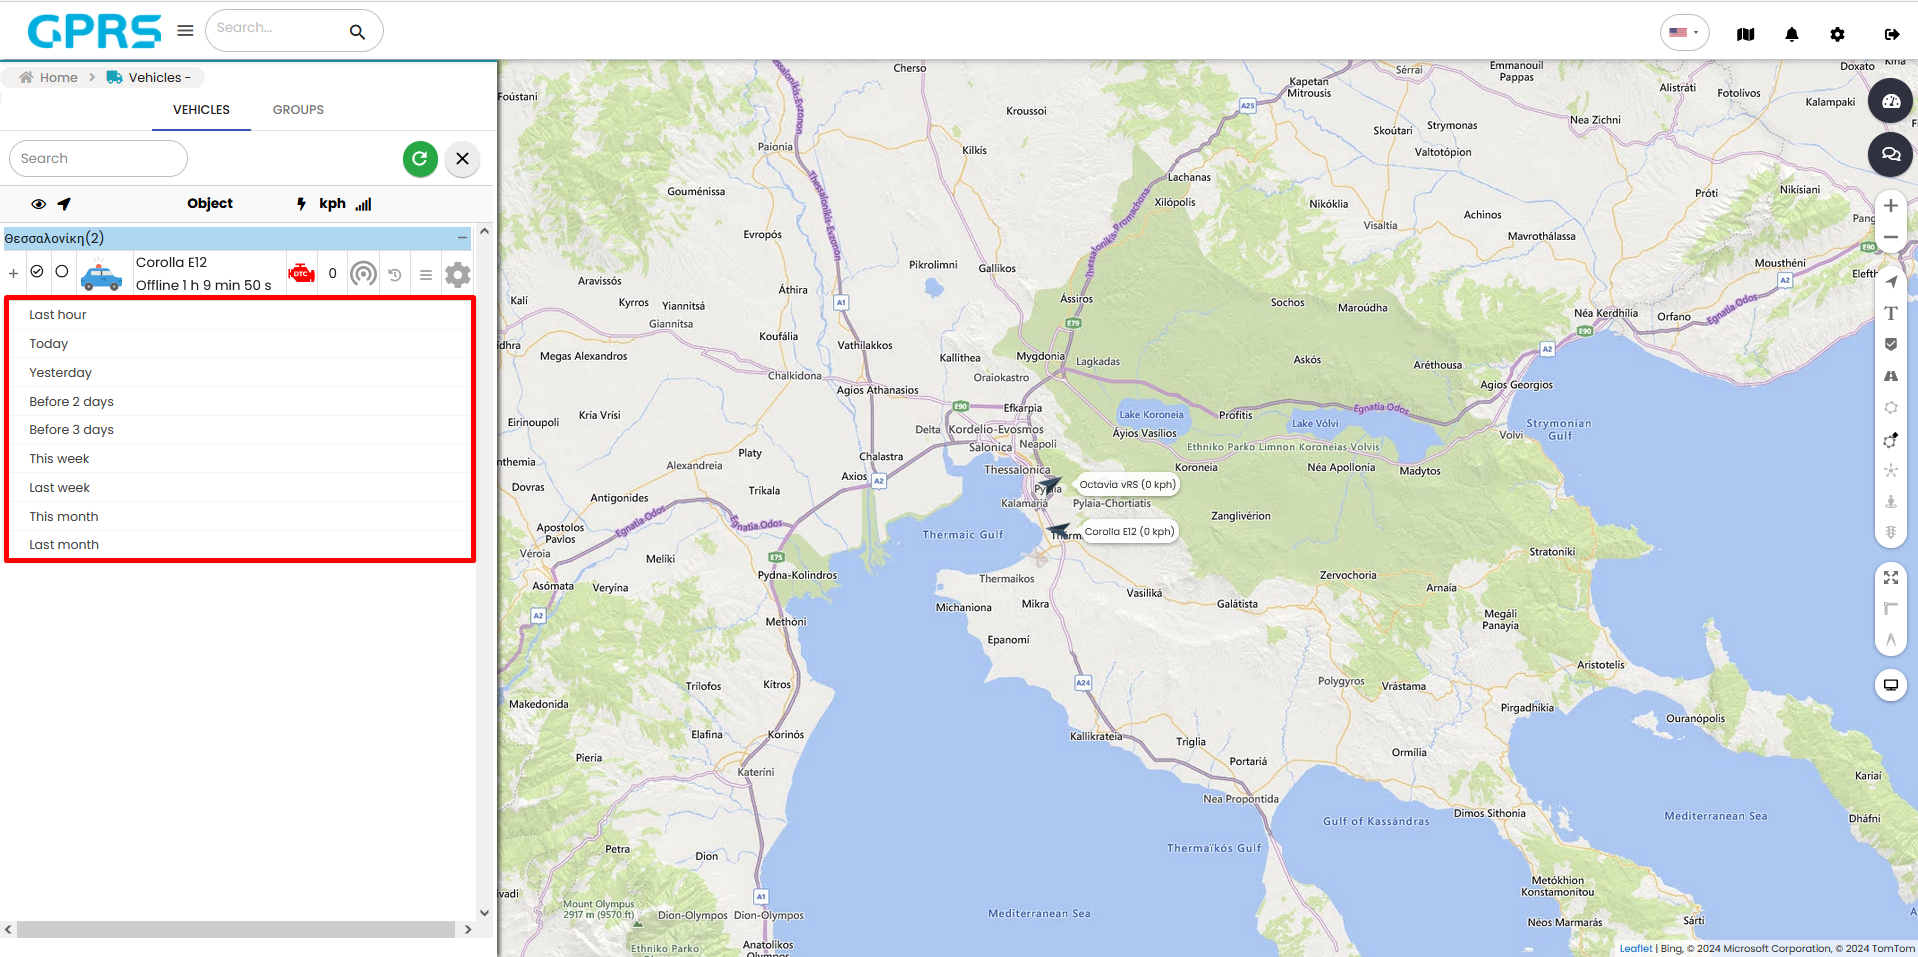
- Last hour: movement history for the last hour
- Today: movement history since 00:00 until now
- Yesterday: movement history for yesterday
- Two days ago: movement history for the last 2 days
- Three days ago: movement history for the last 3 days
- This week: movement history for the current week
- Last week: movement history for last week
- This month: movement history for the current month
- Last month: movement history for last month
The above information is presented on the main map of the GPRS platform. By selecting an event (route, stop) from the pop-up menu table on the left side of the platform, it is centred on the main map where a pop-up window with detailed information is displayed. Detailed history can be viewed from the corresponding History menu.
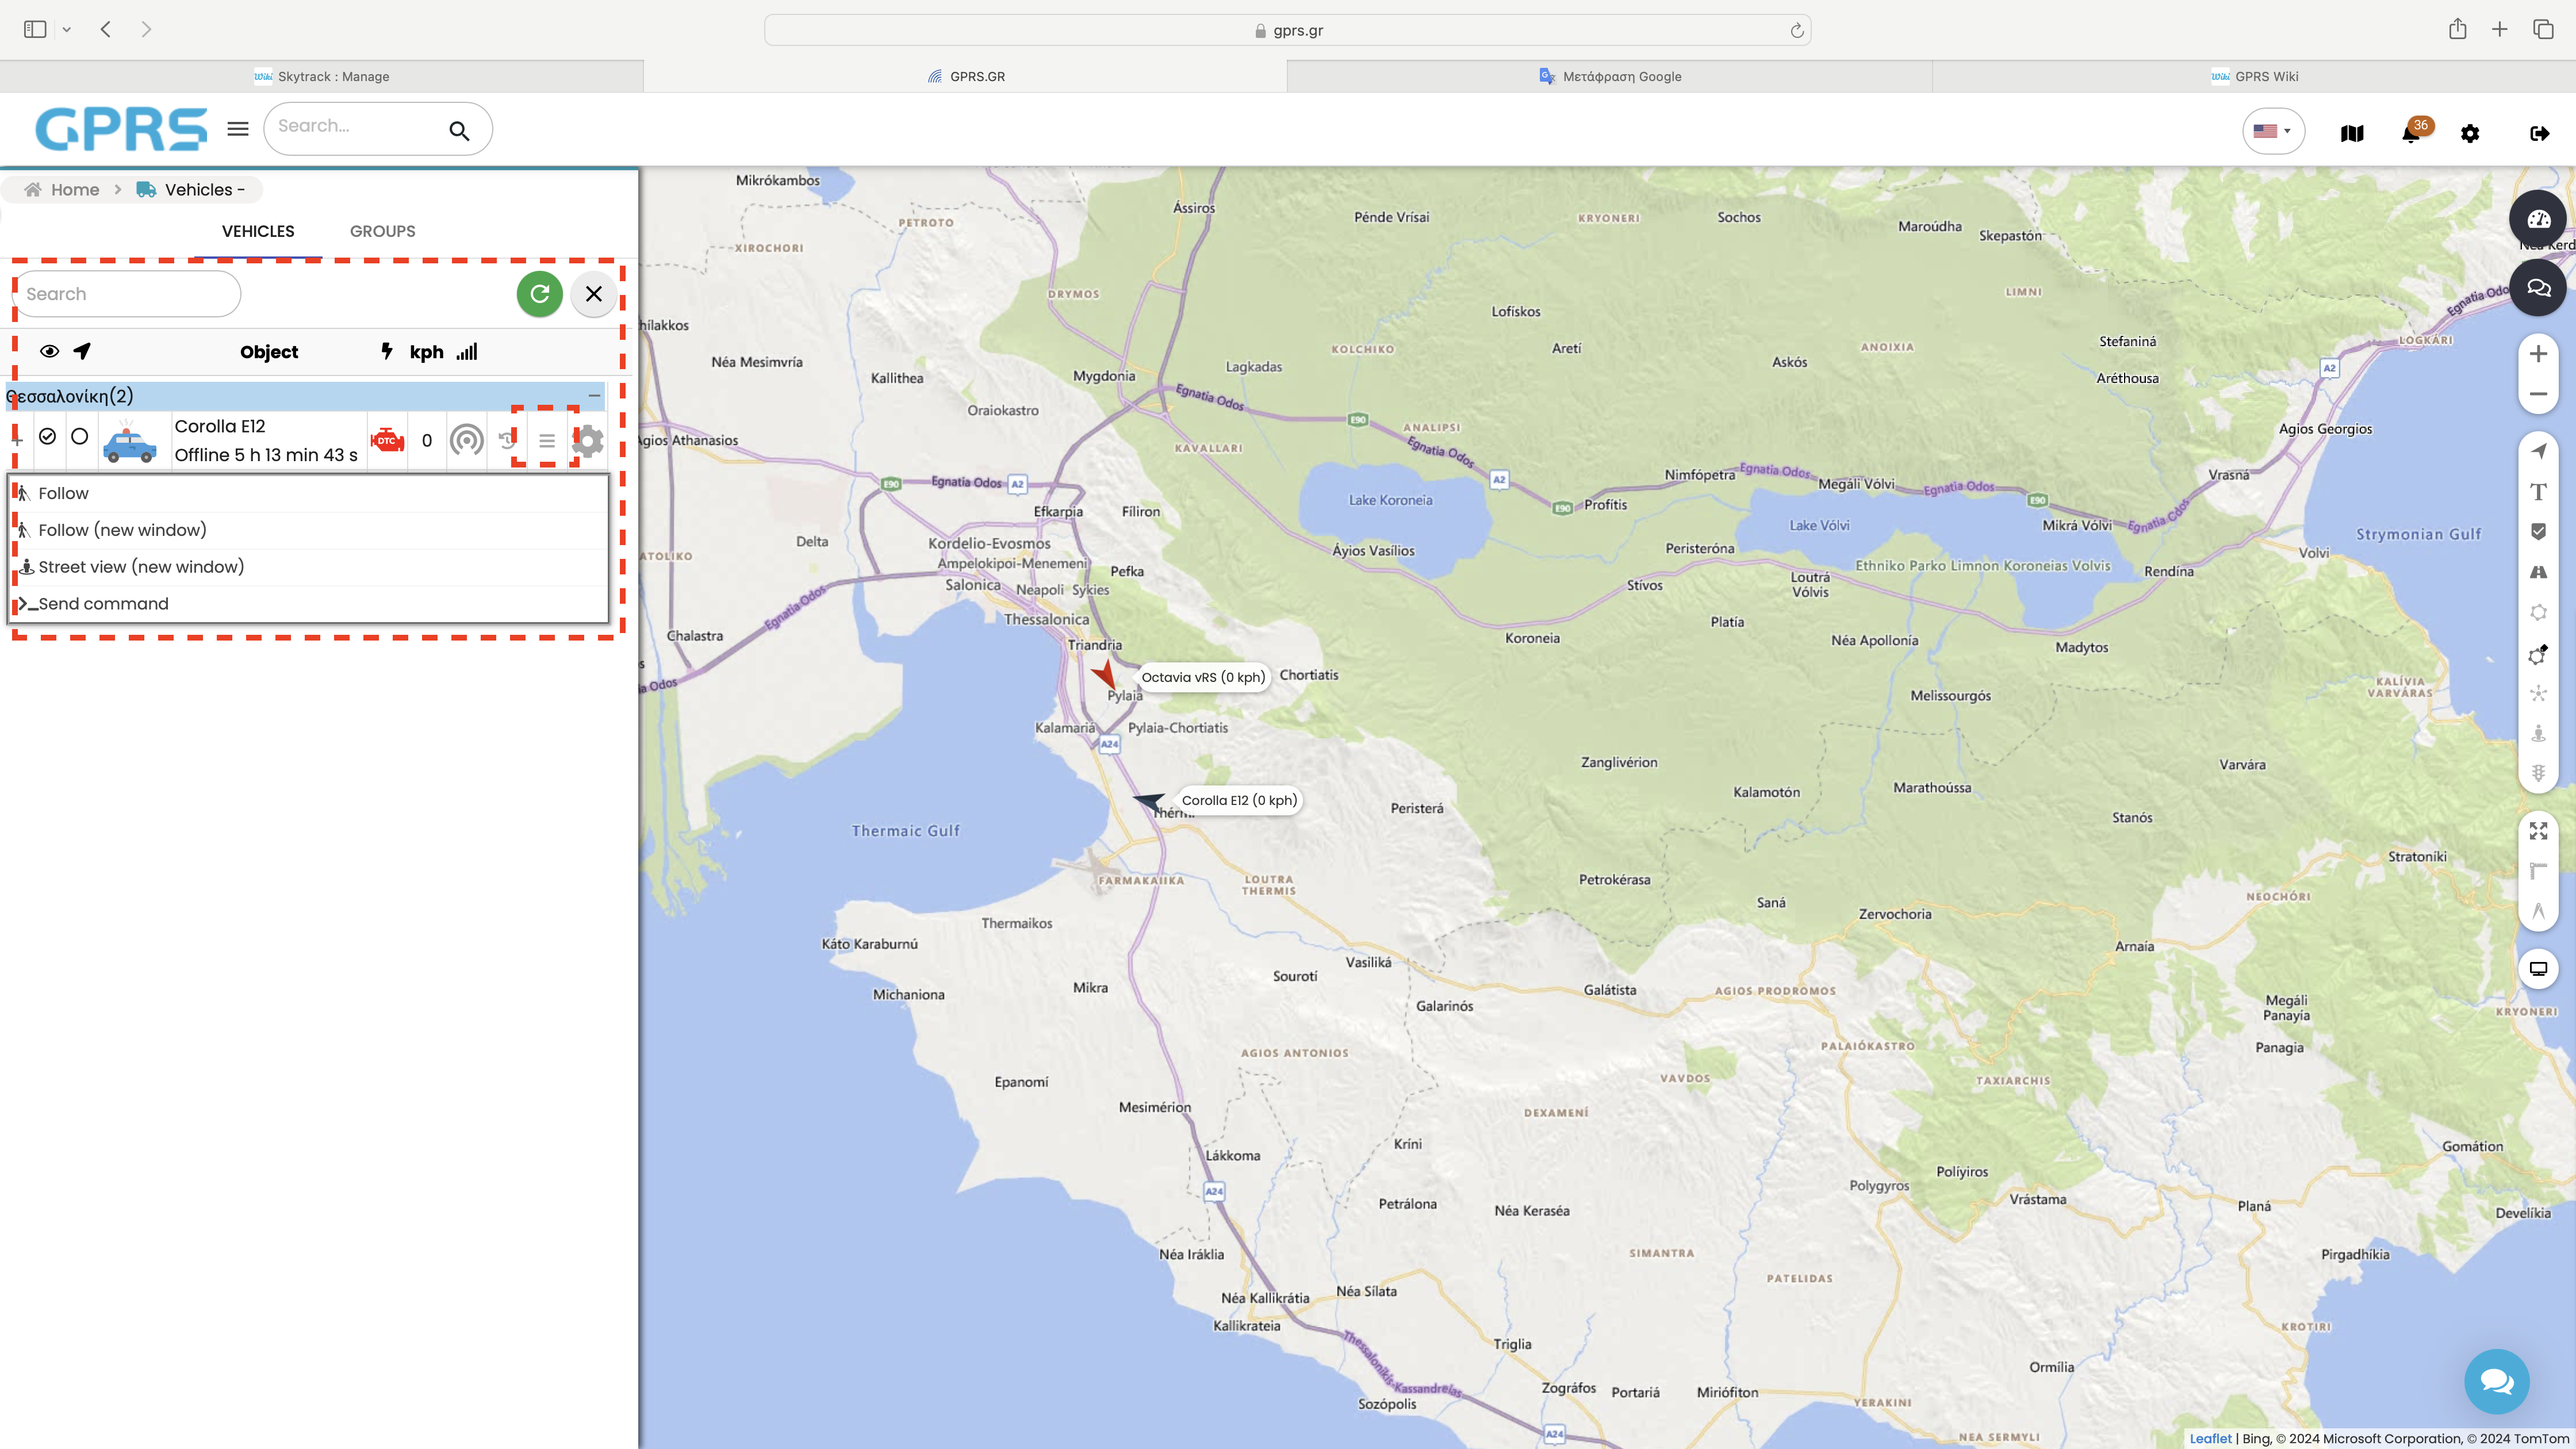
- View Options: Gives us the options Follow, Follow (new window), enter Street view (new window) and Send command.
- Follow: Opens a new browser window with the vehicle centred on the map and relevant information on the left. These are divided into sensors, general and location.
- Information: Allows you to hide/show the left information window.
- Routes icon: Shows/hides the routes of your vehicle.
- Follow (new window) offers the same options, the only difference is that instead of a new browser it will open a new tab in the already open browser.
- Street view opens the Street view interface with the surroundings of the selected vehicle in a new tab.
- >_Send Command refers to commands that can be sent by Skytrack technicians to the device to fix technical issues and to create actions from the device.
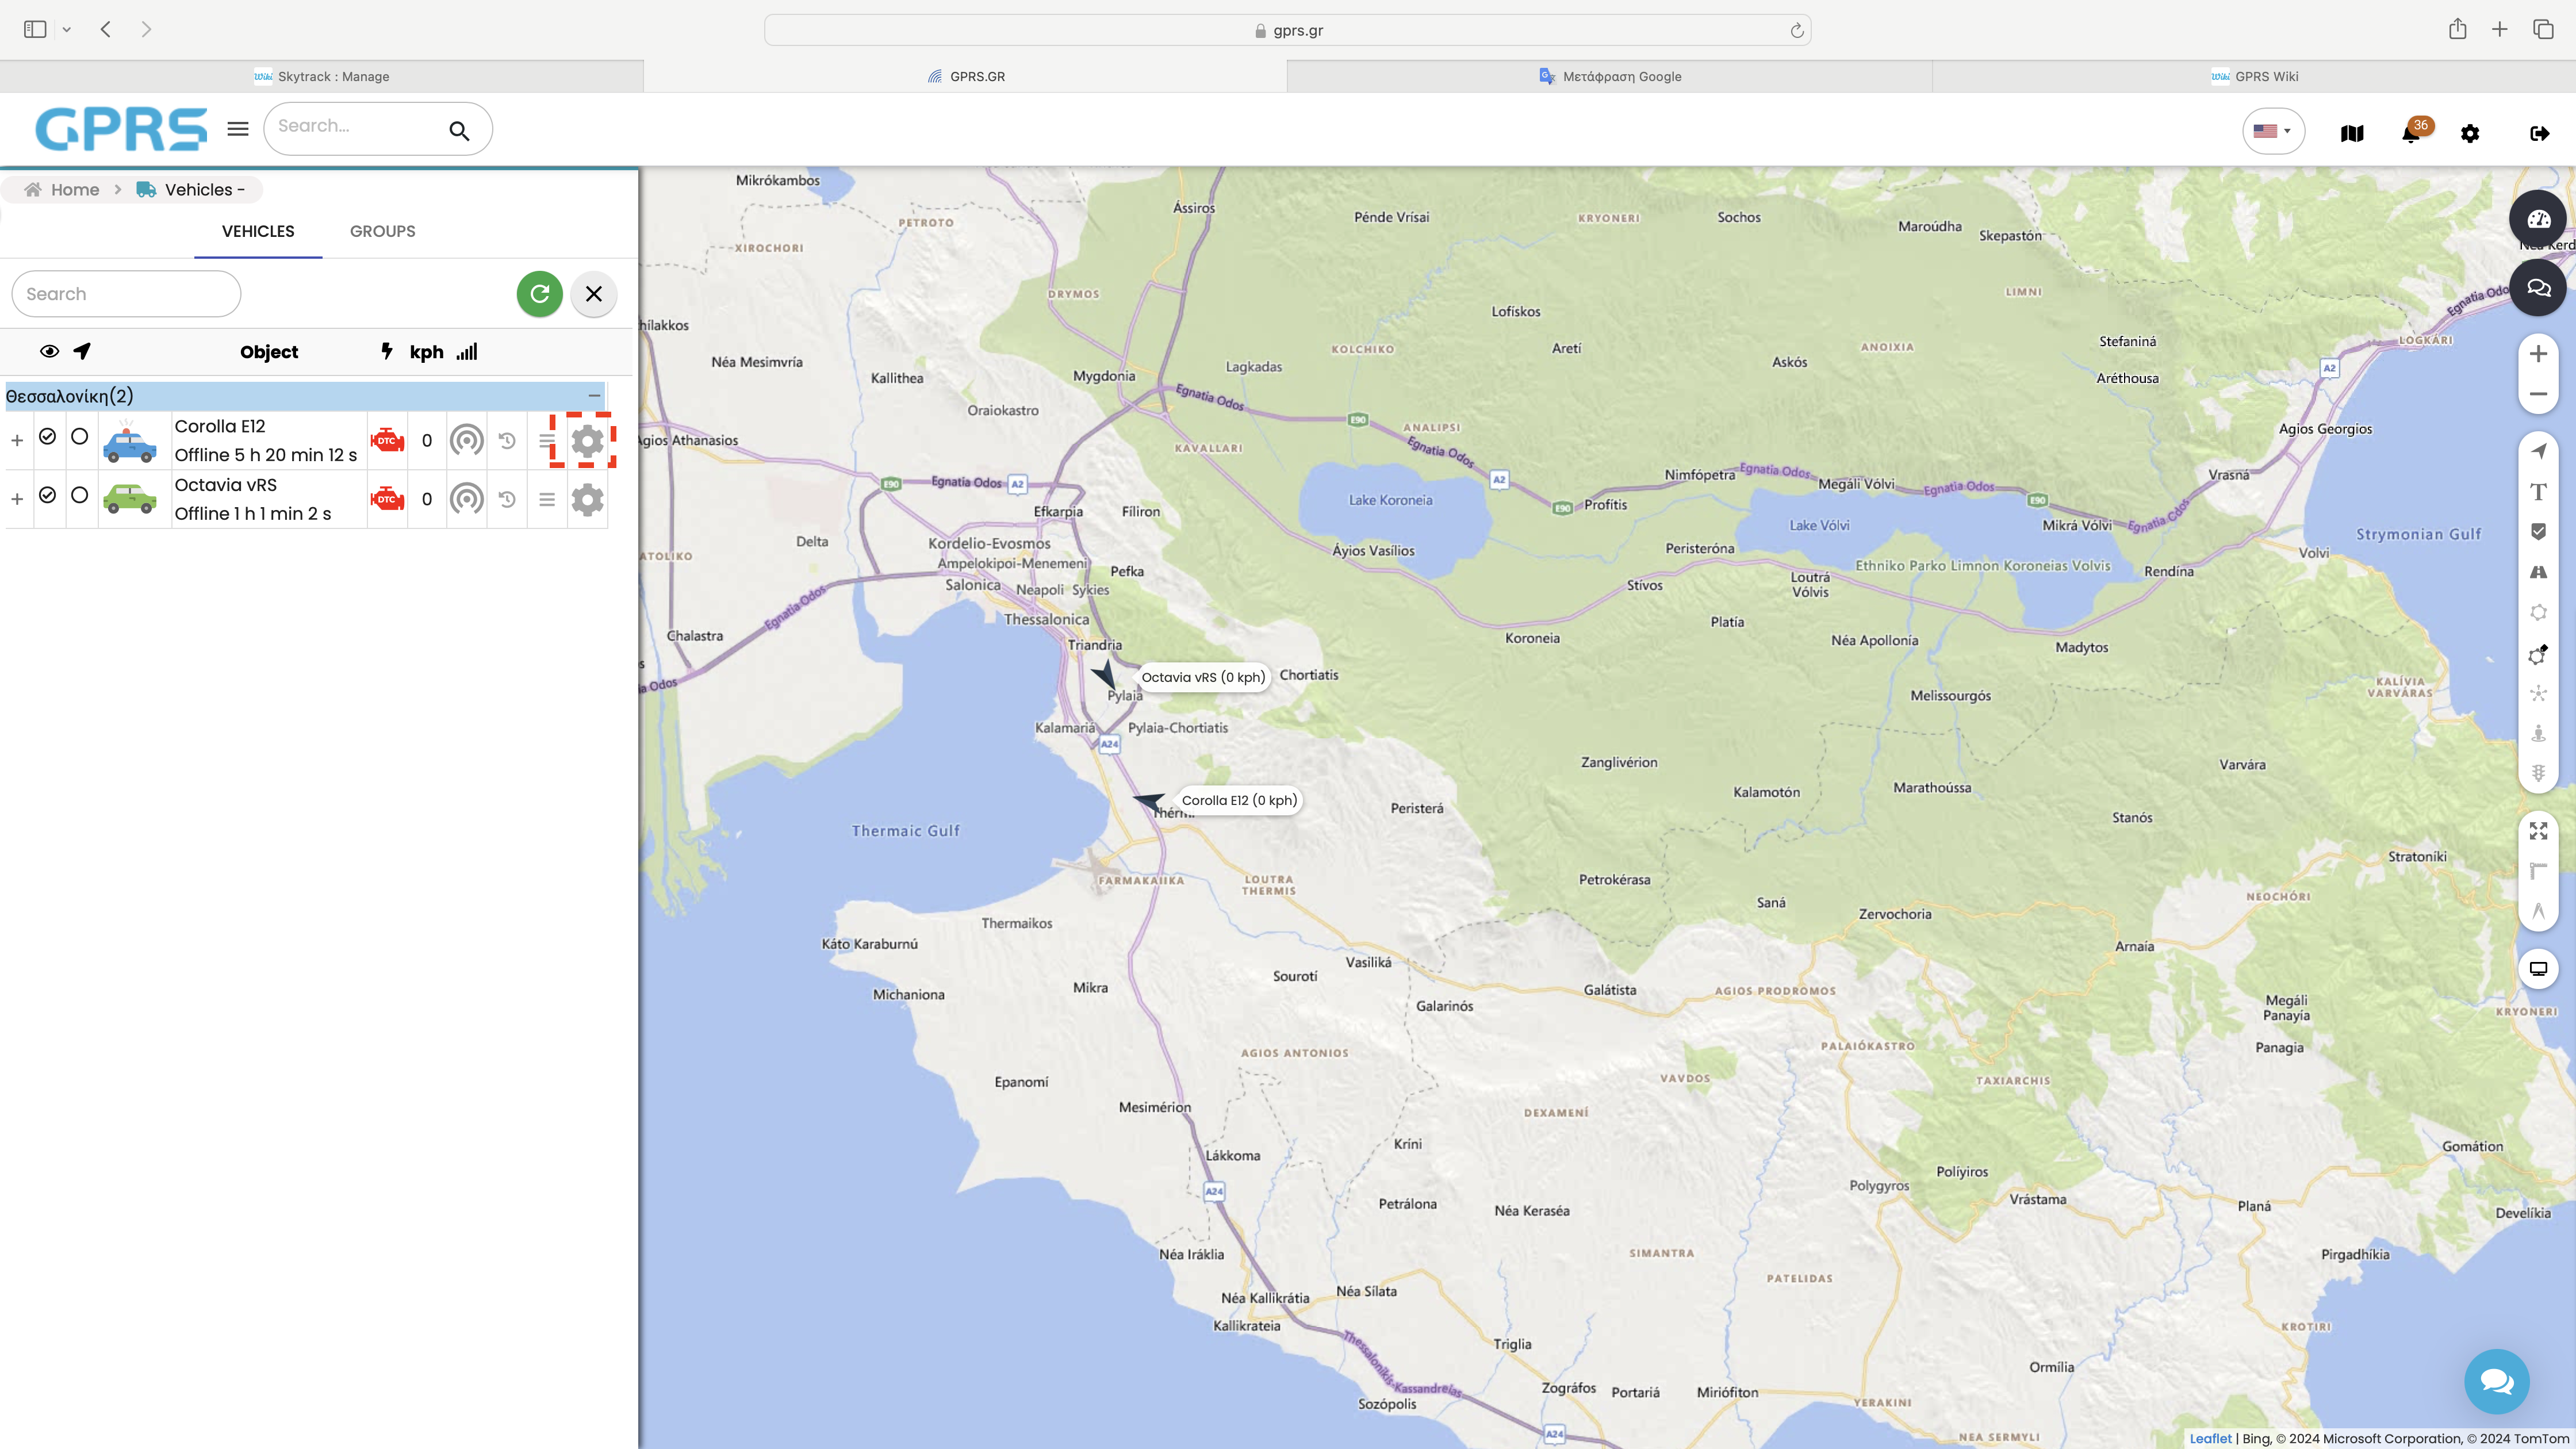
The gear gives access to the vehicle tab, from which you can manage all the information concerning the vehicle.
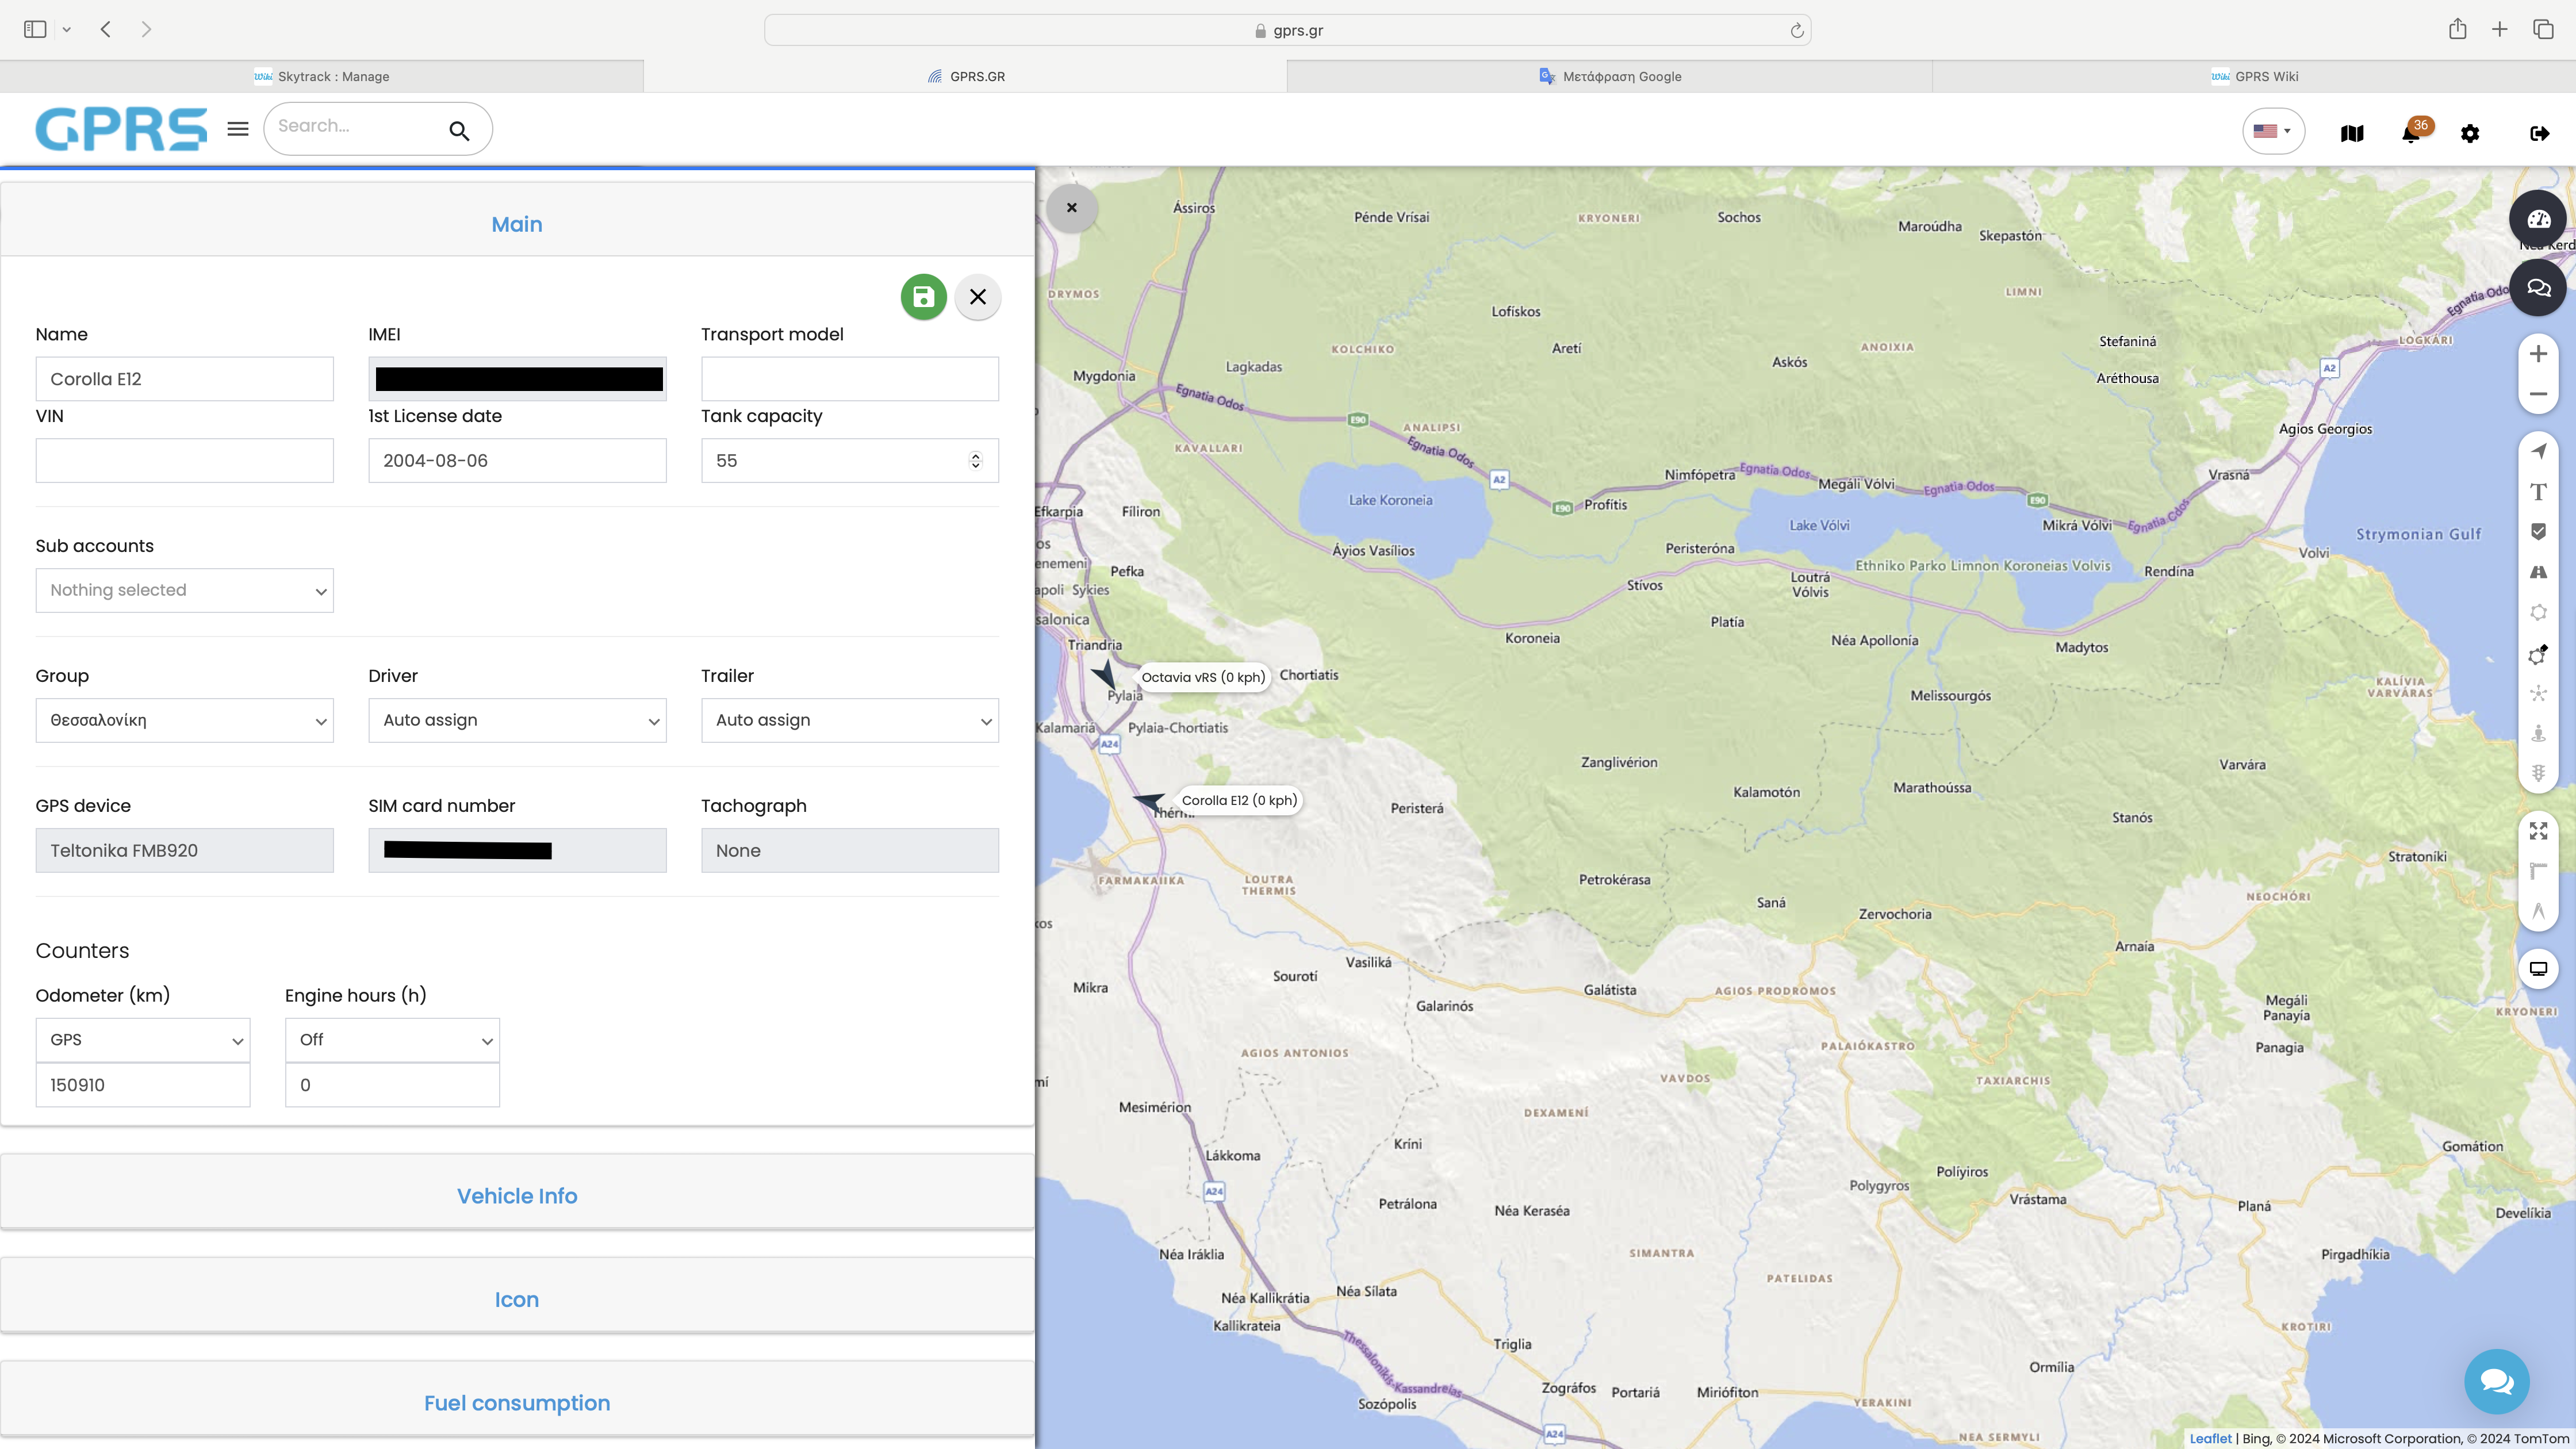
The different tabs are explained in detail below.
The Home tab contains all the basic identification information of the device.
- Name: Fill in the device name. Could be vehicle make and model, registration number etc.
- IMEI: Τhis field comes pre-filled by the platform (cannot be changed by the user) and is the International Mobile Equipment Identity number. In other words, a unique identifier for your tracking device.
- Model: You can fill in the vehicle model the tracker is installed. (optional)
- Chassis number: You can fill in the vehicle's chassis number here. (optional)
- Date of first authorisation: You can fill in the vehicles first authorisation day. (optional)
- Tank capacity (fuel): You can fill in the vehicle's capacity in litres. (optional)
- Group: here you select to which group the device belongs (if you have defined groups) (see corresponding section)
- Driver: here you select who is the driver of the device (if you have entered drivers), or by setting the automatic assignment, you let the platform define who drives the vehicle. (see corresponding section)
- Trailer: Select which trailer is connected to your vehicle, if you have trailers registed to your account.
- GPS Device field: this field comes pre-populated by the platform (cannot be changed by the user) and is the type of your device
- SIM card number this field comes pre-filled by the platform (cannot be changed by the user) and is the SIM card number of your device
- Tachograph: Comes pre-populated and shows us registered tachographs for the specific vehicle.
- Odometer: Measures the road distance covered by the vehicle in kilometers. We choose whether the meter will be closed, measure distance via GNSS or any relevant sensor (Odometer sensor in CANbus devices)
- Engine Hours: The hours of engine operation. Pressing this selects whether the meter will be off, whether it will measure the operating hours via engine start, or whether it will measure the hours via sensor.
These measurements after a period of time may differ from the actual ones due to minor differences in the satellite measurements so it is recommended to update them regularly and definitely during a scheduled vehicle maintenance (service).
Vehicle Info
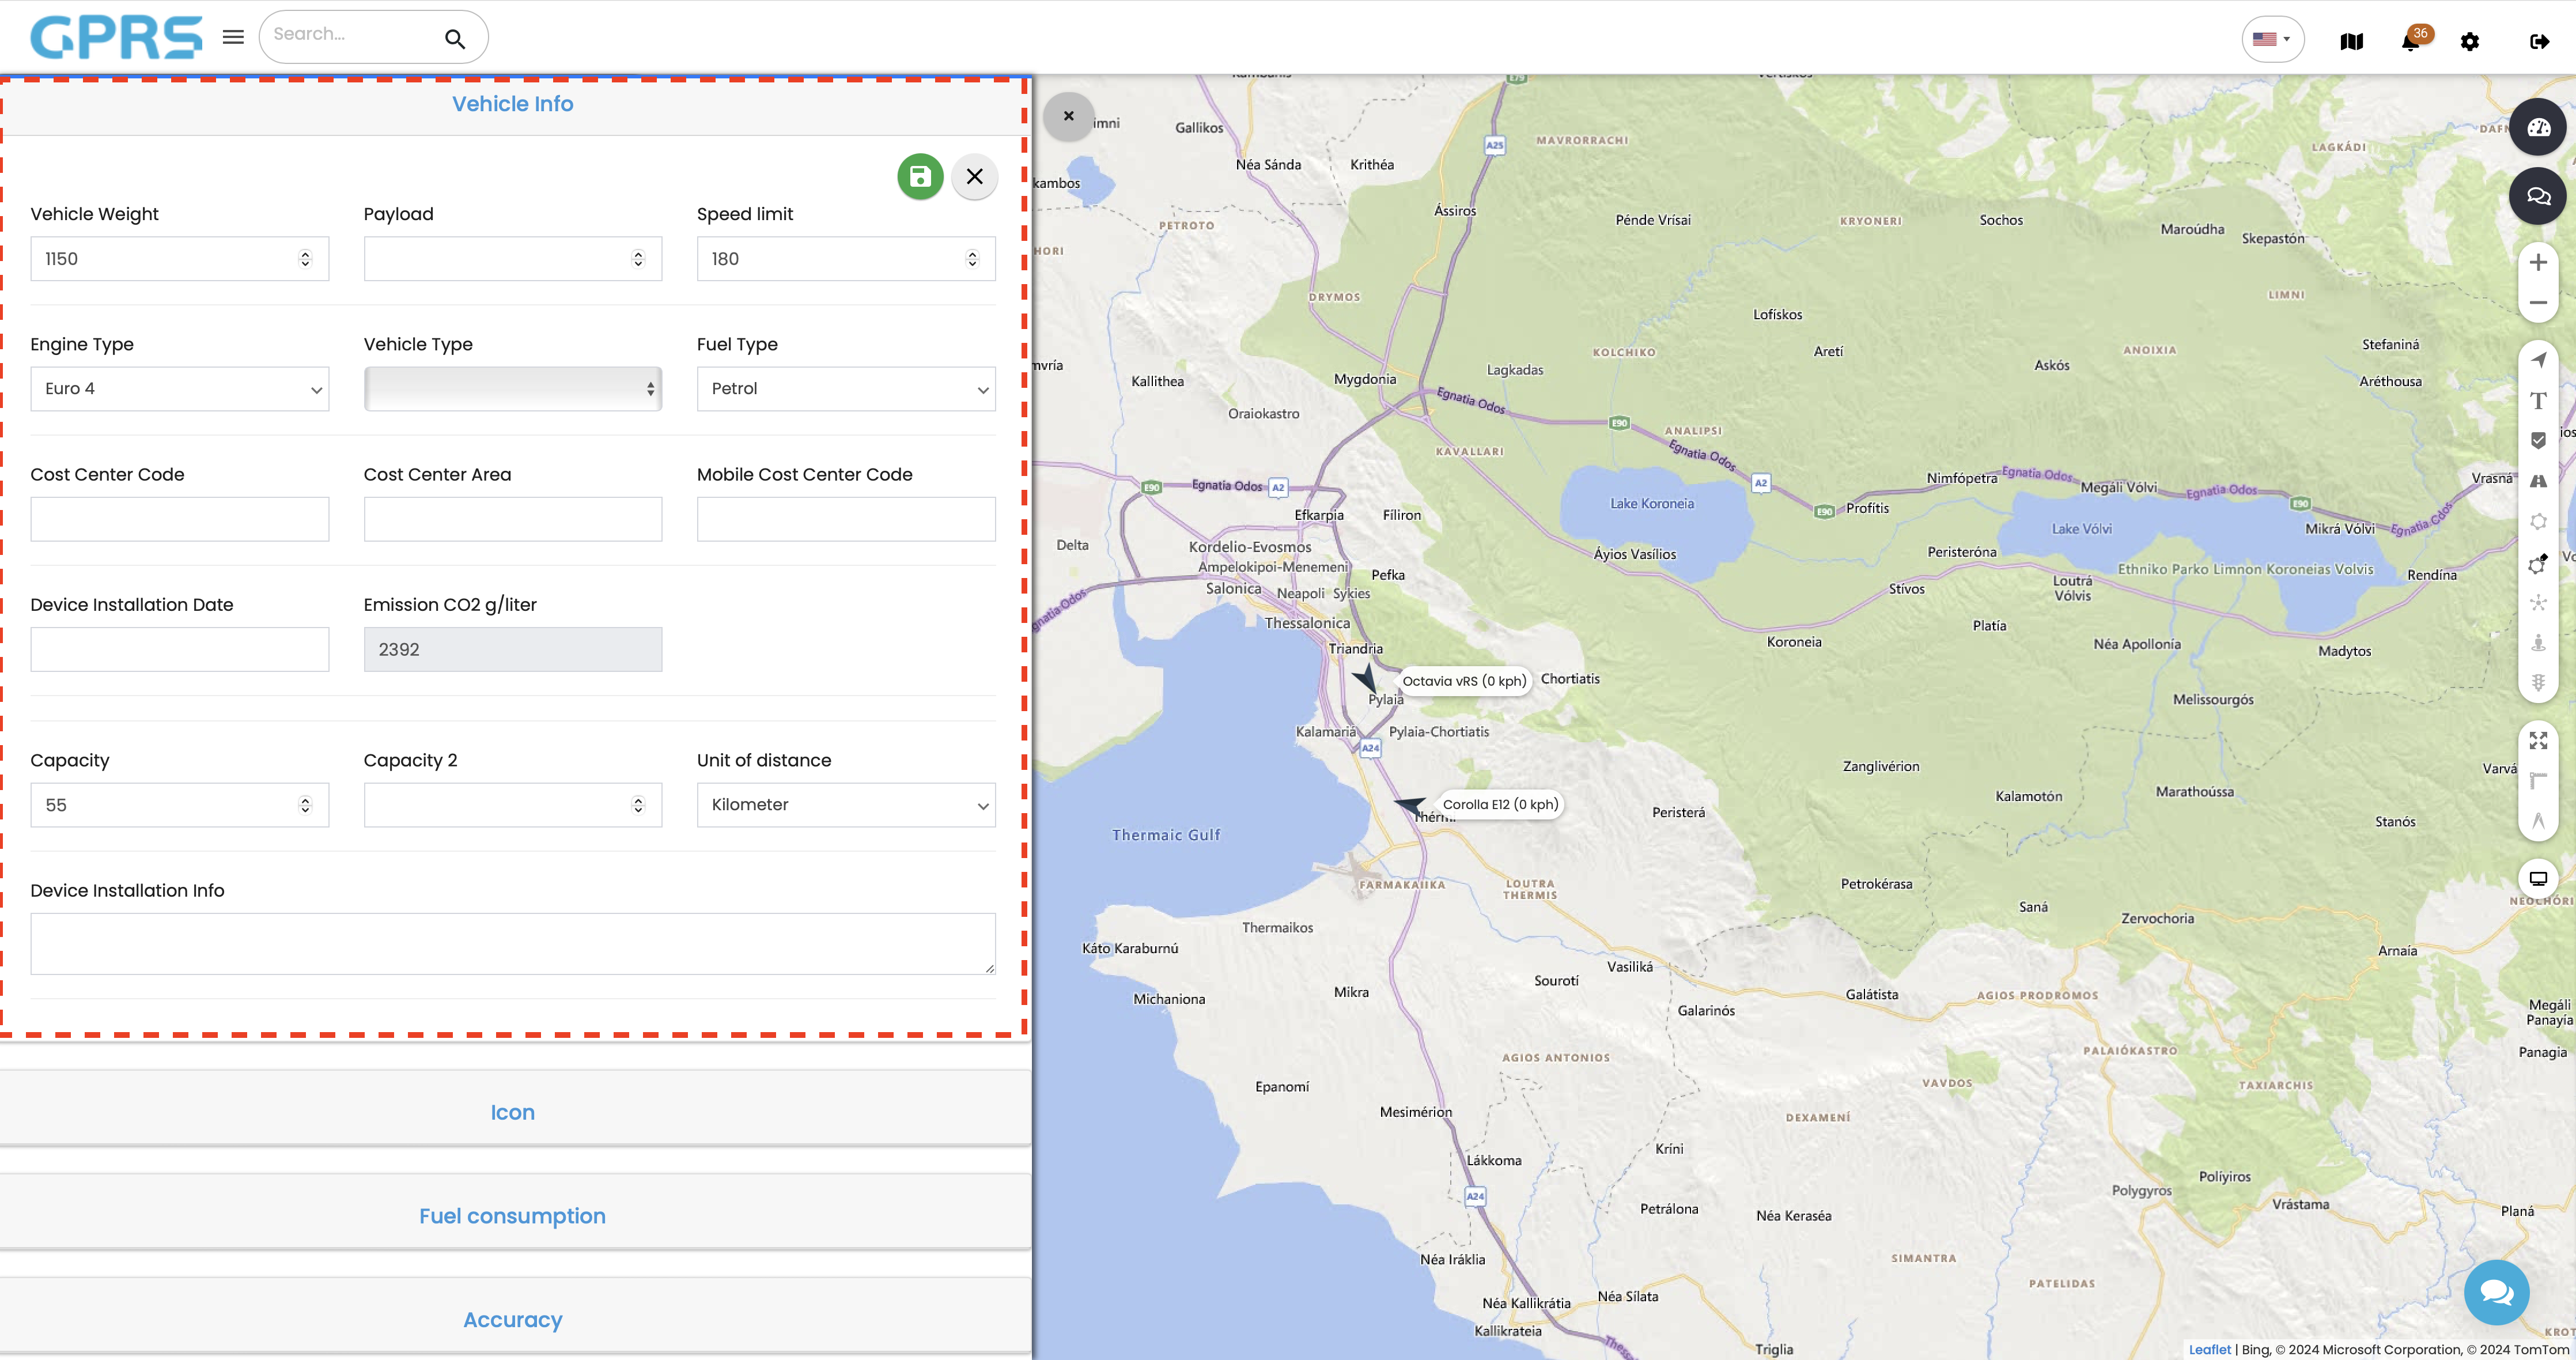
- Vehicle Weight: You can enter your vehicle's weight in kilograms.
- Payload: You can enter your vehicle's paypload in kilograms.
- Speed limit: The top speed of your vehicle.
- Engine Type: select the type of anti-pollution technology your engine has,(Euro 1 to Euro 7).
- Vehicle Type: Select your vehicle's type (Car, Light commercial vehicle, Heavy Goods Vehicle).
- Fuel type: Select your vehicle's fuel type. (Petrol, Diesel, LPG).
- Cost Centre Code: Enter the cost centre code of the vehicle you have defined for its accounting use.
- Cost centre area: Enter the cost centre area for your vehicle (if your vehicles operate in more than one area).
- Mobile Cost Center Code: Enter the mobile cost center code you have defined for its accounting use
- Device installation date field: Enter the date of installation of the device in your vehicle.
- CO2 emission g/Km: This field comes pre-filled by the platform and is your engine's CO2 emissions in grams per km according to the category you have declared. The results may deviate from real world values.
- Device Installation Information field: This free field allows you to register information regarding installation date, technician name, installation shop etc.
Icon
On the Icon tab you can manage the options for displaying the vehicle on the map.
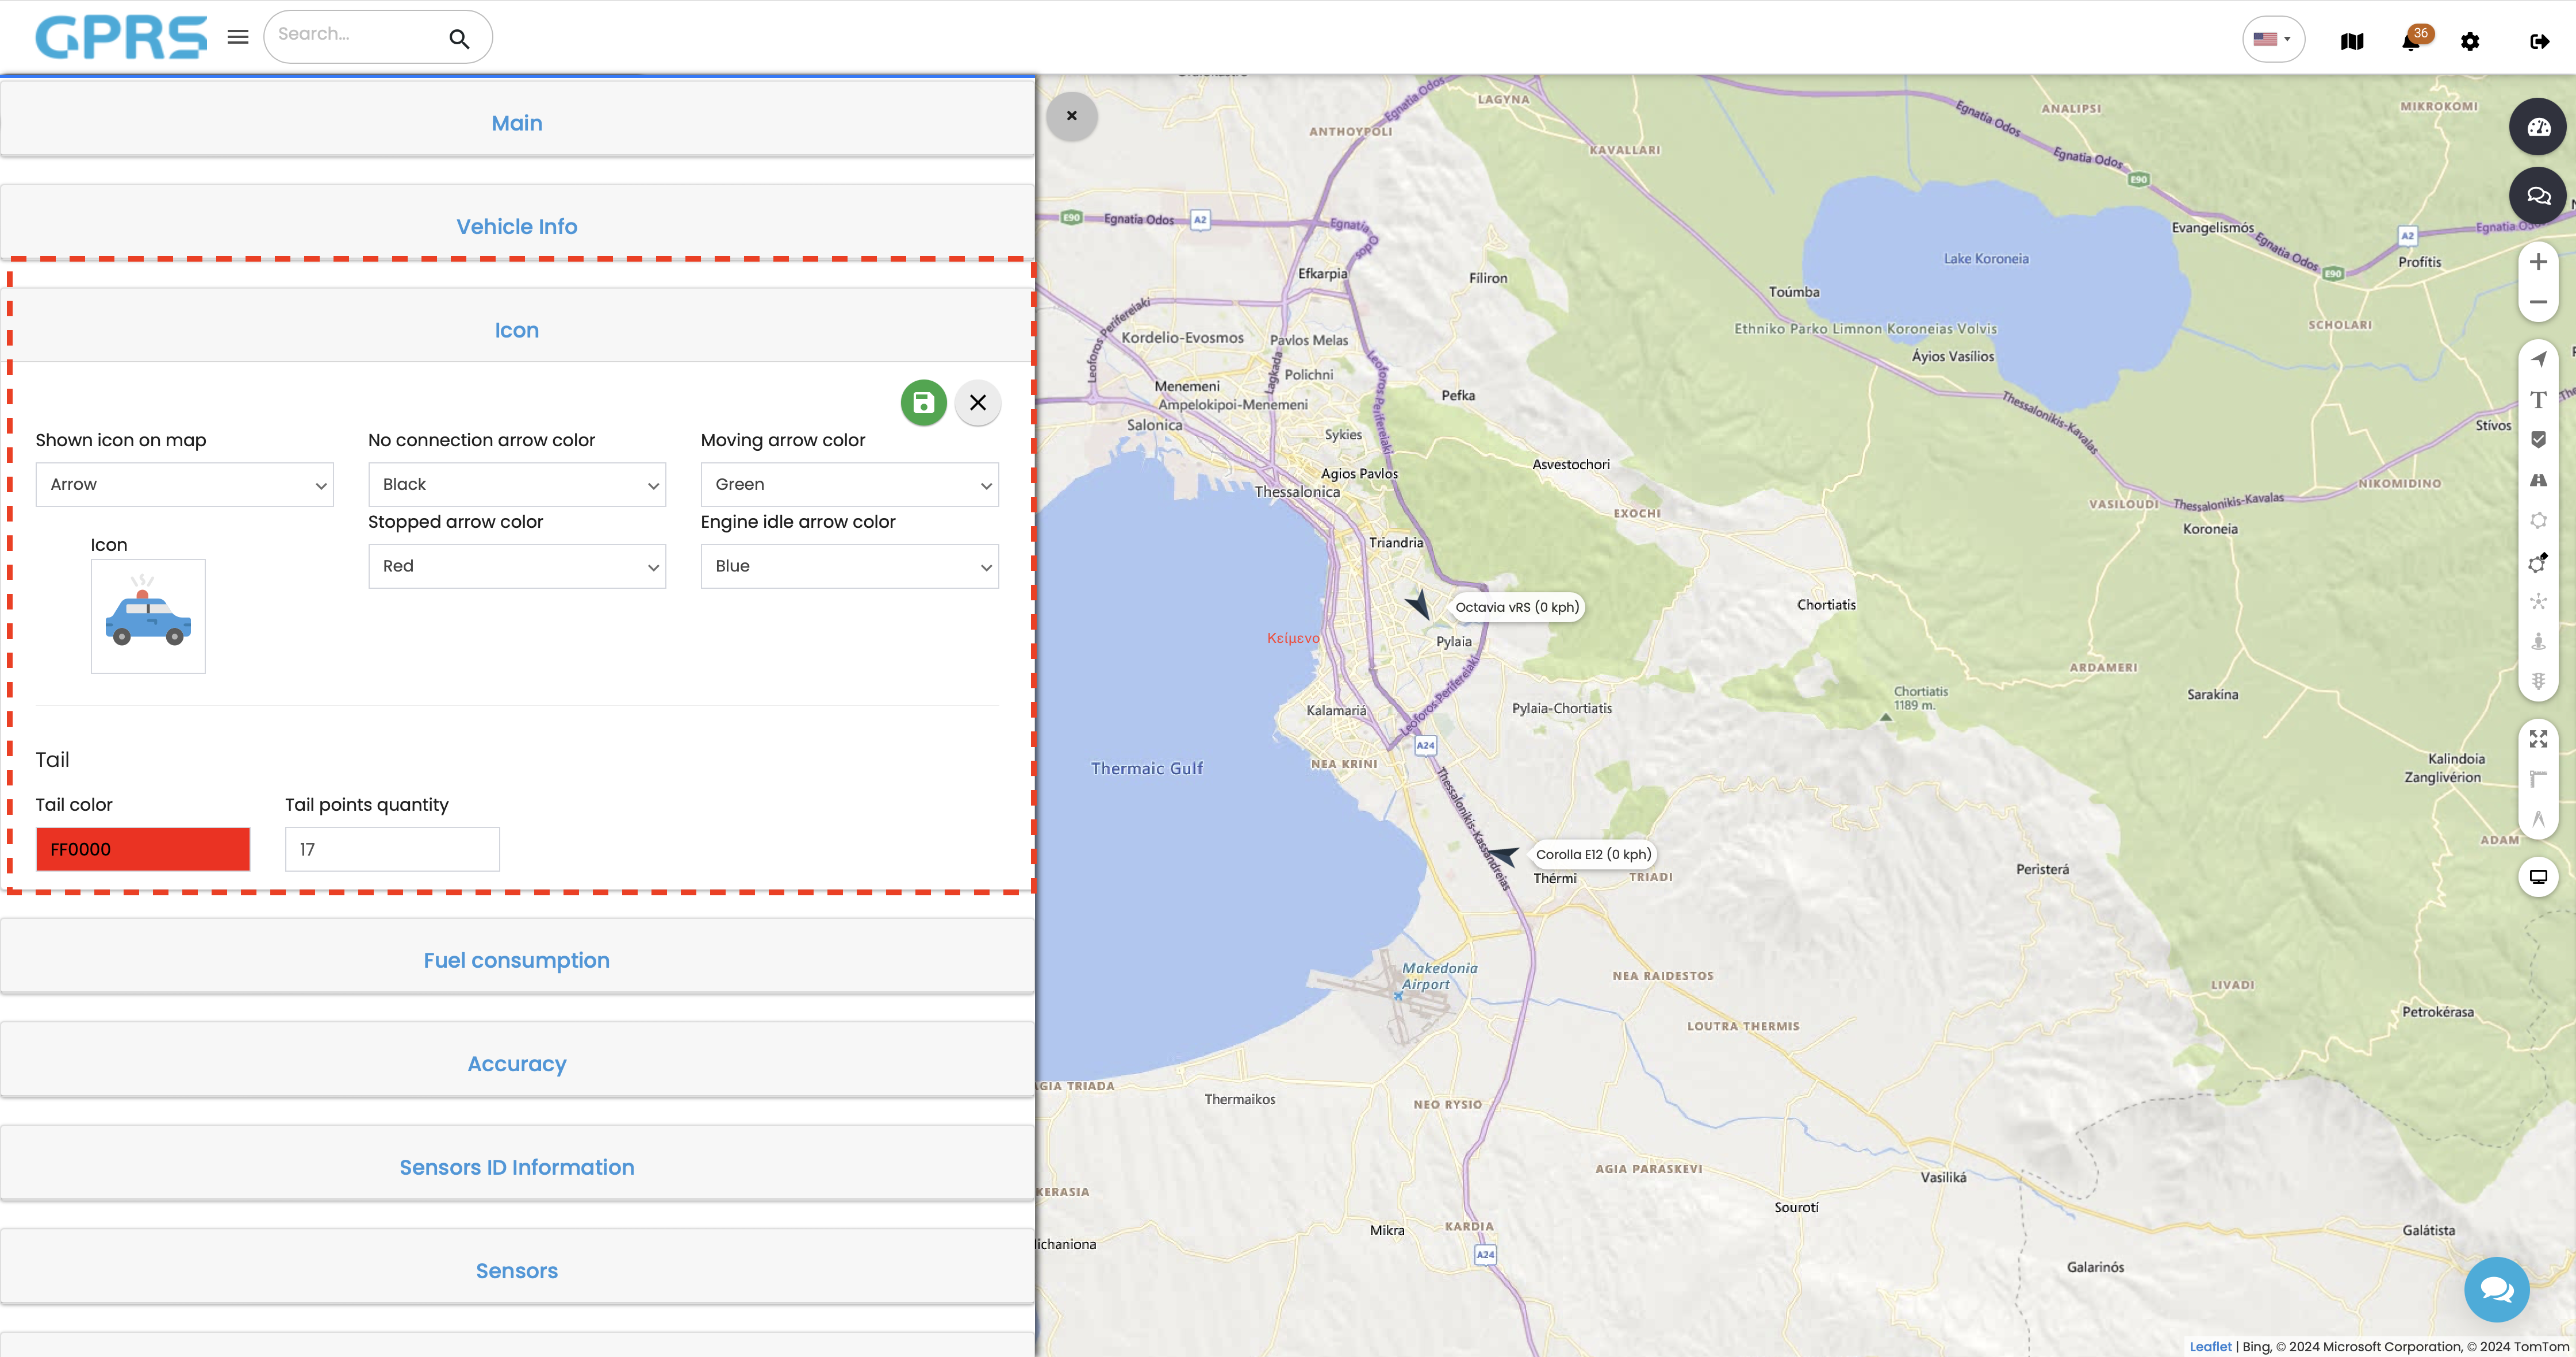
- Shown icon on map: This option allows us to change the default arrow icon to either a custom one or a different one from the default icon list. If 'Arrow' is selected, we will still see an arrow on the map, and the icon change will only affect the relevant device in Objects-Devices menu.
- No connection arrow color: You can change the arrow icon colour to reflect the state of your tracker. In this case, when your vehicle is not connected to the mobile phone provider, you have the option to select the color from among eight available colors, Pictured above both trackers are in ultra sleep mode, and therefore the arrow remains black since there is no active connection at the moment.
- Moving arrow colour: This allows us to change the arrow colour when movement is being detected by the tracker. The default is green.
- Stopped arrow colour: This allows us to change the arrow colour when there is no movement detected from the tracker. It affects the scenario where the vehicle is stopped and there is currently an active connection to the server.
- Engine idle arrow color: This allows us to change the arrow color when a vehicle is stationary, but ignition is detected.
- Tail & tail color: Changes the tail color of a vehicle. The tail shows the last few positions of the vehicle as reported by the tracker.
- Tail points quantity: Allows us to change the tail points quantity. This may have an impact in performance if a great value is selected
Fuel consumption
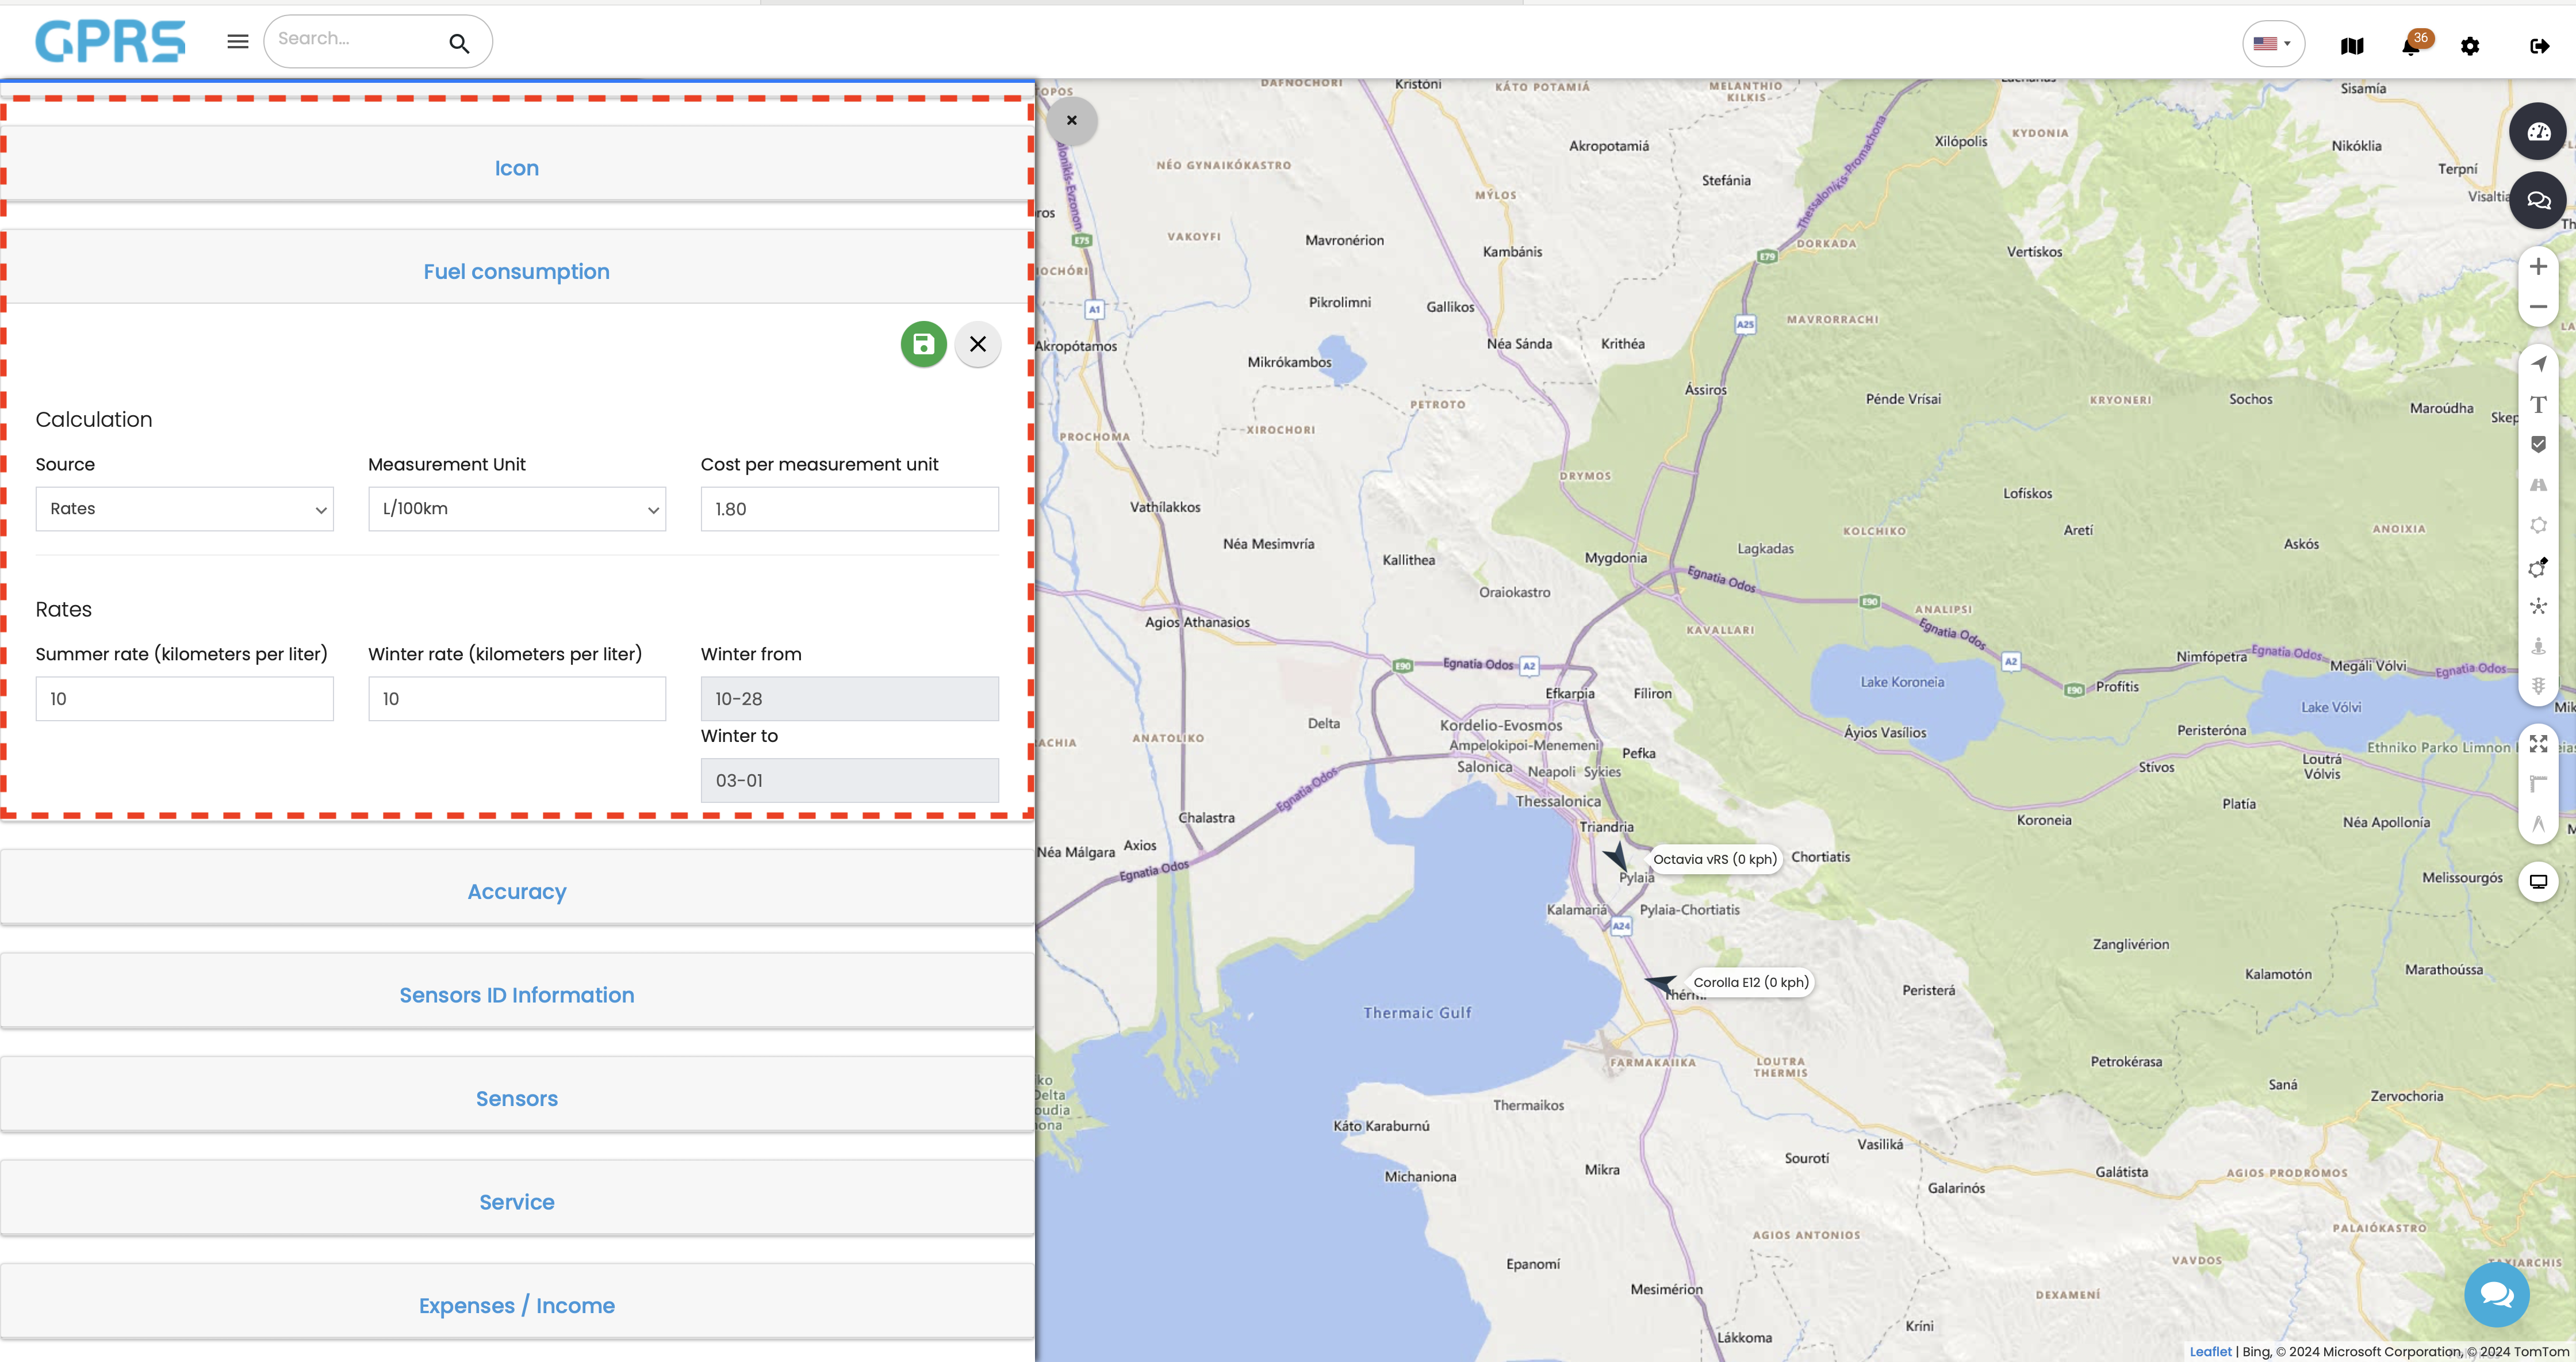
- Fuel consumtpion: Set the values for GNSS aided fuel counting.
- Source: This menu allows you to choose how to calculate the fuel consumption. (Average GNSS aided consumption, Fuel level sensor or Consumption sensor). The last two heavily depend on how the vehicle interprets the fuel level data as it the information can either be in percentage or liters.
- Measurement Unit: This changes the fuel measurement units (L/100KM or MPG)
- Cost per measurement unit: Price per liter/gallon.
- Summer rate: The consumption rate of the vehicle during summer months in kilometers per liter.
- Winter rate: The consumption rate of the vehicle during winter months in kilometers per liter.
- Winter from & to: We can alter the winter duration depending on the area we are based.
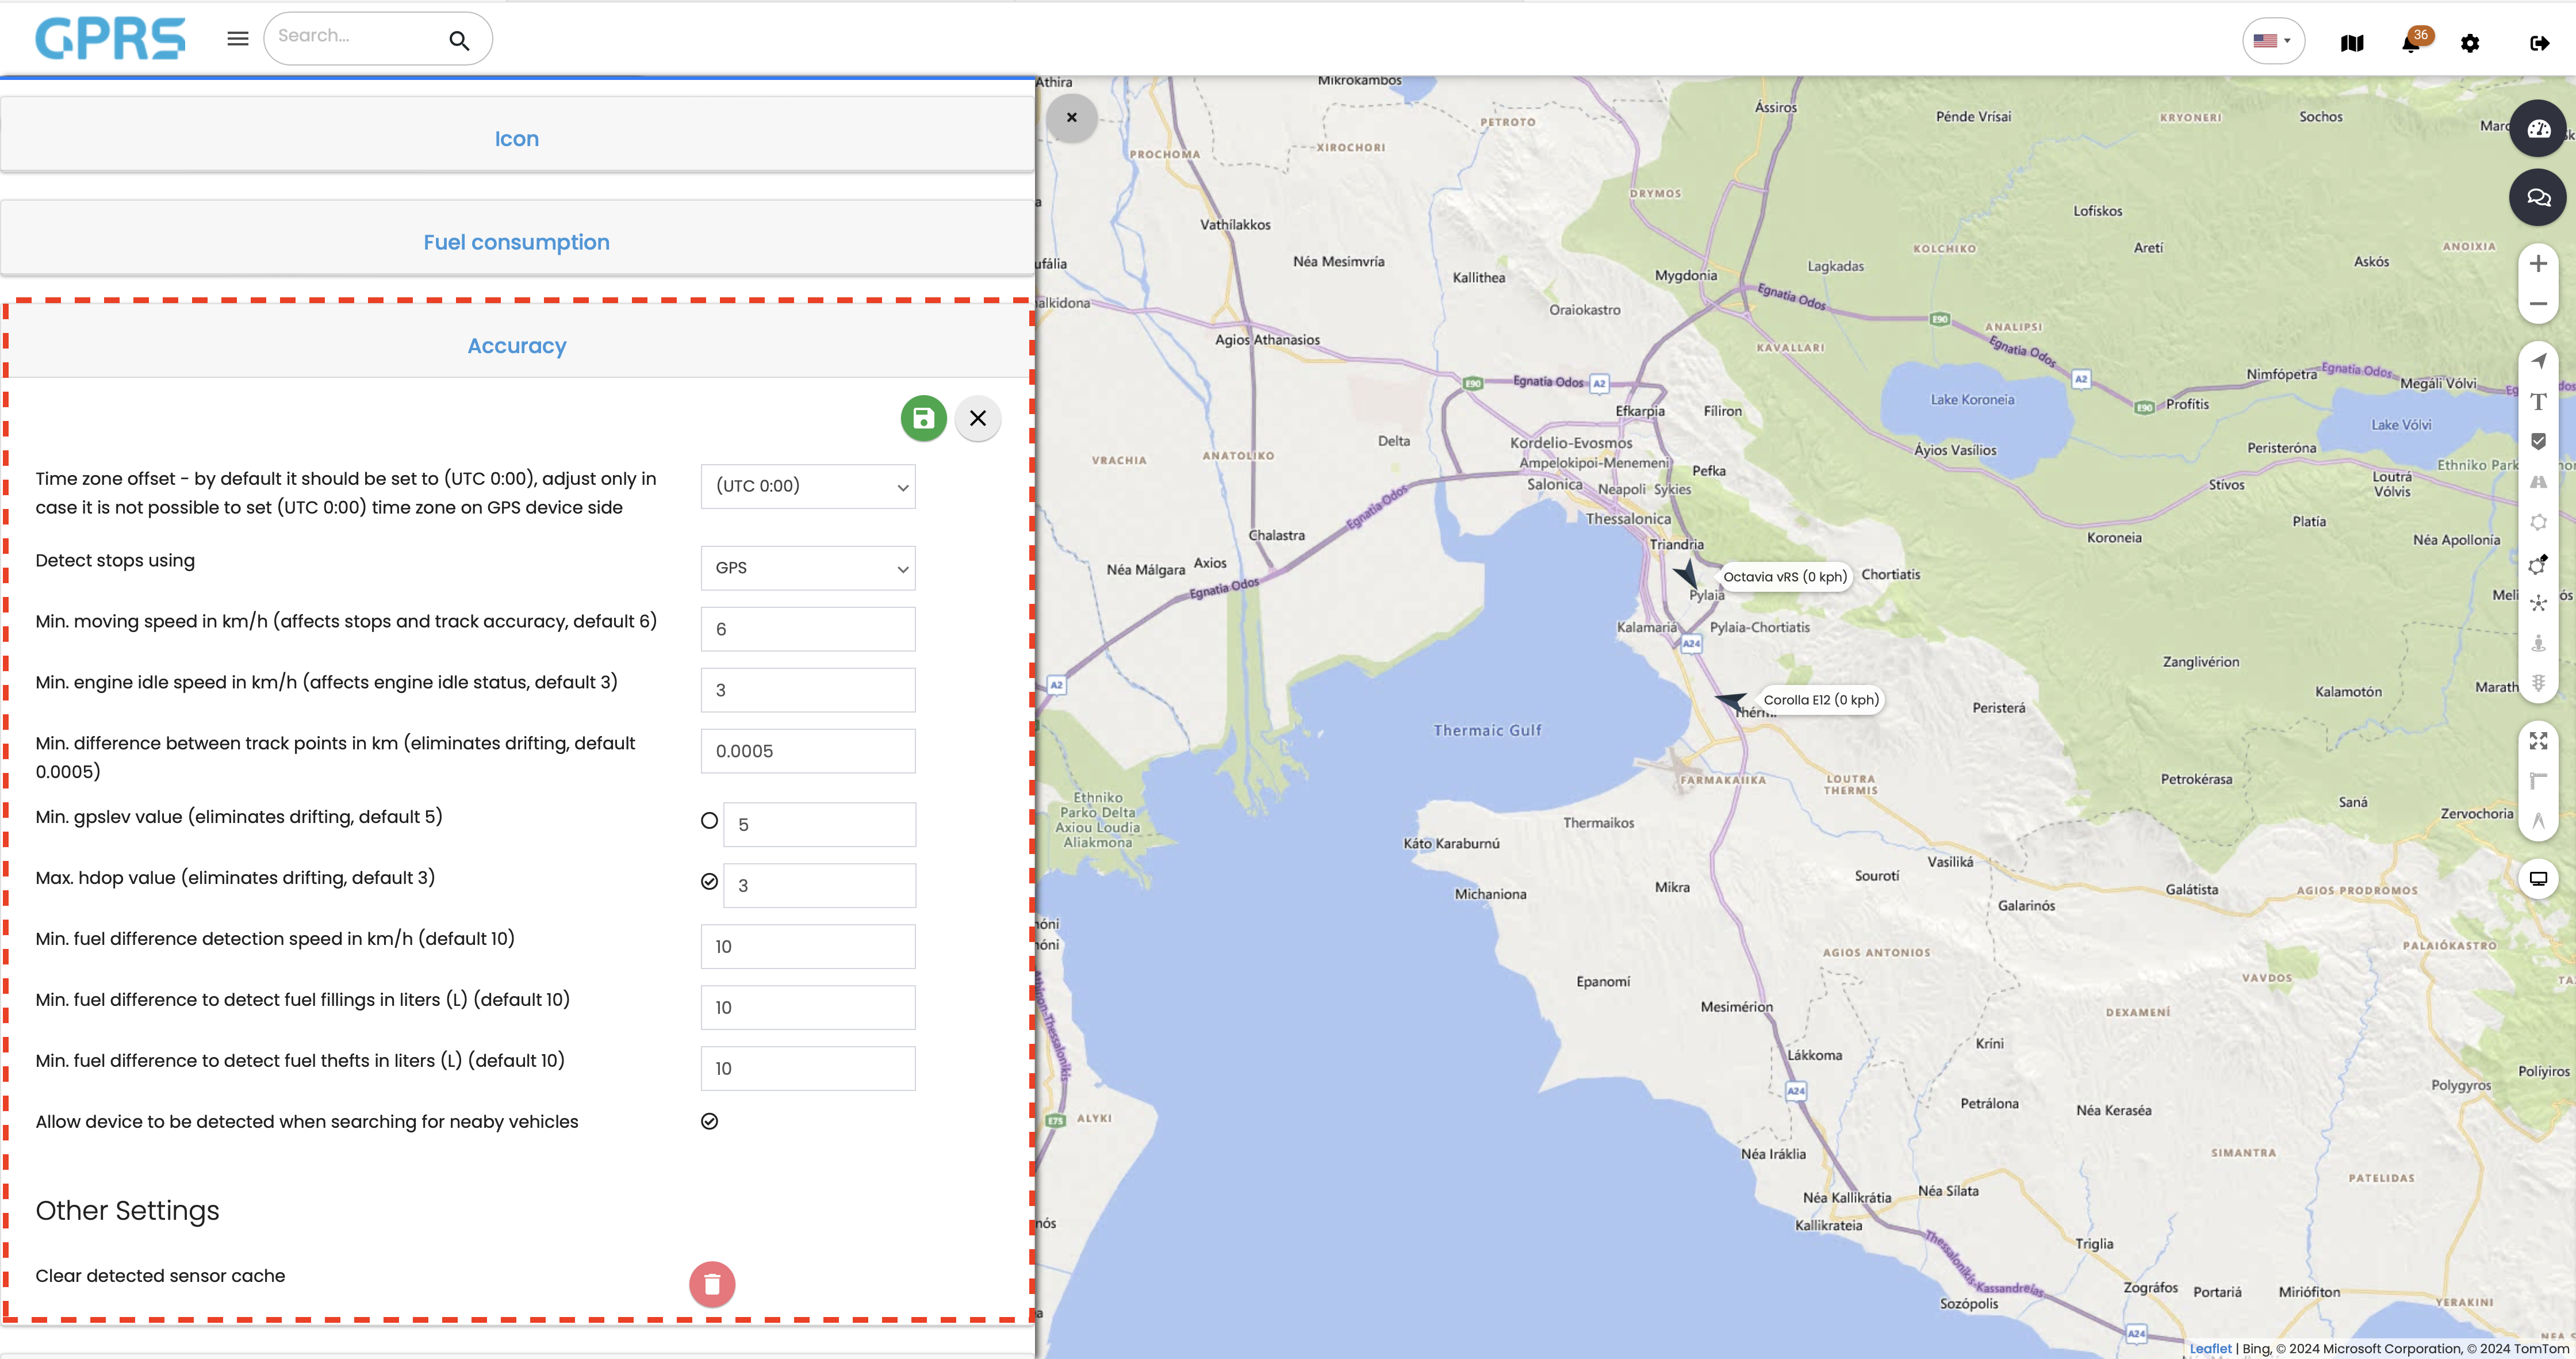
In the Accuracy tab you find fields responsible for the accuracy of the measurements you want to receive. It is highly recommended to keep the default values. Please contact Skytrack's technical support department in case you're facing accuracy issues.
- Time zone offset: Fixes timestamp issues in records sent by the GPS tracking devices. The default value is UTC and should be left as is.
- Detect stops using: How GPRS understands that your vehicle is stopped. The options are: Satellite signal (GPS), tracker internal accelerometer (ACC) or a combination of both.
- Minimum moving speed has to do with the minimum speed value below which the vehicle is considered to be stationary.
- Minimum idle speed field is the minimum speed value from which the vehicle is considered to be in idle mode.
- Minimum distance between two tracking points field have to do with the accuracy of tracking the vehicle on the map.
- Minimum value of GPS satellite numbers. Our device can connect to many satellites at the same time and the larger number helps us to have a more accurate tracking. If we want to make a change, to save it we need to select the round field before the value and then save with the save button.
- Maximum height deviation value. With this setting, the platform does not calculate vehicle height deviation values greater than 3. This helps the accuracy of the data. The values range from above 20 to below 1. The lower number is better. If we want to make a change, to save it we have to select the round field before the value and then save it with the save button.
- Minimum Fuel Difference Detection Speed in kilometers per hour (km/h): This setting tells the system when to start checking for differences in the amount of fuel in the vehicle. This helps us avoid having unnecessary data to analyze.
- Minimum fuel value for tank fill detection in litres (L): This setting tells the system when to start checking for differences in the amount of fuel in the vehicle. This helps us avoid having unnecessary data to analyze.
- Minimum value for fuel theft detection in liters (L). This setting tells the system when to start checking for differences in the amount of fuel in the vehicle and if there is fuel theft. This helps us avoid having unnecessary data to analyze and false alarms.
- The clear sensor data button clears the fields to the default values.
Sensor ID Information
In the Sensor ID Information tab you find fields responsible for identifying and personalizing the sensors installed in your vehicle. These are custom fields that we are free to personalise in any way we want.
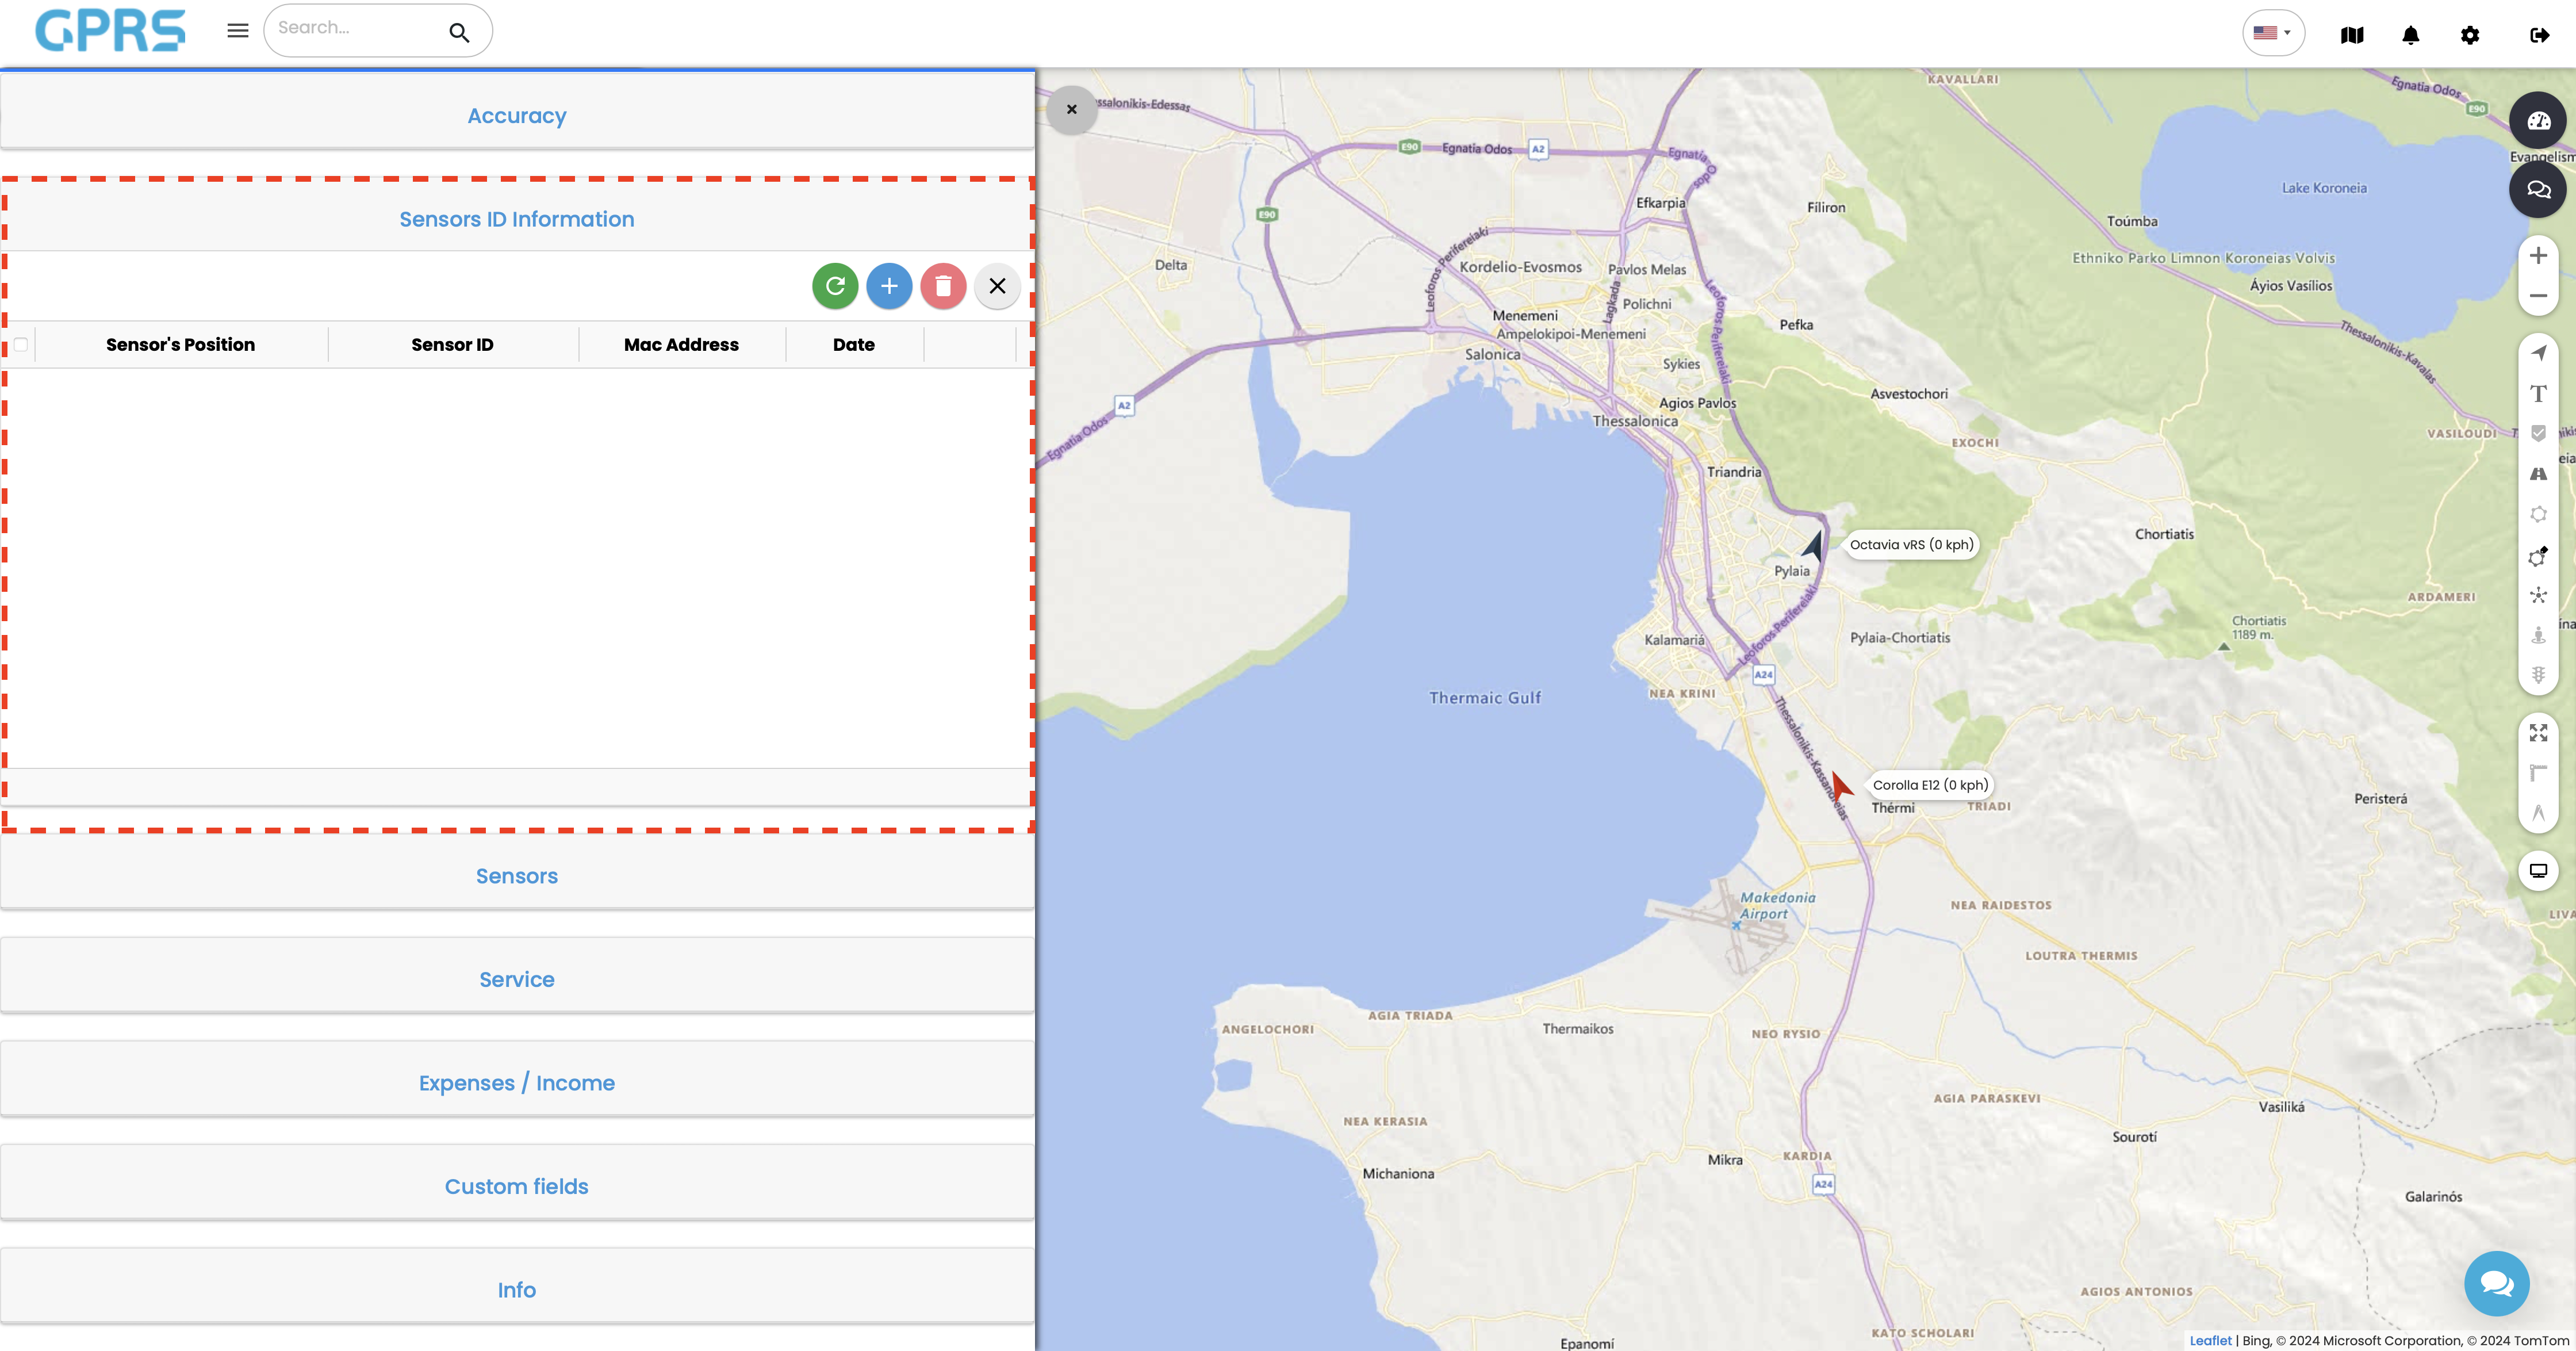
![]() will refresh the sensor ID information list
will refresh the sensor ID information list
![]() will add a new field
will add a new field
![]() will delete any selected fields
will delete any selected fields
![]() will close the Sensor ID information menu
will close the Sensor ID information menu
Adding a new field will present the following screen.
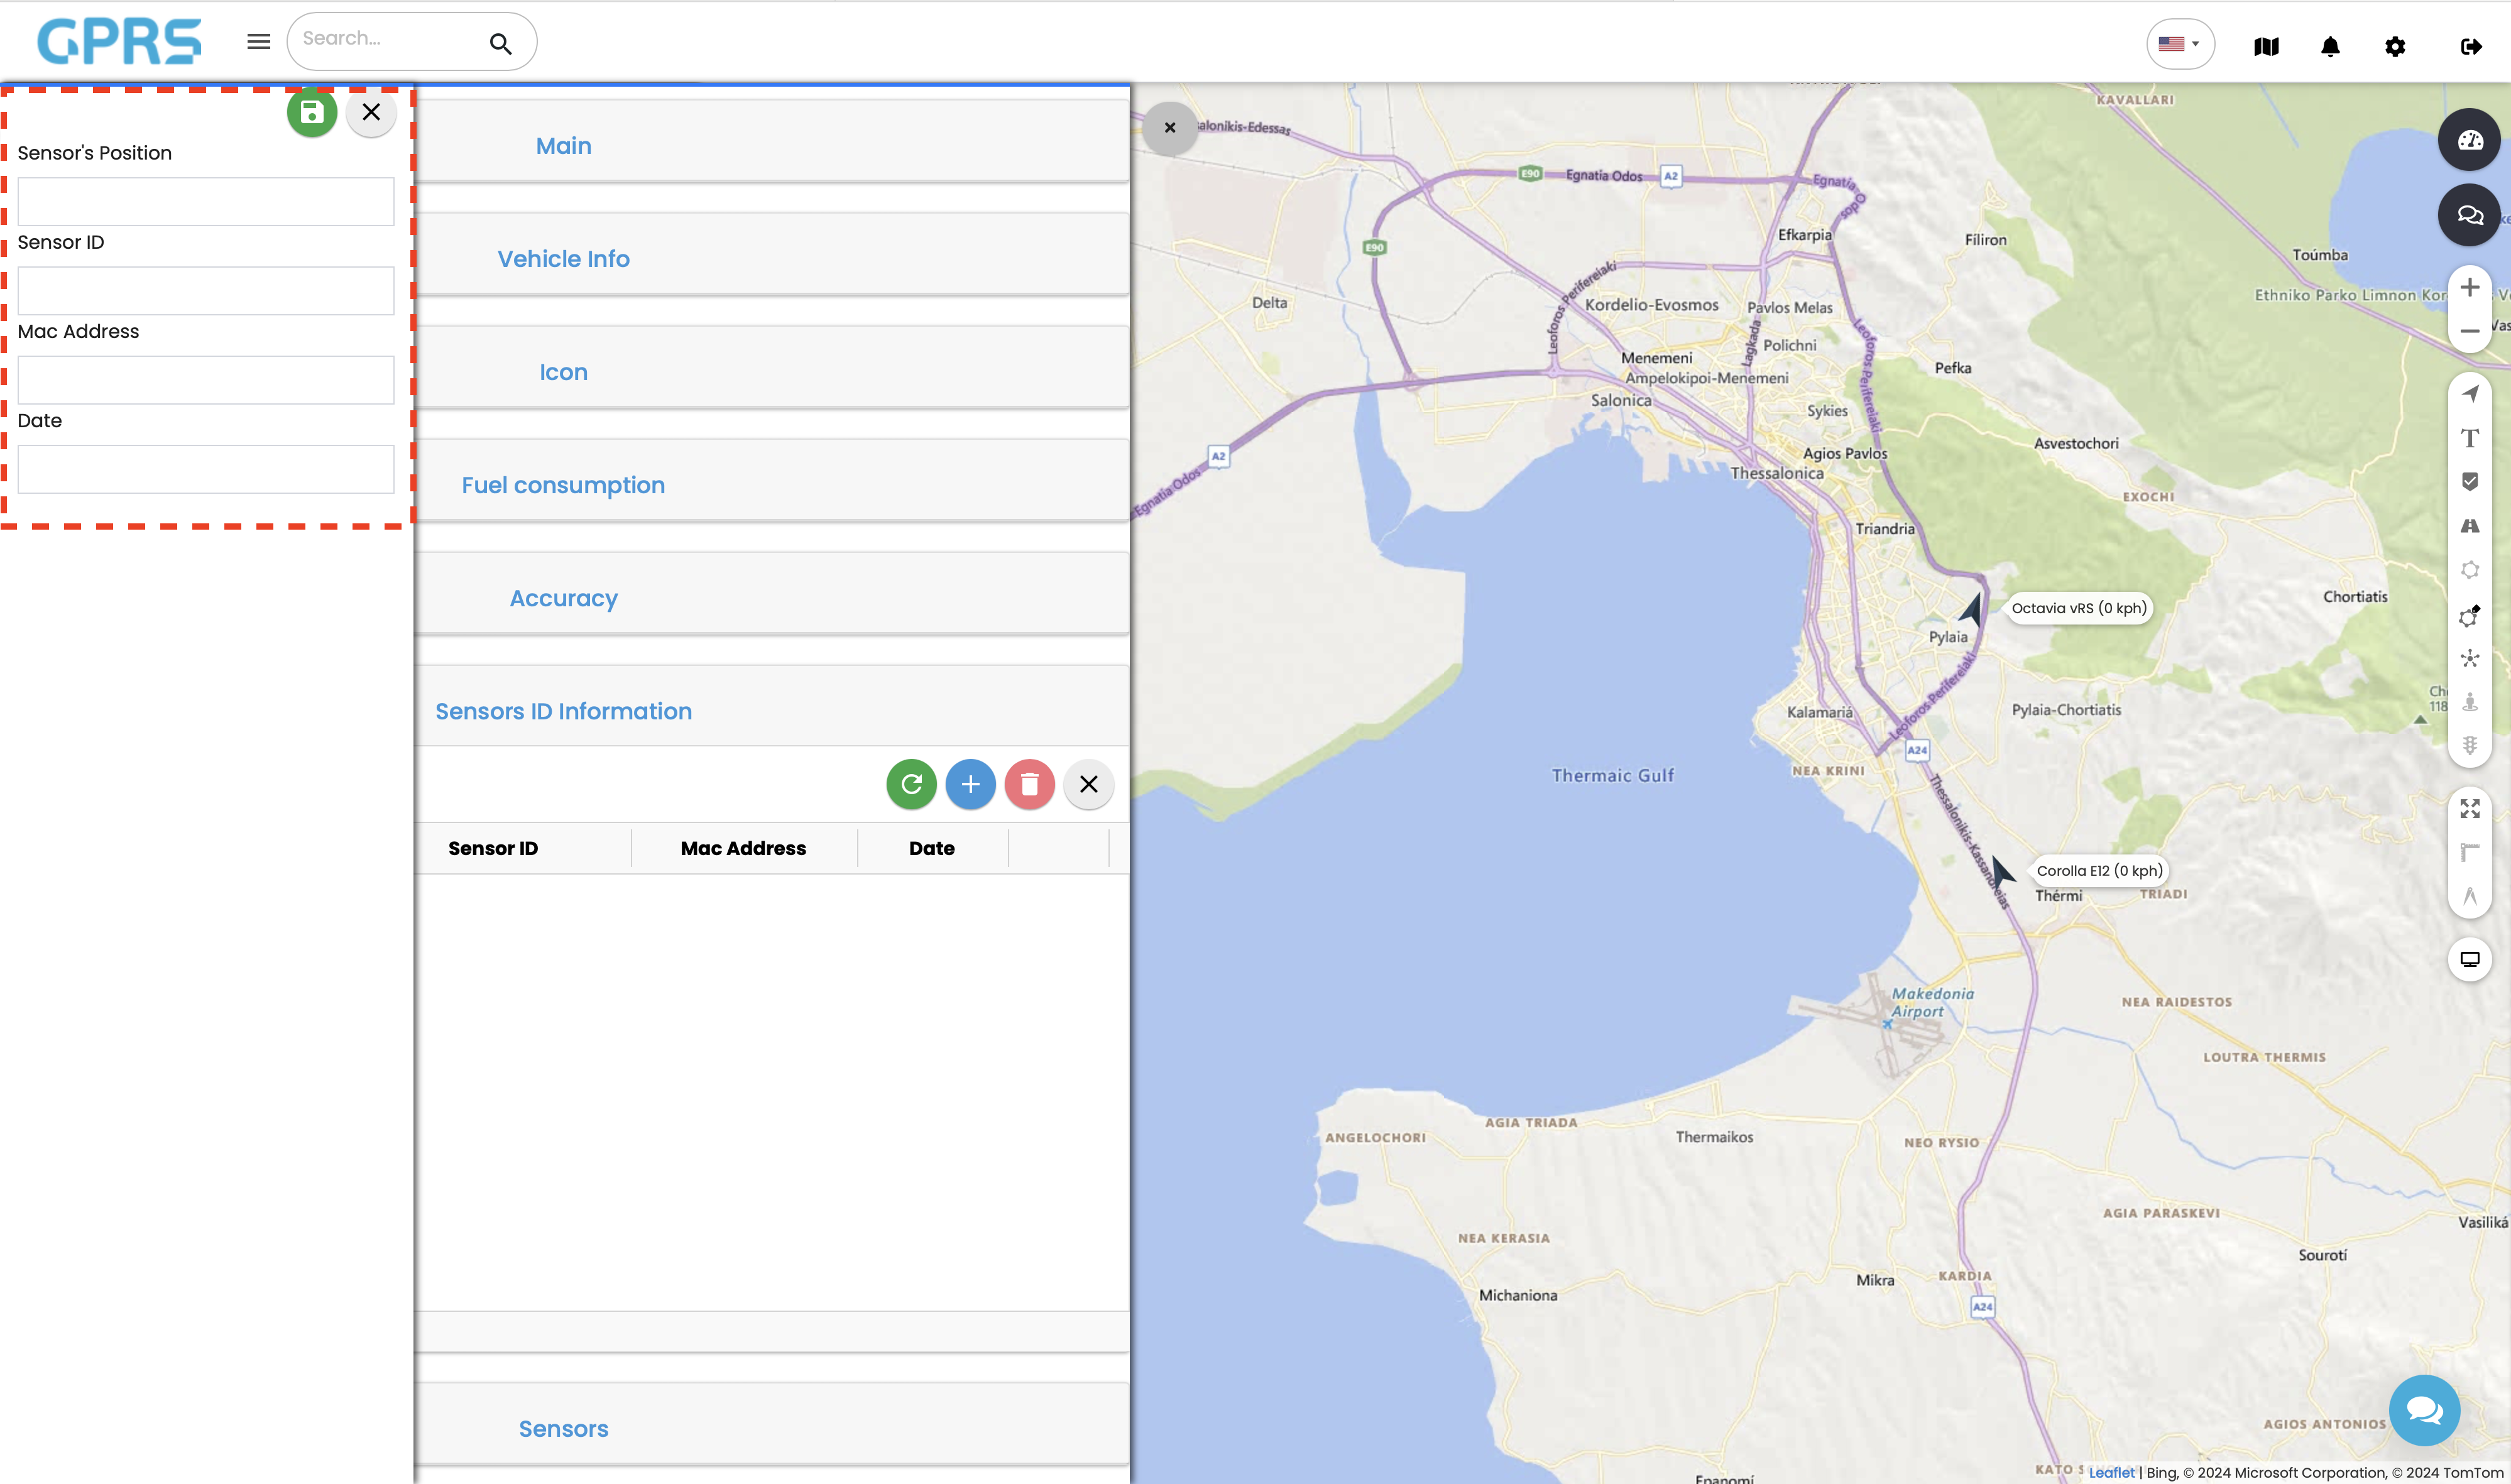
- Sensor position: Where the sensor is installed.
- Sensor ID: Unique sensor identifier, dependent on the sensor brand/type.
- MAC Address: Sensor's MAC address.
- Date: Sensor installation date.
It is recommended to keep the default values, if any. Please contact Skytrack's technical support for any queries.
Sensors
In the sensors tab we have the ability to create sensors in order to monitor various parameters for our vehicle. This is heavily dependant on the device type (simple tracking devices vs CANbus devices) as well as the vehicle type if we are using a CANbus device. Sensors are created by Skytrack's technical support department.
The generic sensors that are offered from every device type are the following:
- ext_volt (voltage applied to tracker)
- gpslev (visible satellites)
- gsmlev (GSM signal in %)
- move (vehicle moving state)
- unplug (tracker unplug)
- io239 (Ignition state)
Based on the above, we then can create notifications.
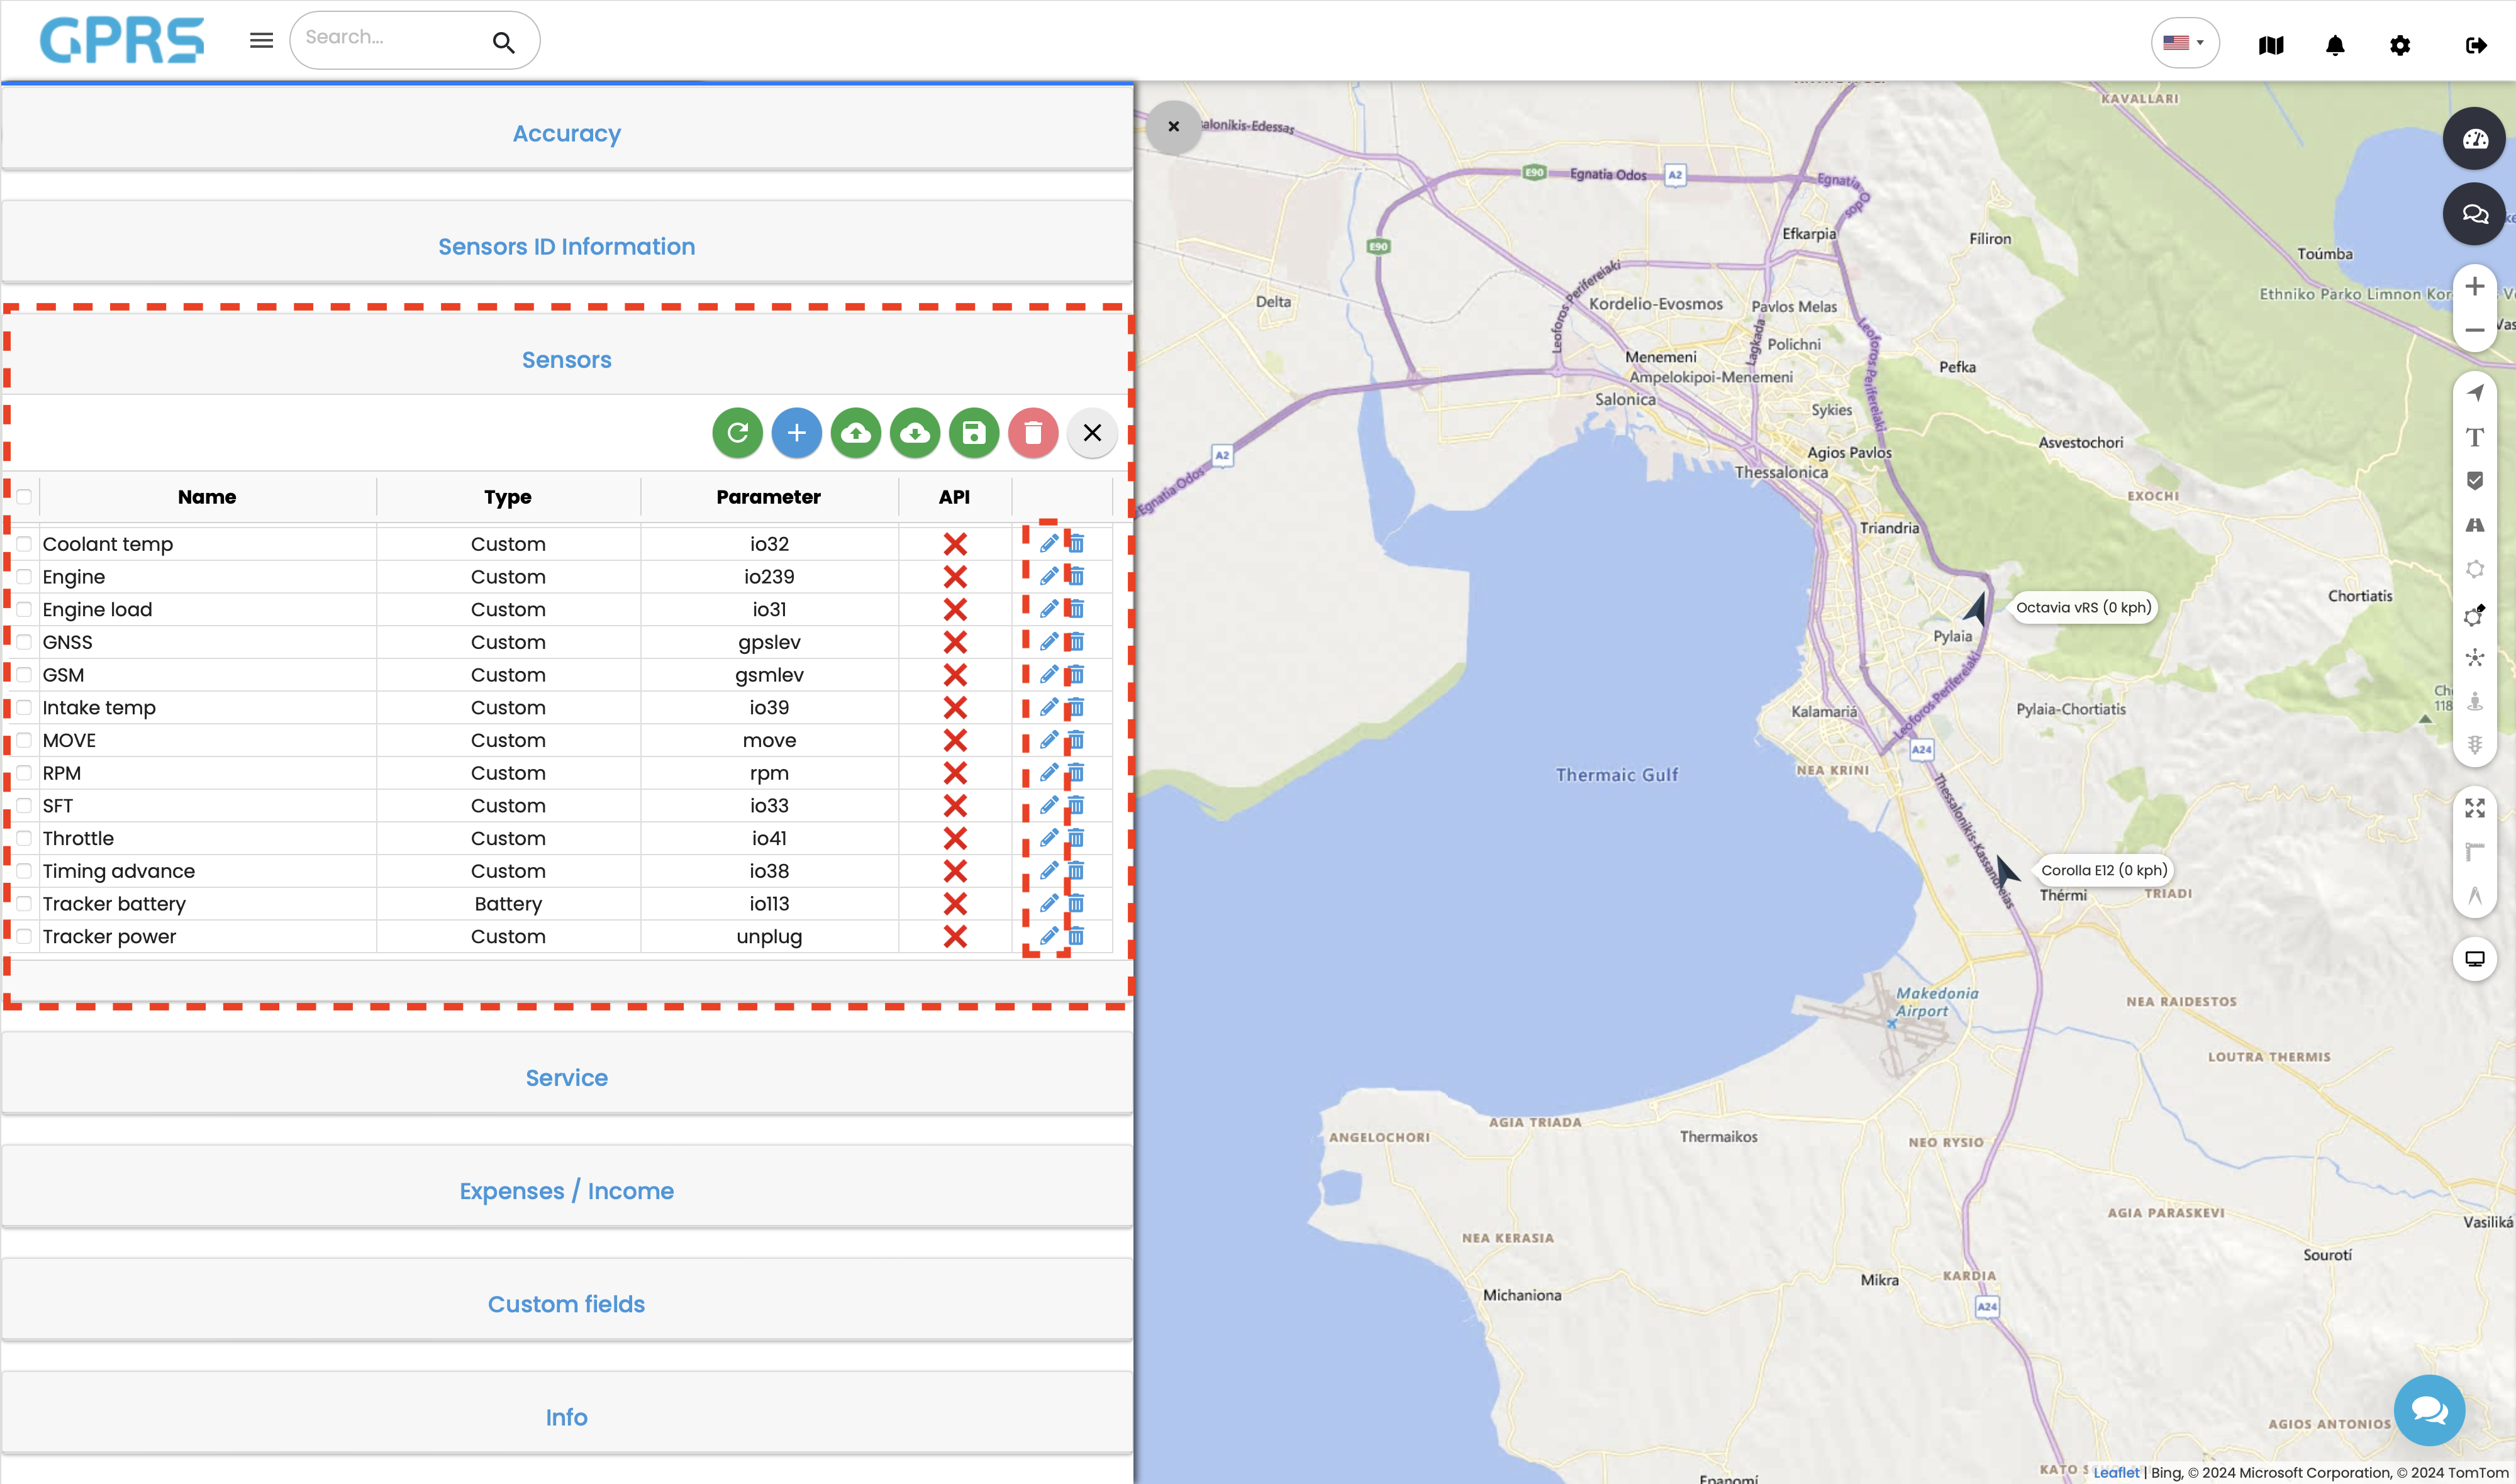
Below we have an example with a FMB920 paired with a bluetooth OBD tracker for testing purposes.
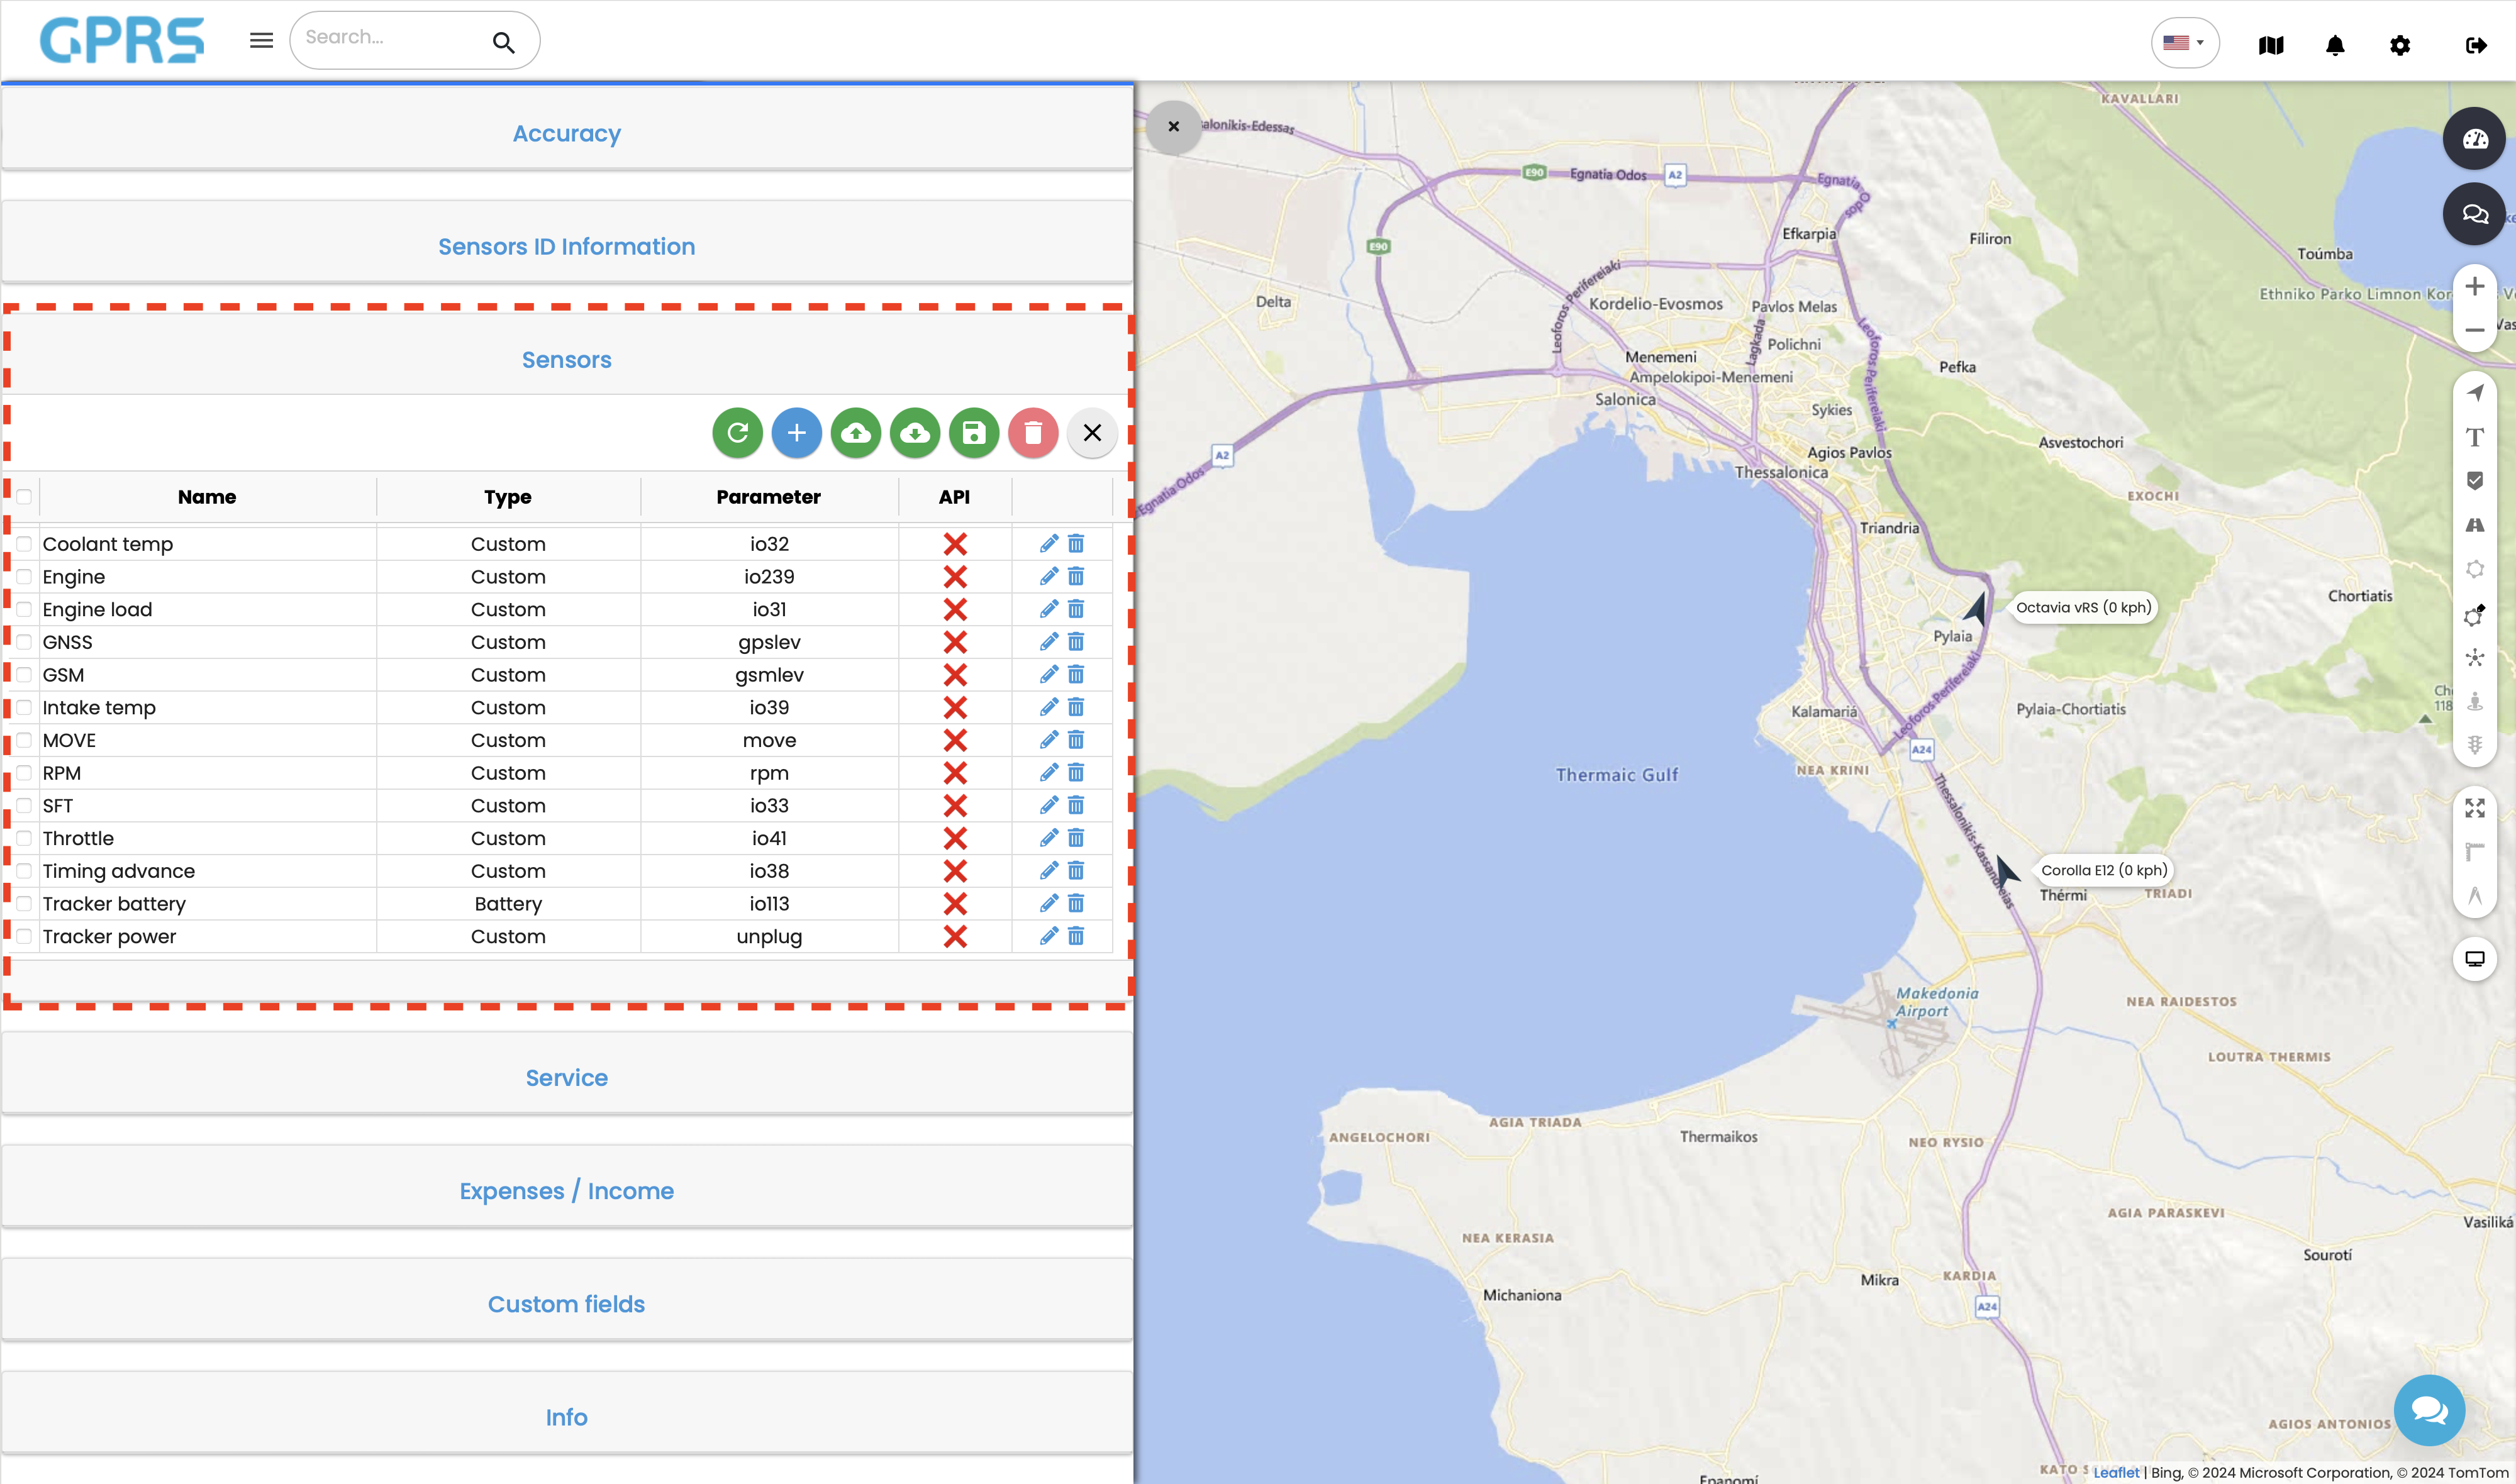
The sensor menu gives us the following options.
- Sensor list refresh

- Add a new sensor

- Sensor import/export

- Save changes

- Delete selected sensors

- Menu close

We can also edit sensors individually, by clicking the pencil icon next to the desired sensor
Clicking the ![]() button, will open the following screen.
button, will open the following screen.
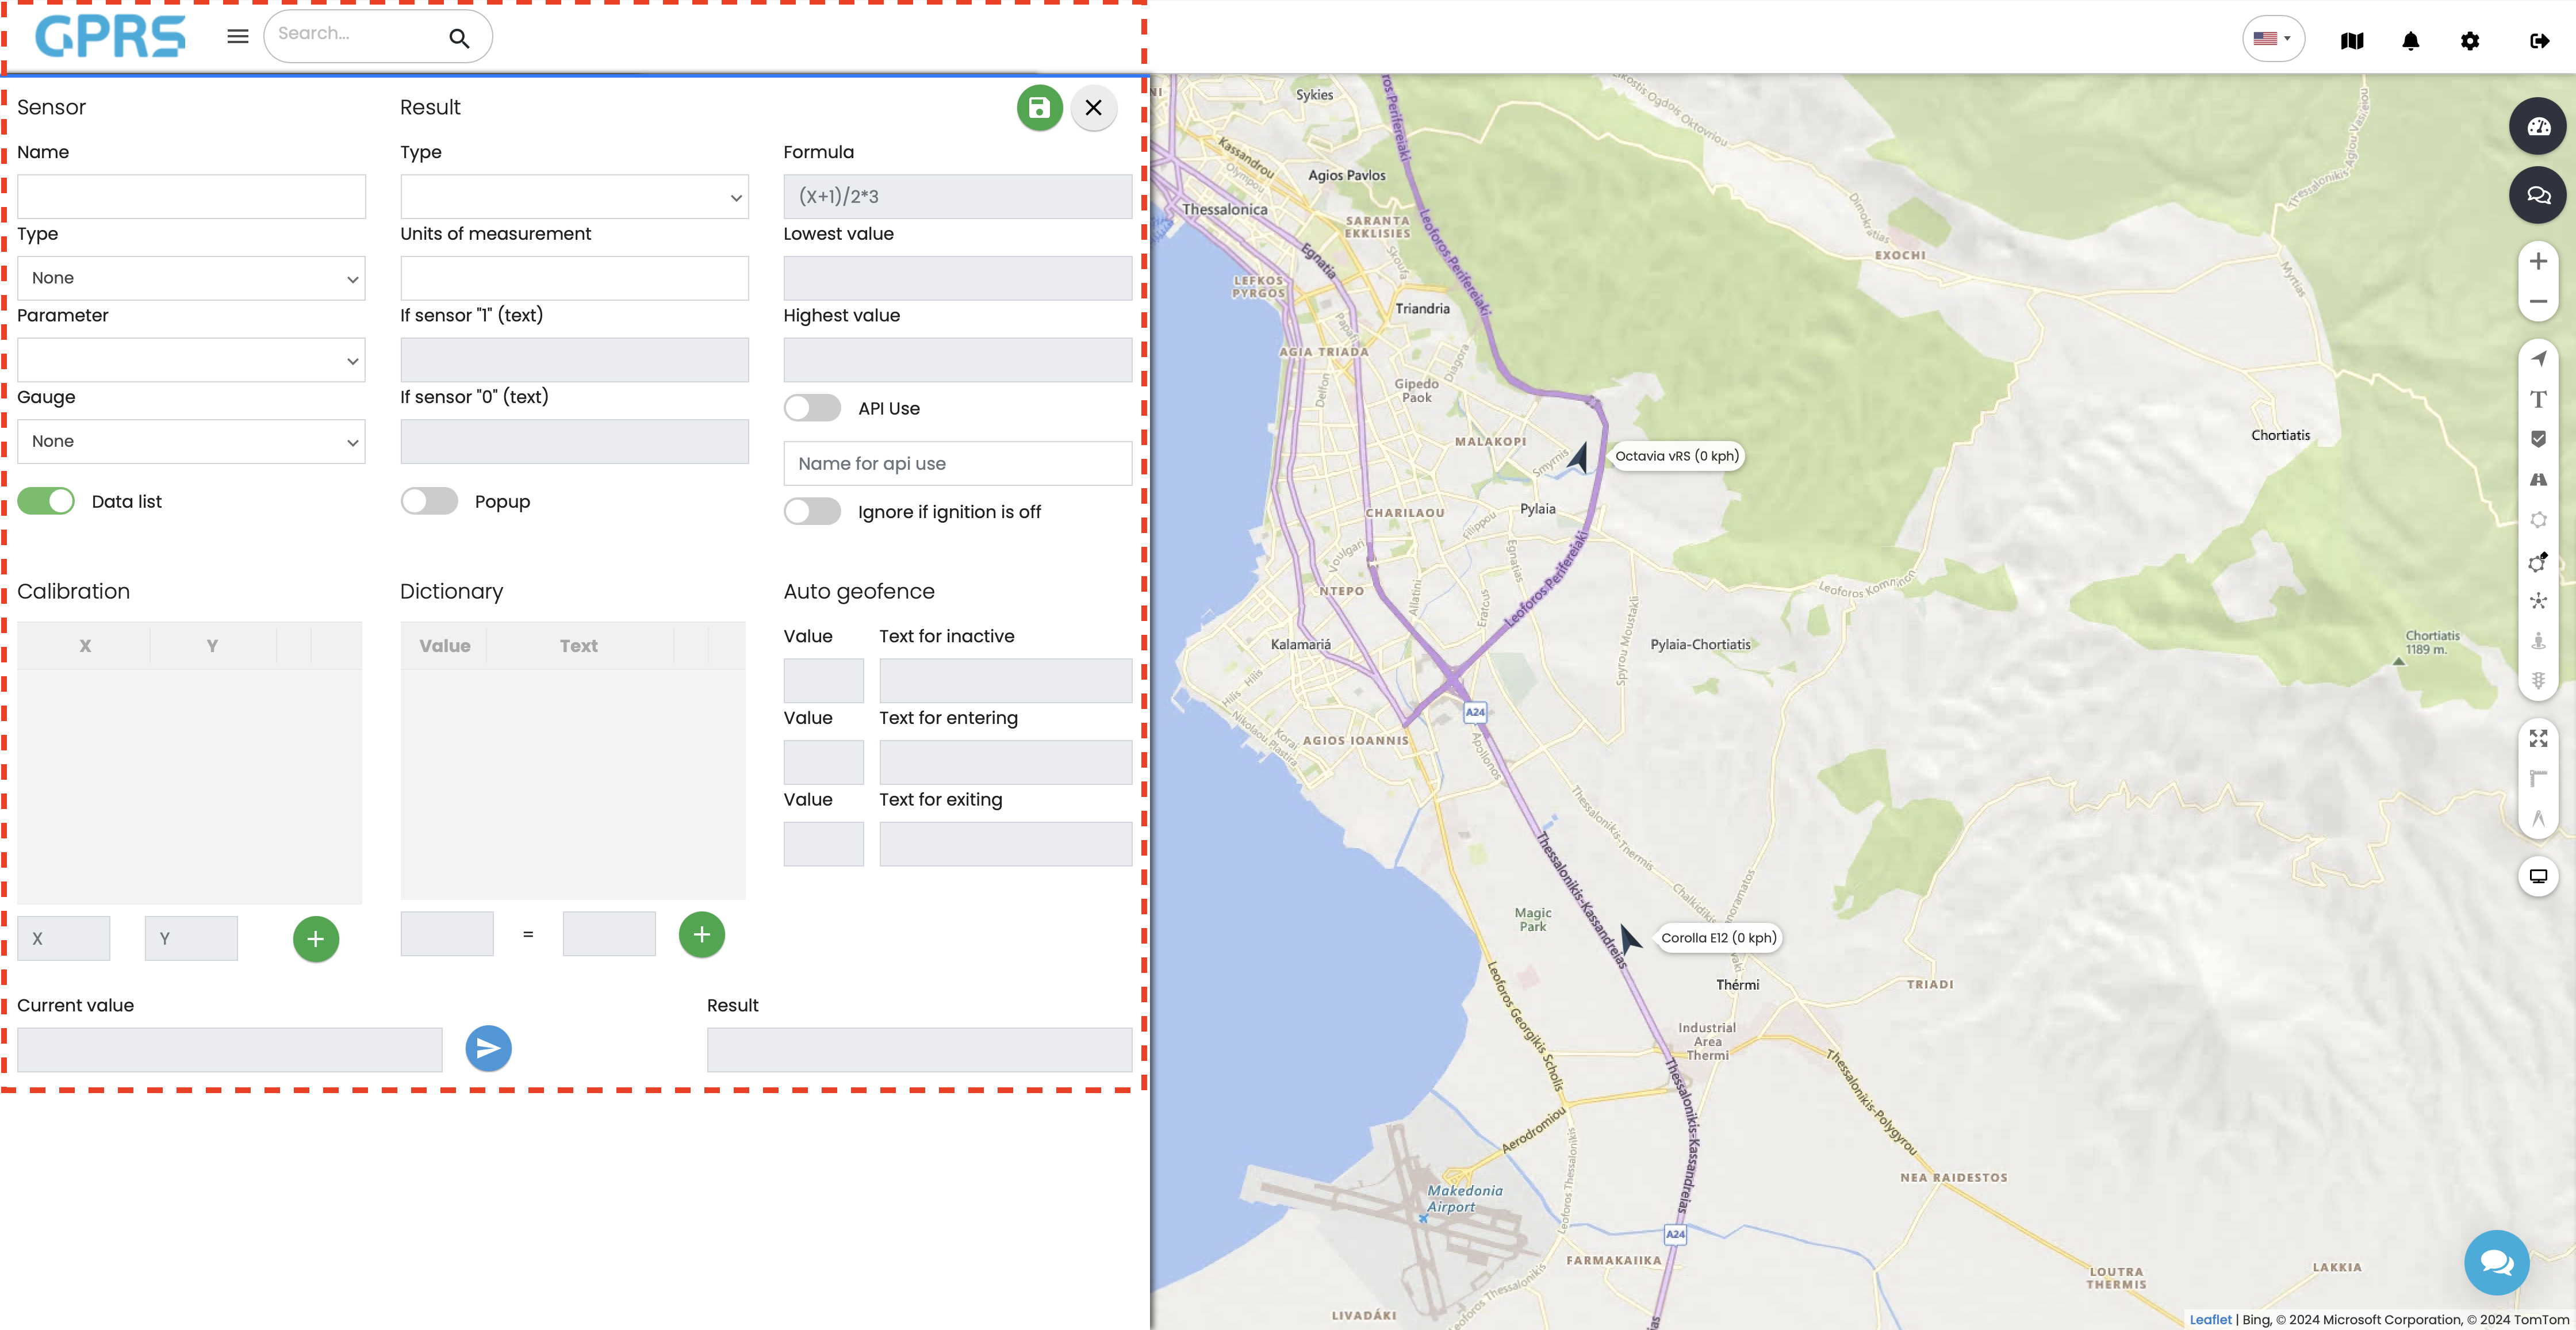
This menu allows us to create a new sensor. We have the following menus:
- Name (sensor name)
- Type (Sensor type e.g. battery, digital input/output,fuel level etc.)
- Battery - shows data about the battery charge level
- Digital output - shows the value of the device sensor 1 or 0
- Driver assignment - this type of sensor allows to accept data from RFID or iButton devices. This data will be checked by the system and the information will be visible, i.e. which driver is using the vehicle.
- Engine Hours - accepts engine hours data.
- Fuel level - for this option we have to choose the type of result (value or percentage) in relation to the result of the device.
- Consumption - accepts the value for full fuel consumption or consumption between 2 points
- Start (Starter) - shows the value of the sensor 1 or 0. It gives us the possibility to put text when the engine is 1 (e.g. On) and when it is 0 (e.g. Off)
- Odometer - accepts total kilometres or kilometres between 2 points.
- Passenger assignment - this type of sensor allows to accept data from RFID or iButton devices. This data will be checked by the system and the information will be visible, i.e. which passenger is in the vehicle.
- Temperature - accepts the temperature value
- Trailer assignment - this type of sensor allows to accept data from RFID or iButton devices. This data will be checked by the system and the information will be visible, i.e. which trolley is connected to the vehicle.
- Custom - allows us to enter any necessary sensor information.
Depending on our selection various fields are enabled and disabled.
- Parameter (The logical sensor transmitted by the device e.g. ext_volt, io239, unplug, etc.)
- Gauge (Gauge type e.g. temperature, RPM, voltage etc.)
- Data list (On/Off, shows the sensor on any data list available)
- Type (Logic/Value/String/Percentage-depends on the sensor type)
- Logic - allows to enter description based on sensor values.
- Value - this option asks us to define result values (for example units of measurement kilograms, liters, etc.) and formula (where there is a need to enter our own formula/mathematical formula)
- Percentage - this option asks us to set the lowest and highest result value
- String - allows us to enter a string of consecutive symbols.
- Units of measurement (Custom field value determined by the type of sensor (e.g. litres, gallons, volts)
- If sensor "1" (text) (Logic sensors only, state if sensor value = 1 (true))
- If sensor "0" (text): (Logic sensors only, state if sensor value = 0 (false))
- Popup (On/Off, shows the sensor and its value on the vehicle popup menu)
- Formula (Mathematical formula to adjust the sensor data if needed. e.g. gsmlev is transmitted in values 1-4. Formula allows us to convert to percentage. X represents the value transmitted by the tracker)
- Lowest value (percentage only, lowest true value to filter out wrong results)
- Highest value (percentage only, highest true value to filter out wrong results)
- API Use (On/Off, turns on or off sensor API use)
- Ignore if ignition is off (Ignores sensor data if ignition is off)
- Auto geofence value & text for inactive/entering/exiting (Text displayed depending on the autogeofence state-values transmitted by the tracker)
- Calibration: (Calibrates sensor data and creates offsets for better results if needed. We can set different values from the ones given by the sensor. The X field is the value given by the sensor and the Y field is the value we want to give. For example when the battery gives us 12.6 volts we can have the value 1 and when the battery gives us 13.5 volts we can have the value 2.)
- Dictionary: (Adds multiple values and text results accordingly. Useful when receiving CAN door data where 0=all doors closed, 256=front left door open etc.)
- Current Value: Shows the sensor's raw current value
- Result: The final result after all configuration and modification.
Service
The Service tab is a shortcut to the Maintenance menu (Main Menu>Maintenance)
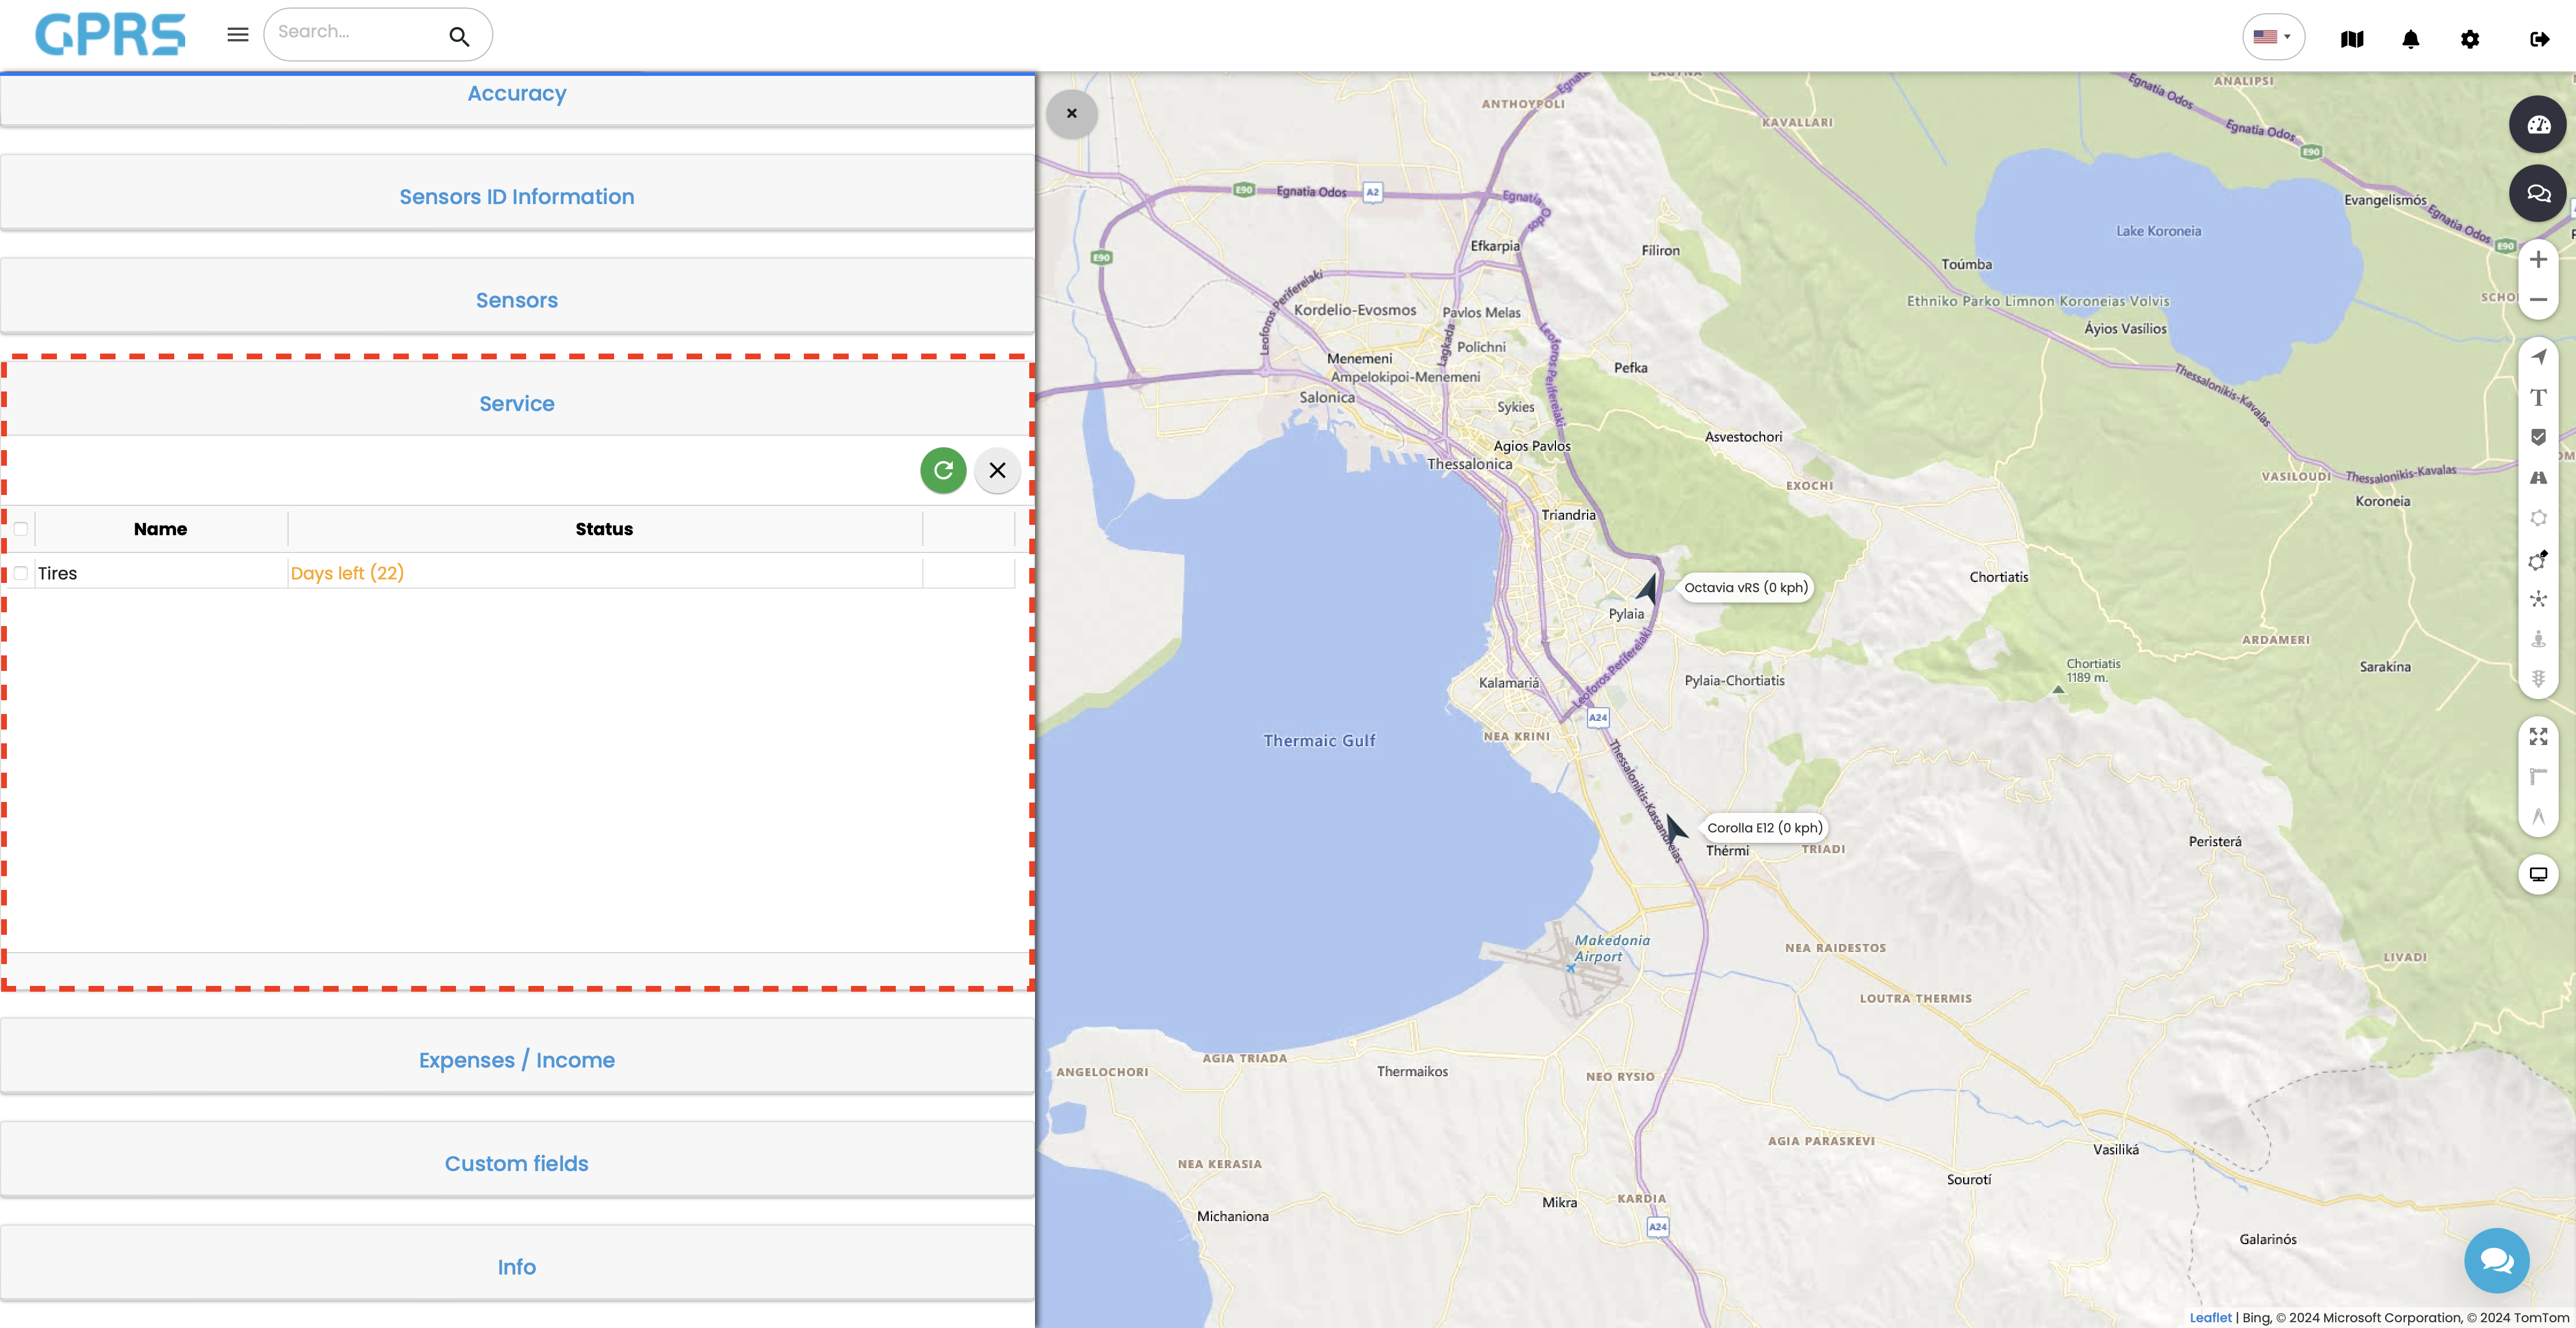
In this menu you can see at a glance all the maintenance tasks you have created and are either pending, completed, or overdue.Above the list of maintenance tasks there are buttons to refresh the list or close the menu
Expenses/Income
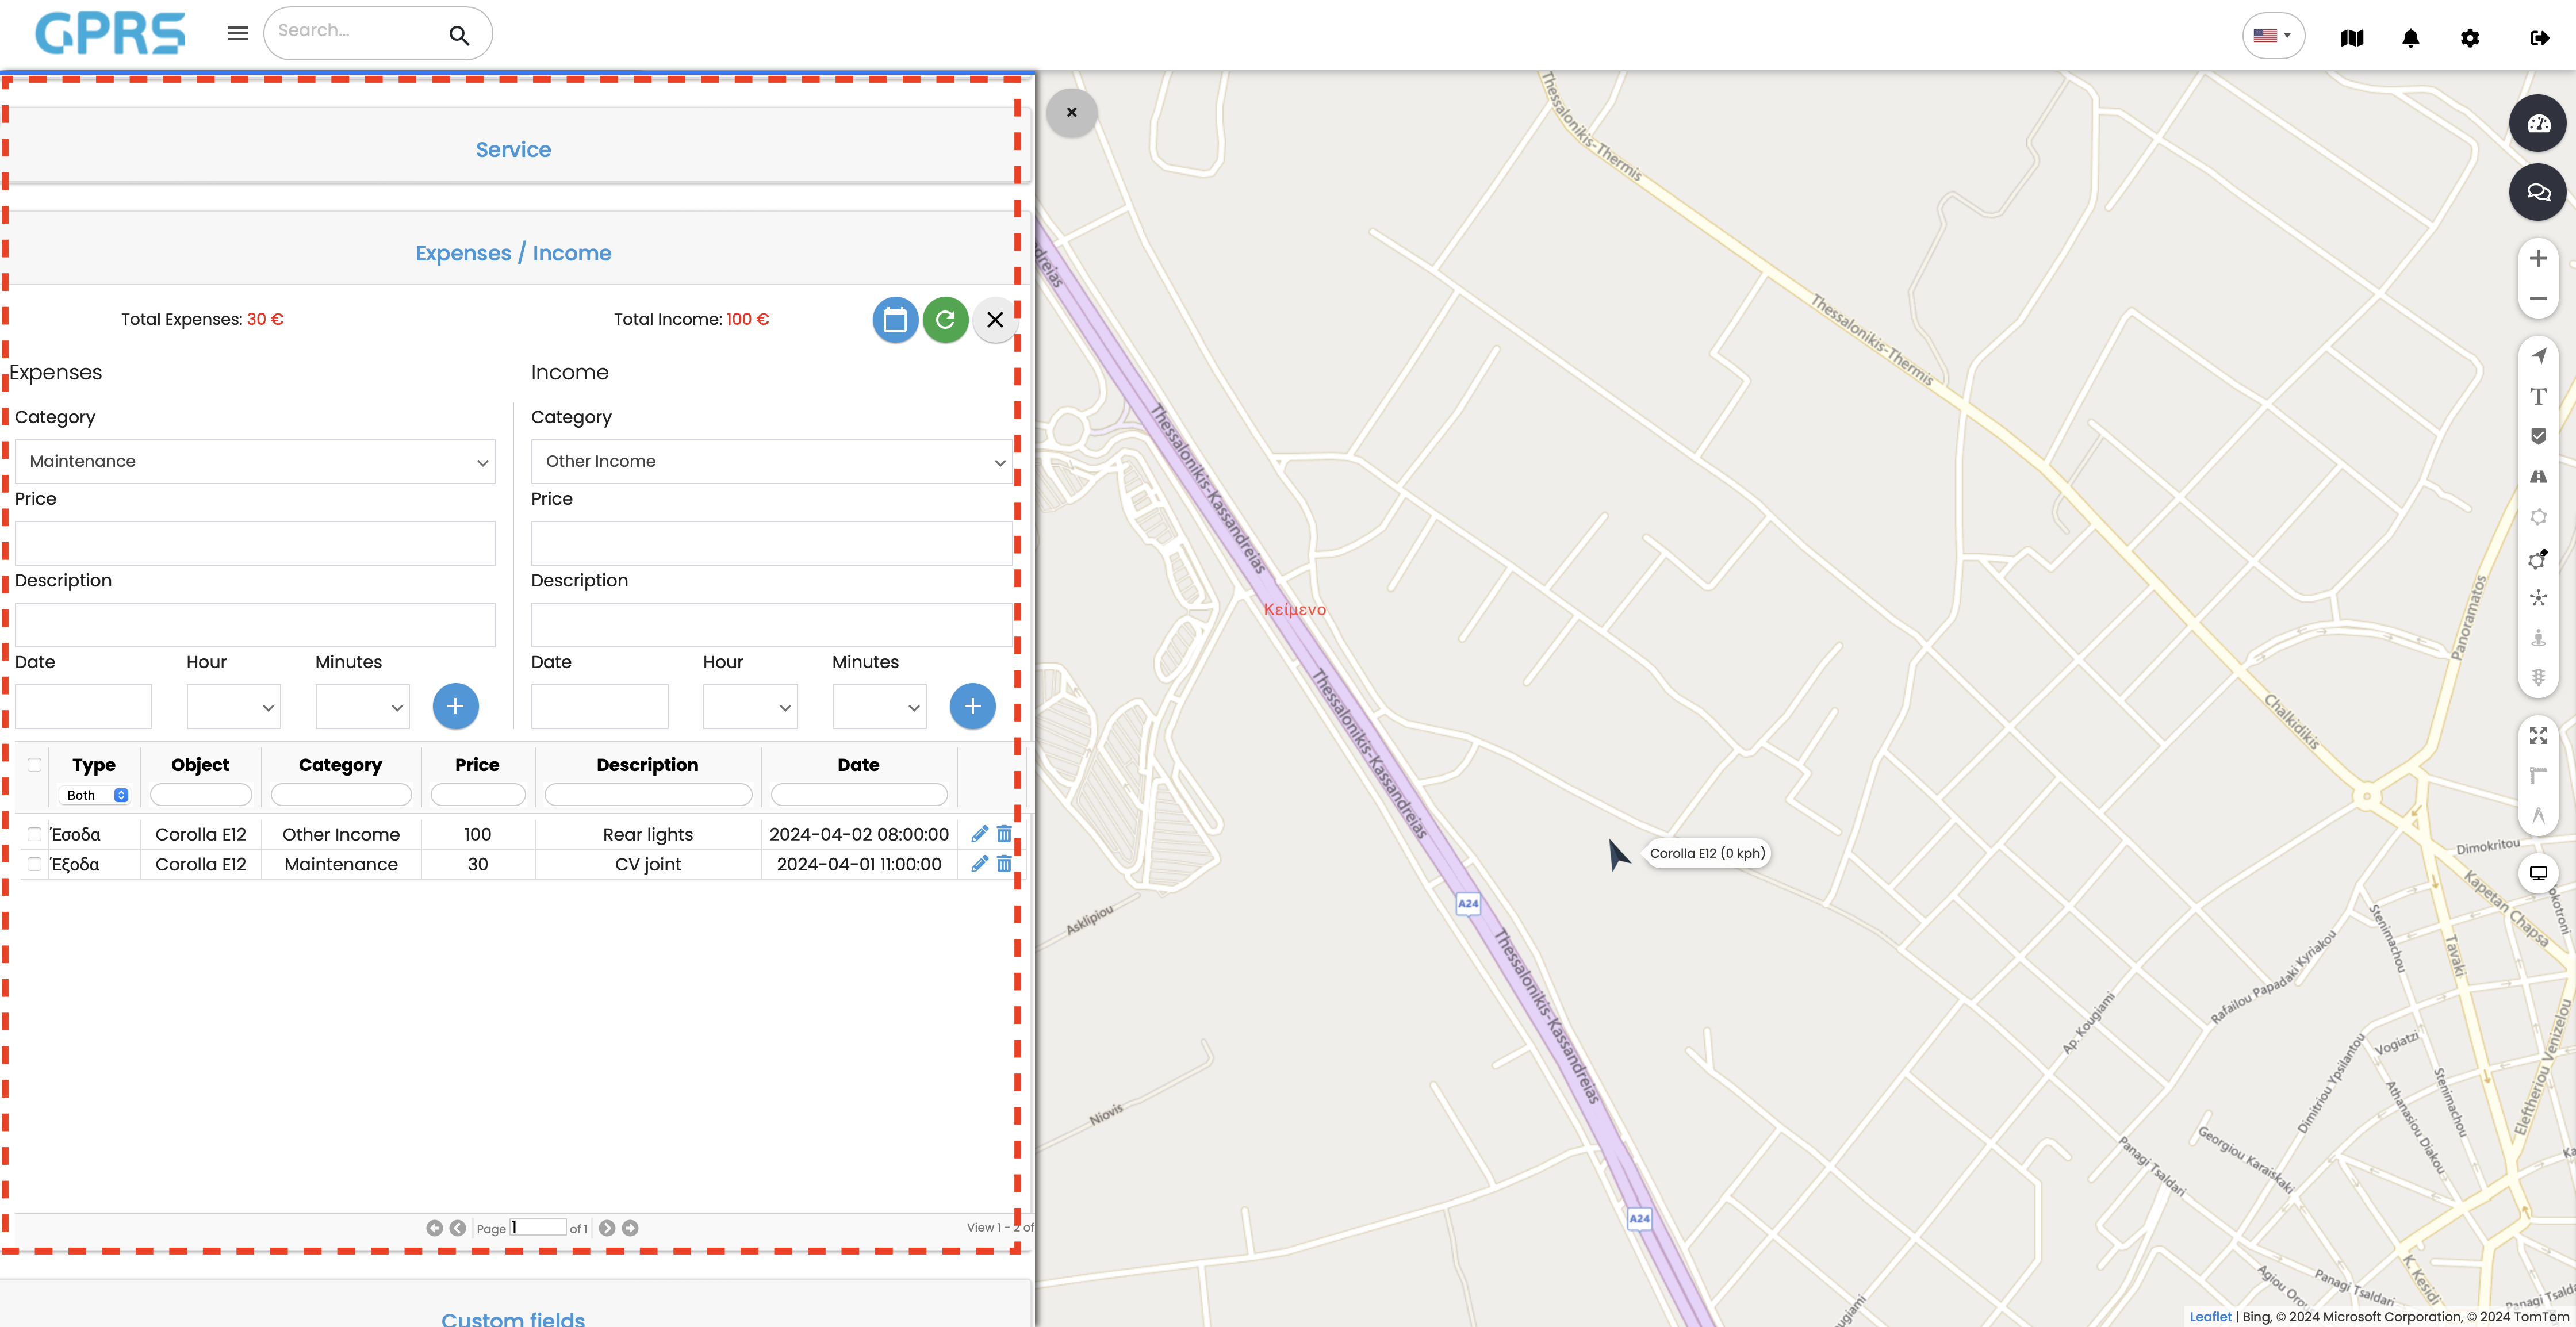
The Expenses/Income tab allows you to register income/expenses that your vehicles generate. You select the relevant category, the value, a brief description of it (optional) and the date. By clicking on the calendar icon (top right of the tab) we can search for revenues/expenses in a specific period of time.
The tab is divided into two tabs. Expenses on the left and Income on the right.
Expenses
In the expenses tab the following fields are present.
- Category
- Accomodation
- Food
- Fuel
- Maintenance
- Other expenses
- Tolls
- Price
- Description
- Date
Τo register a new expense, we choose the relevant category, the price, a short description, and the date. Finally we click the ![]() button to save the entry.
button to save the entry.
Income
In the Income tab, the following fields are present.
- Category
- Income payment
- Other payment
- Price
- Description
- Date
To register a new income, we choose the relevant category, price, a short description, and date. Finally we click the ![]() button to save the entry. The list is automatically refreshed.More detailed information about Expenses/Revenues can be found in the corresponding menu (Main Menu > Expenses/Revenues).
button to save the entry. The list is automatically refreshed.More detailed information about Expenses/Revenues can be found in the corresponding menu (Main Menu > Expenses/Revenues).
Custom fields
In the Custom Fields tab you can add, edit or delete your own fields which will appear in the pop-up menu of your vehicle when you click on its icon on the map.
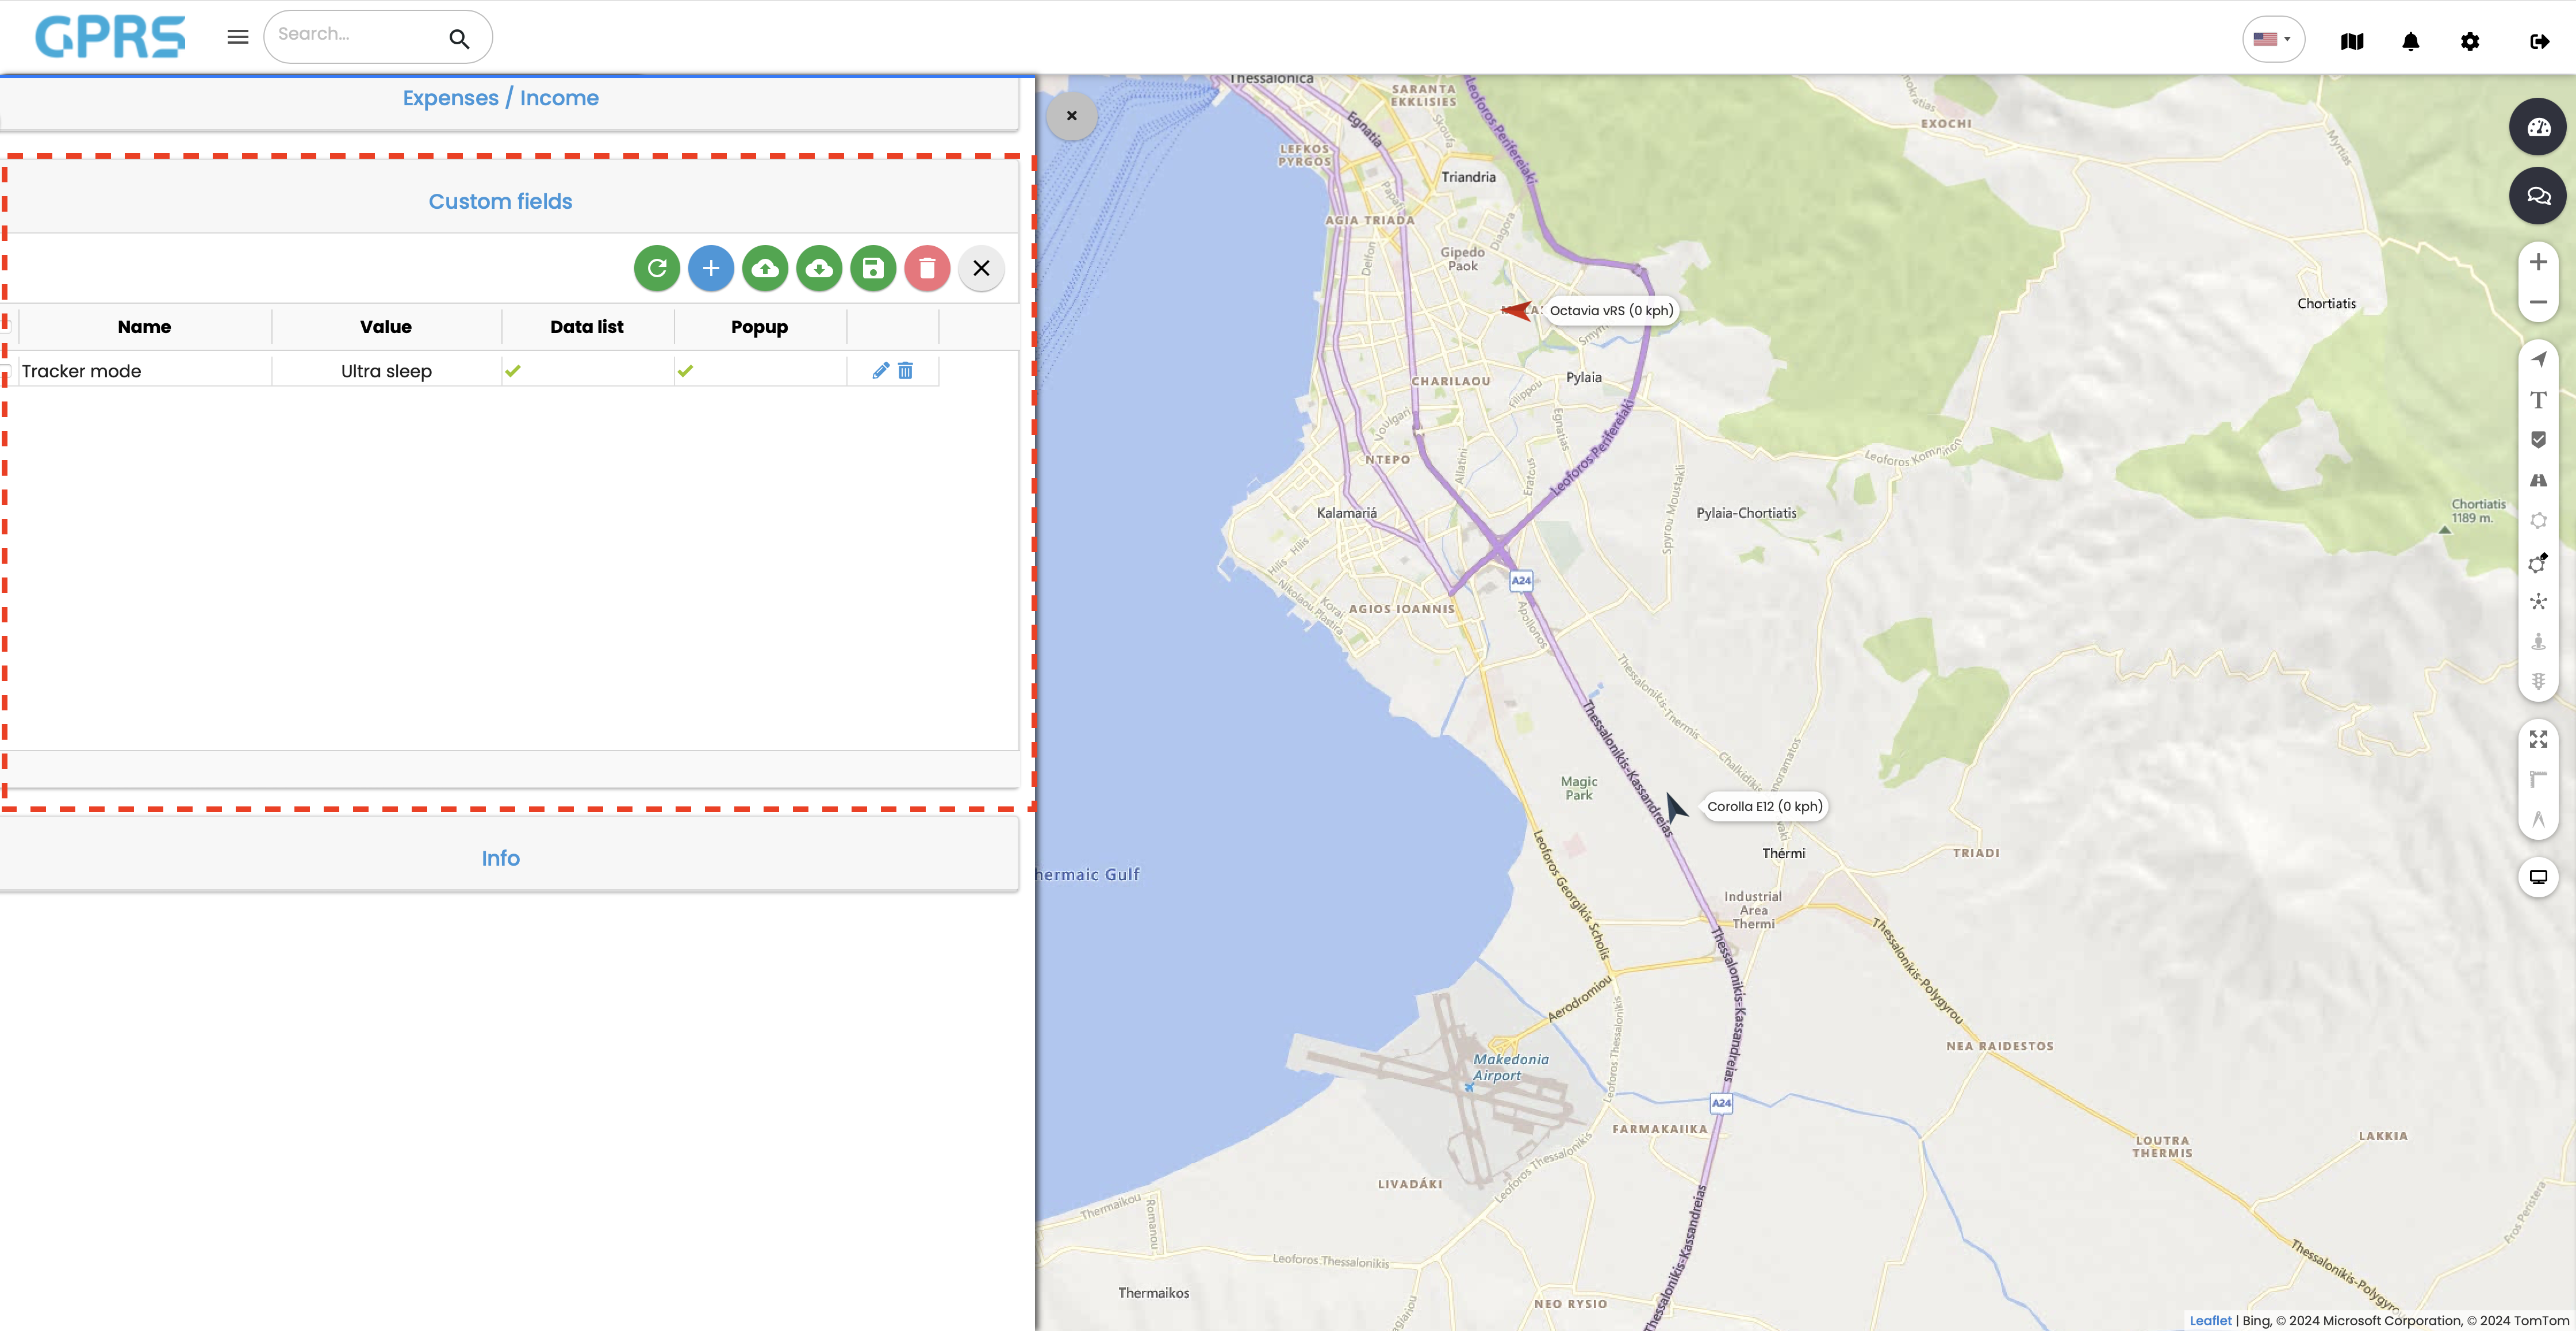
Clicking the Reload button refreshes the list of custom fields. Clicking the Add Item button opens a new window so you can add a new field.
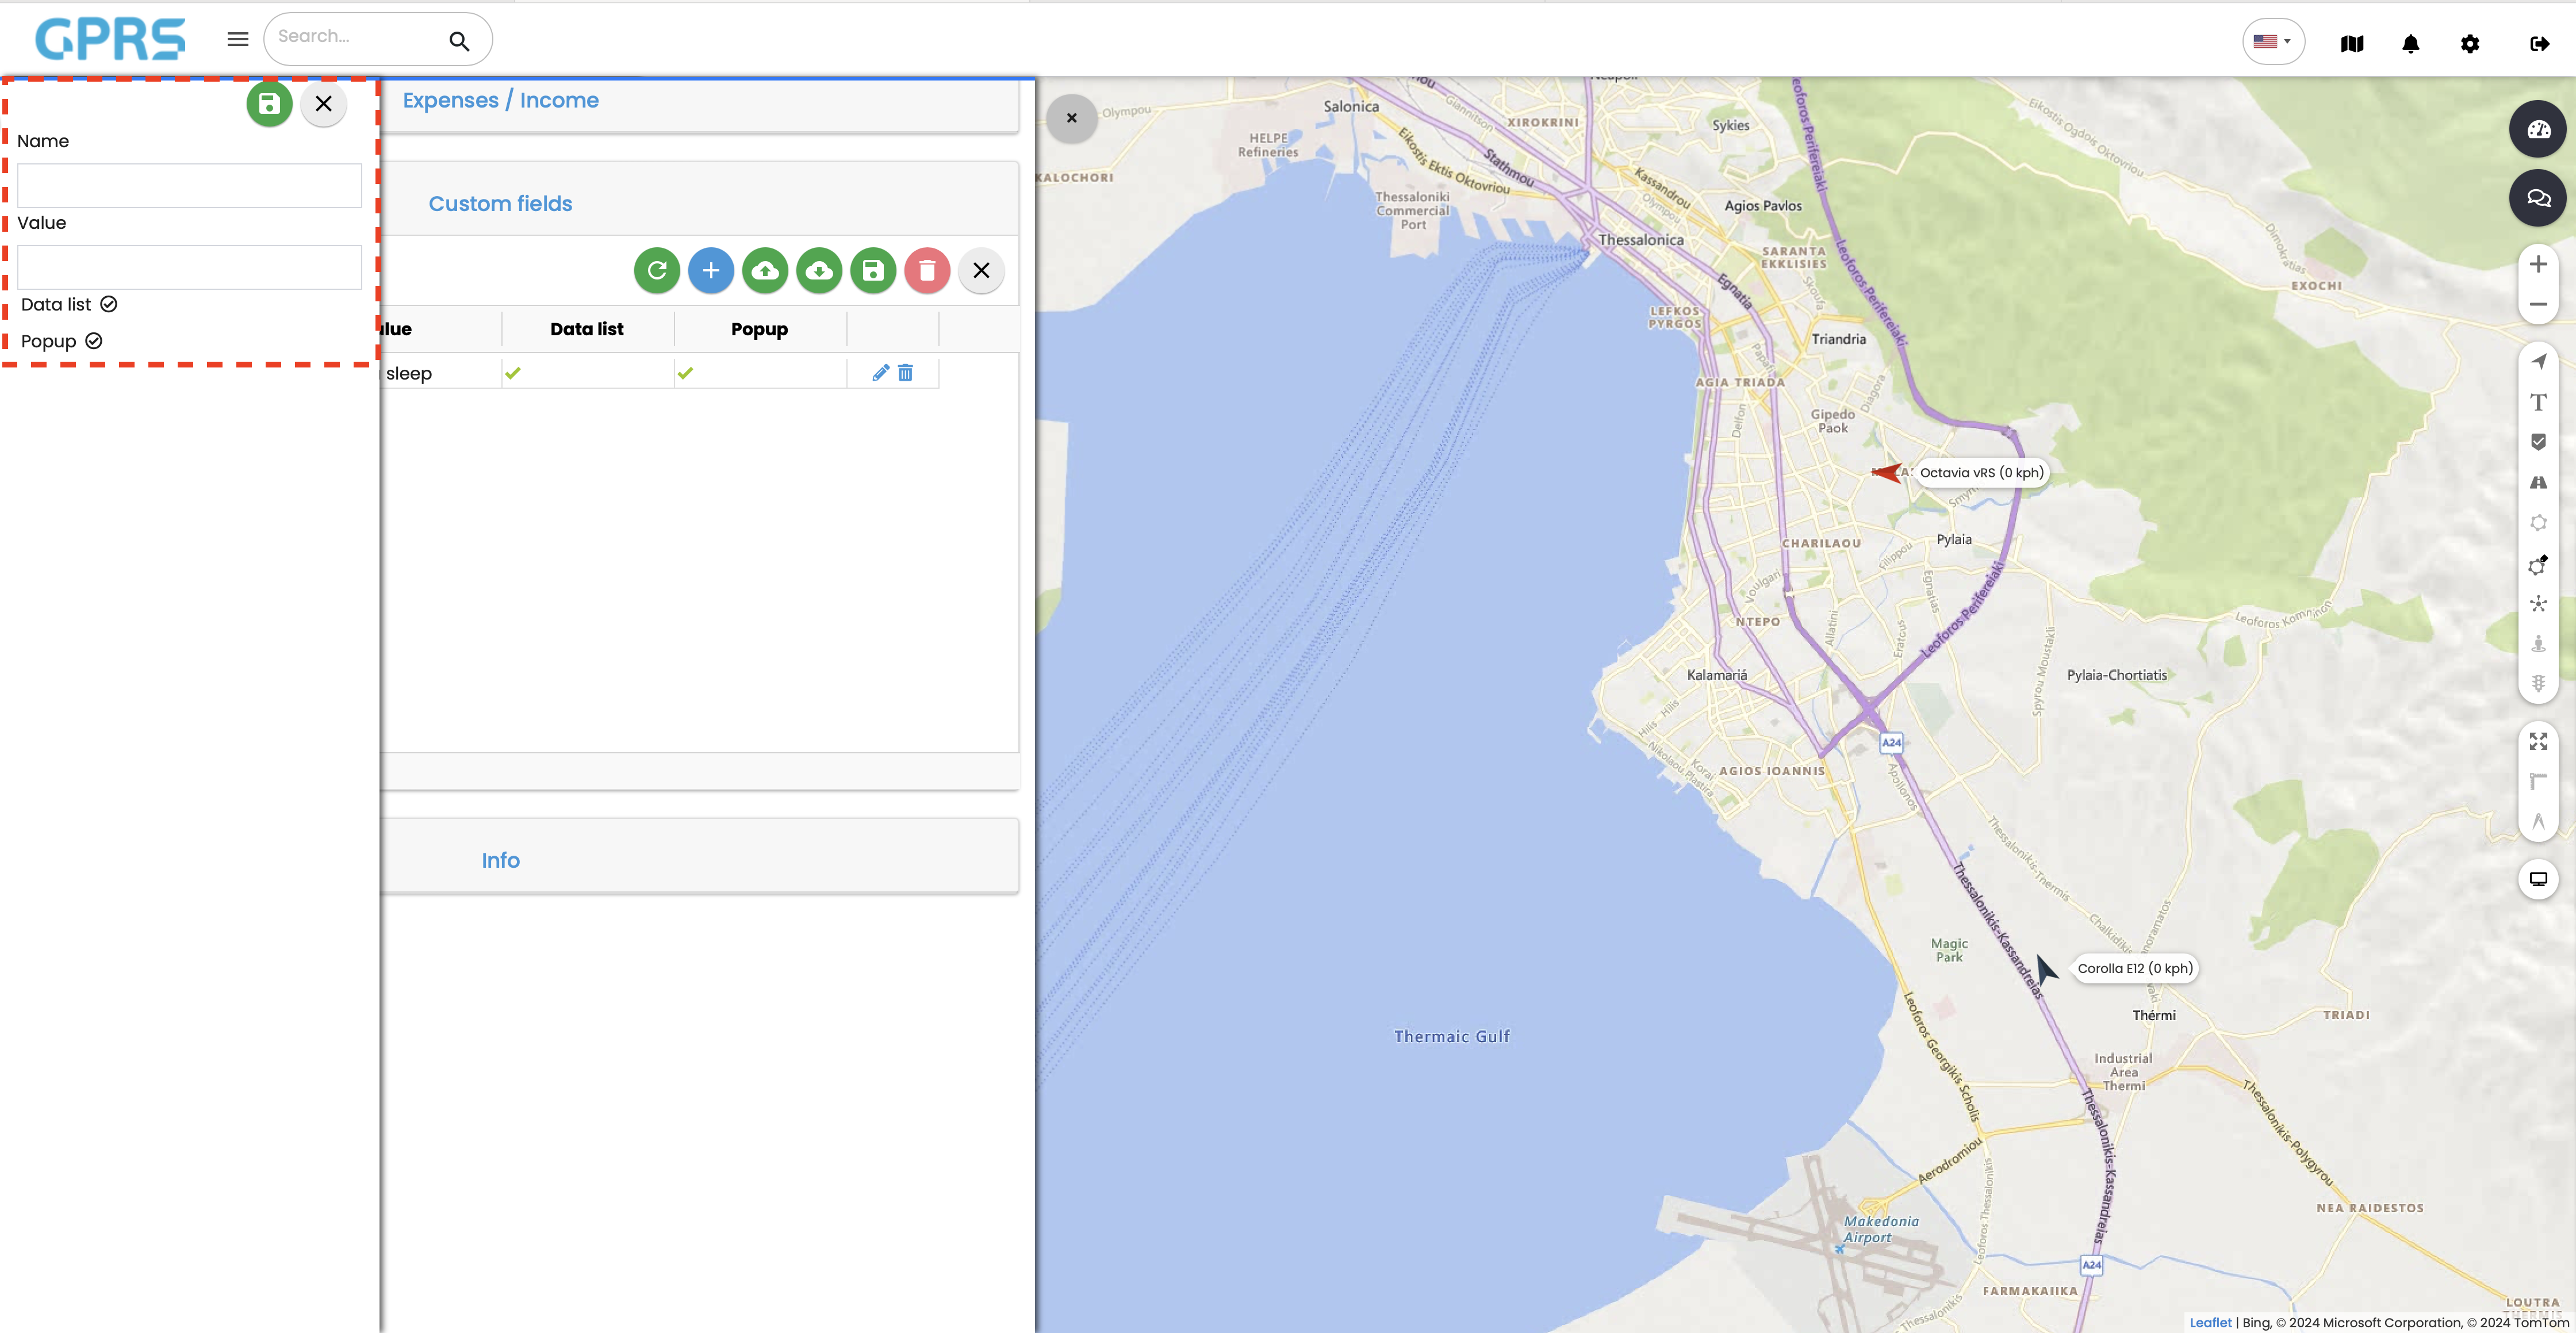
- Name: Custom field name
- Value: Custom field value
Select both Data List and Popup and finally click on the save button to finalise the process.
We can import or export multiple fields by using the relevant import/export function.
Information
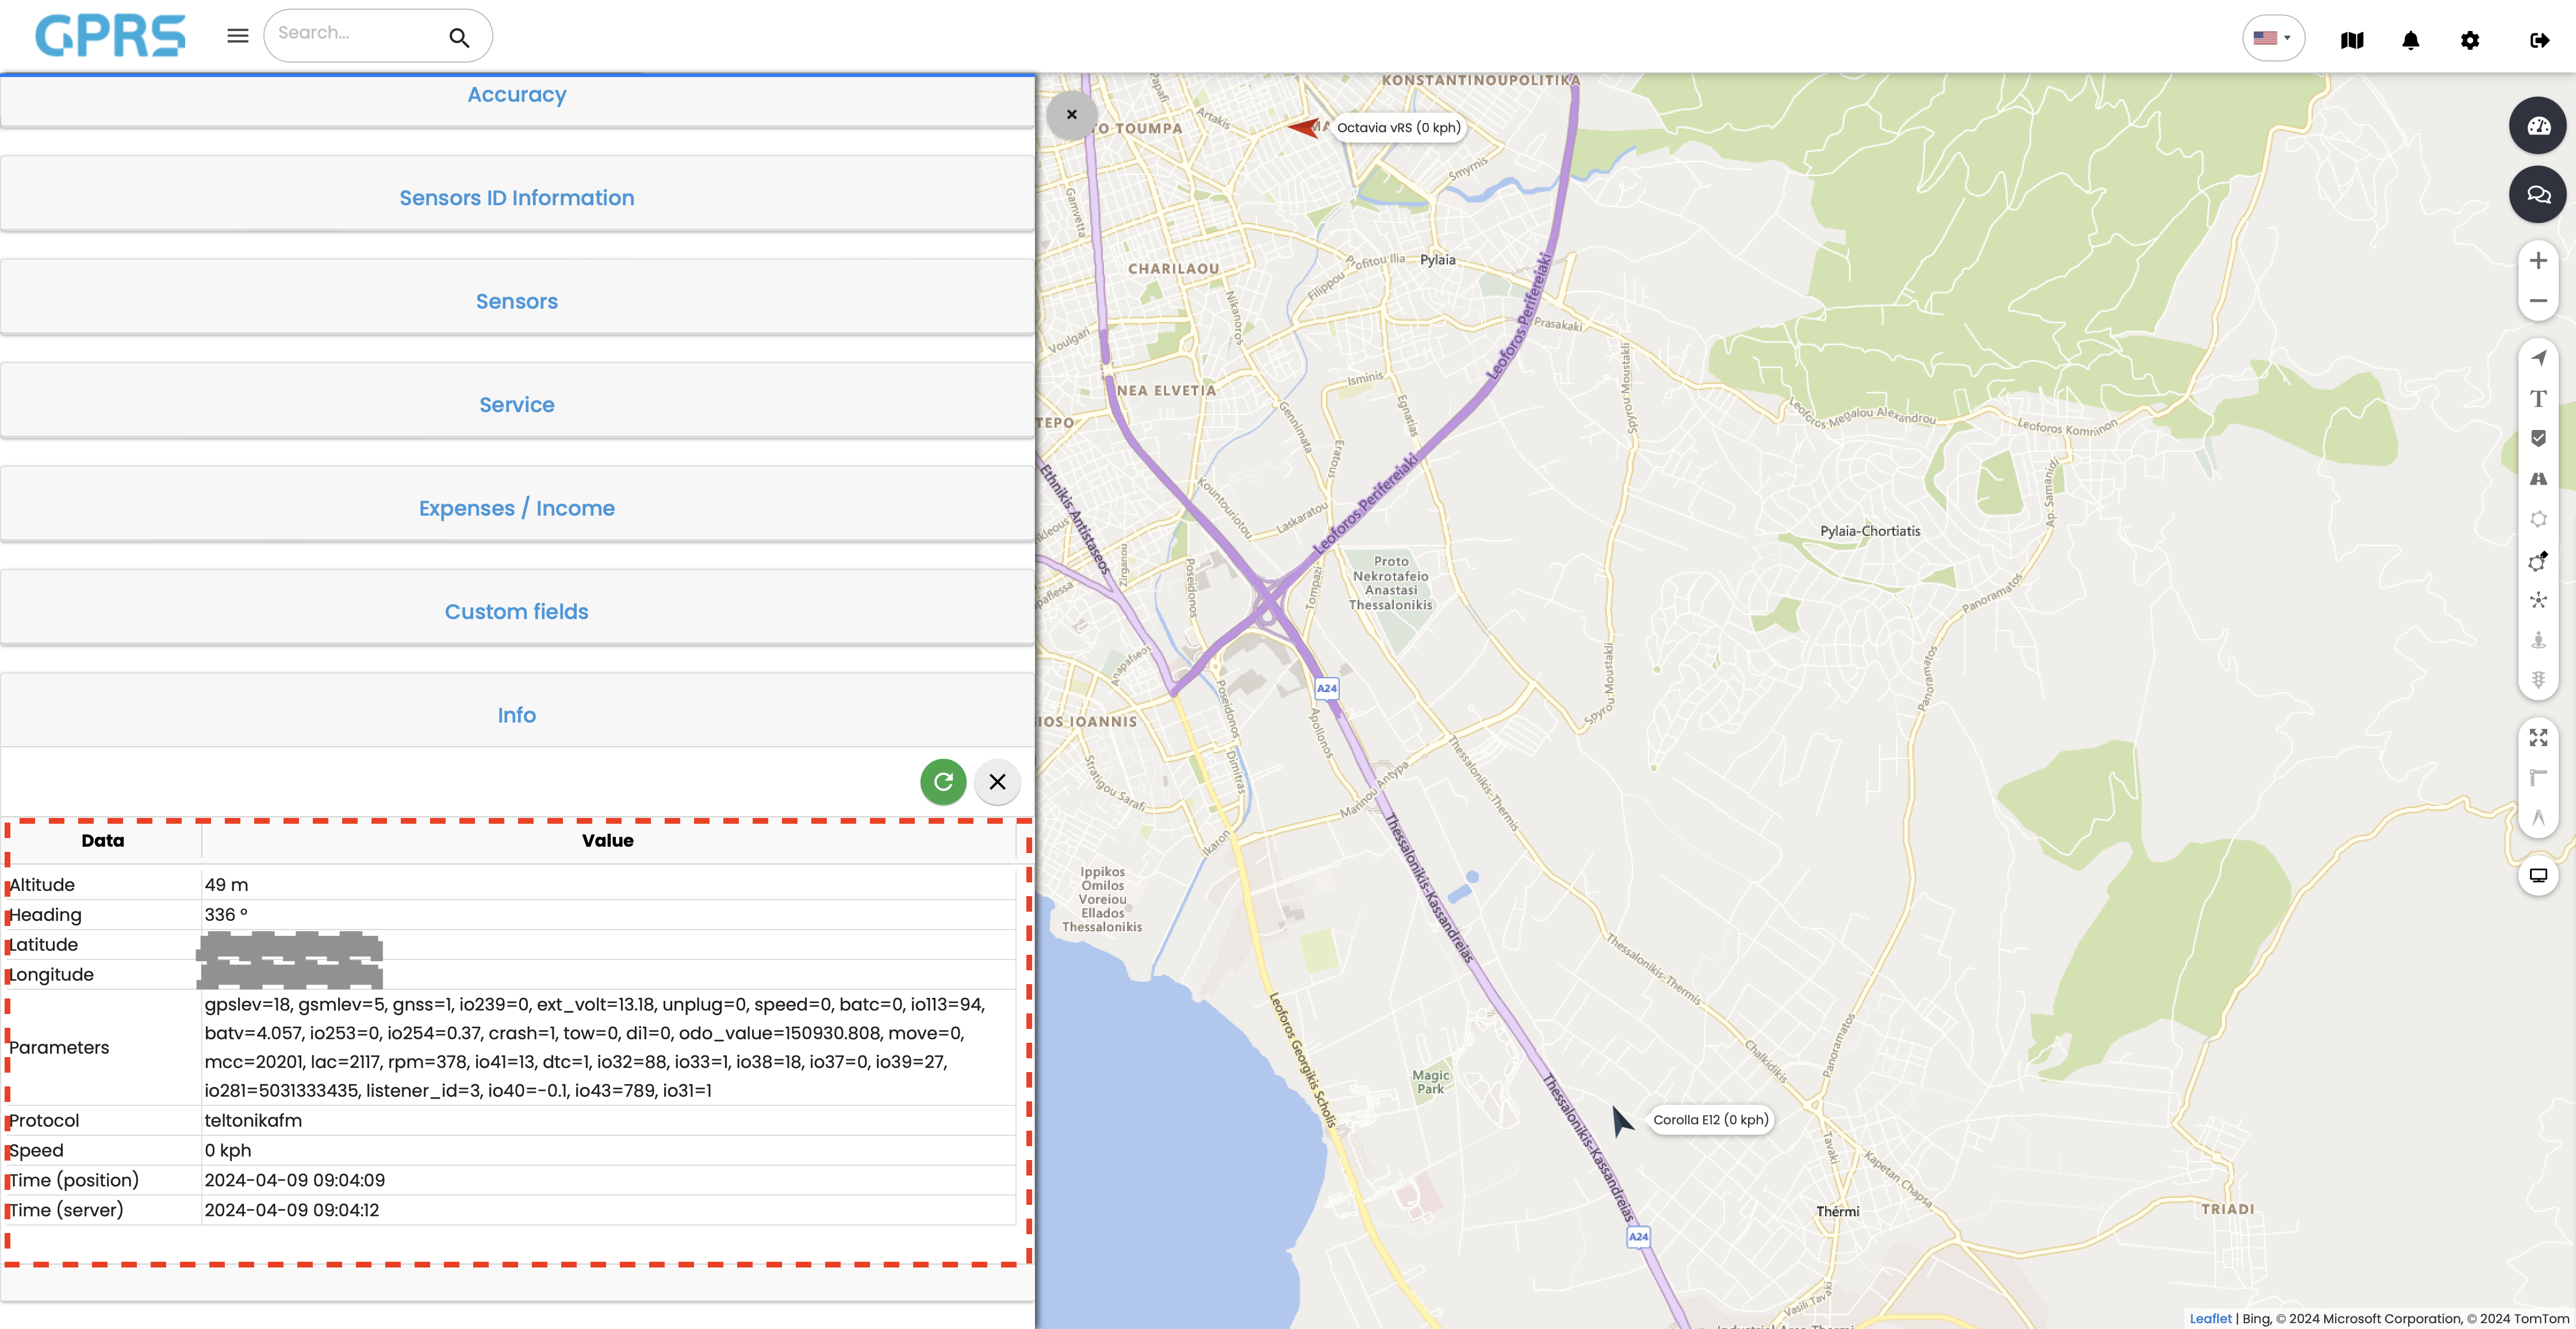
The Information tab displays some general information based on the last location the tracker has reported, such as Time (location) (he local time in the geographic location where the vehicle is currently located), Server Time (the local time of the server/server), Longitude and Latitude, Vehicle Direction, Parameters (based on the sensors available), Communication Protocol, Vehicle Speed at that time, and altitude.
It is possible to turn your mobile phone into a tracker using an in house developed application. The application is called GPRS Tracker and it enables you to have tracking capabilities without purchasing a device. Through a special identifier the device is registered in your account and is available from the 'Tablet' menu.
In this menu you can view and manage all the drivers of your vehicles.
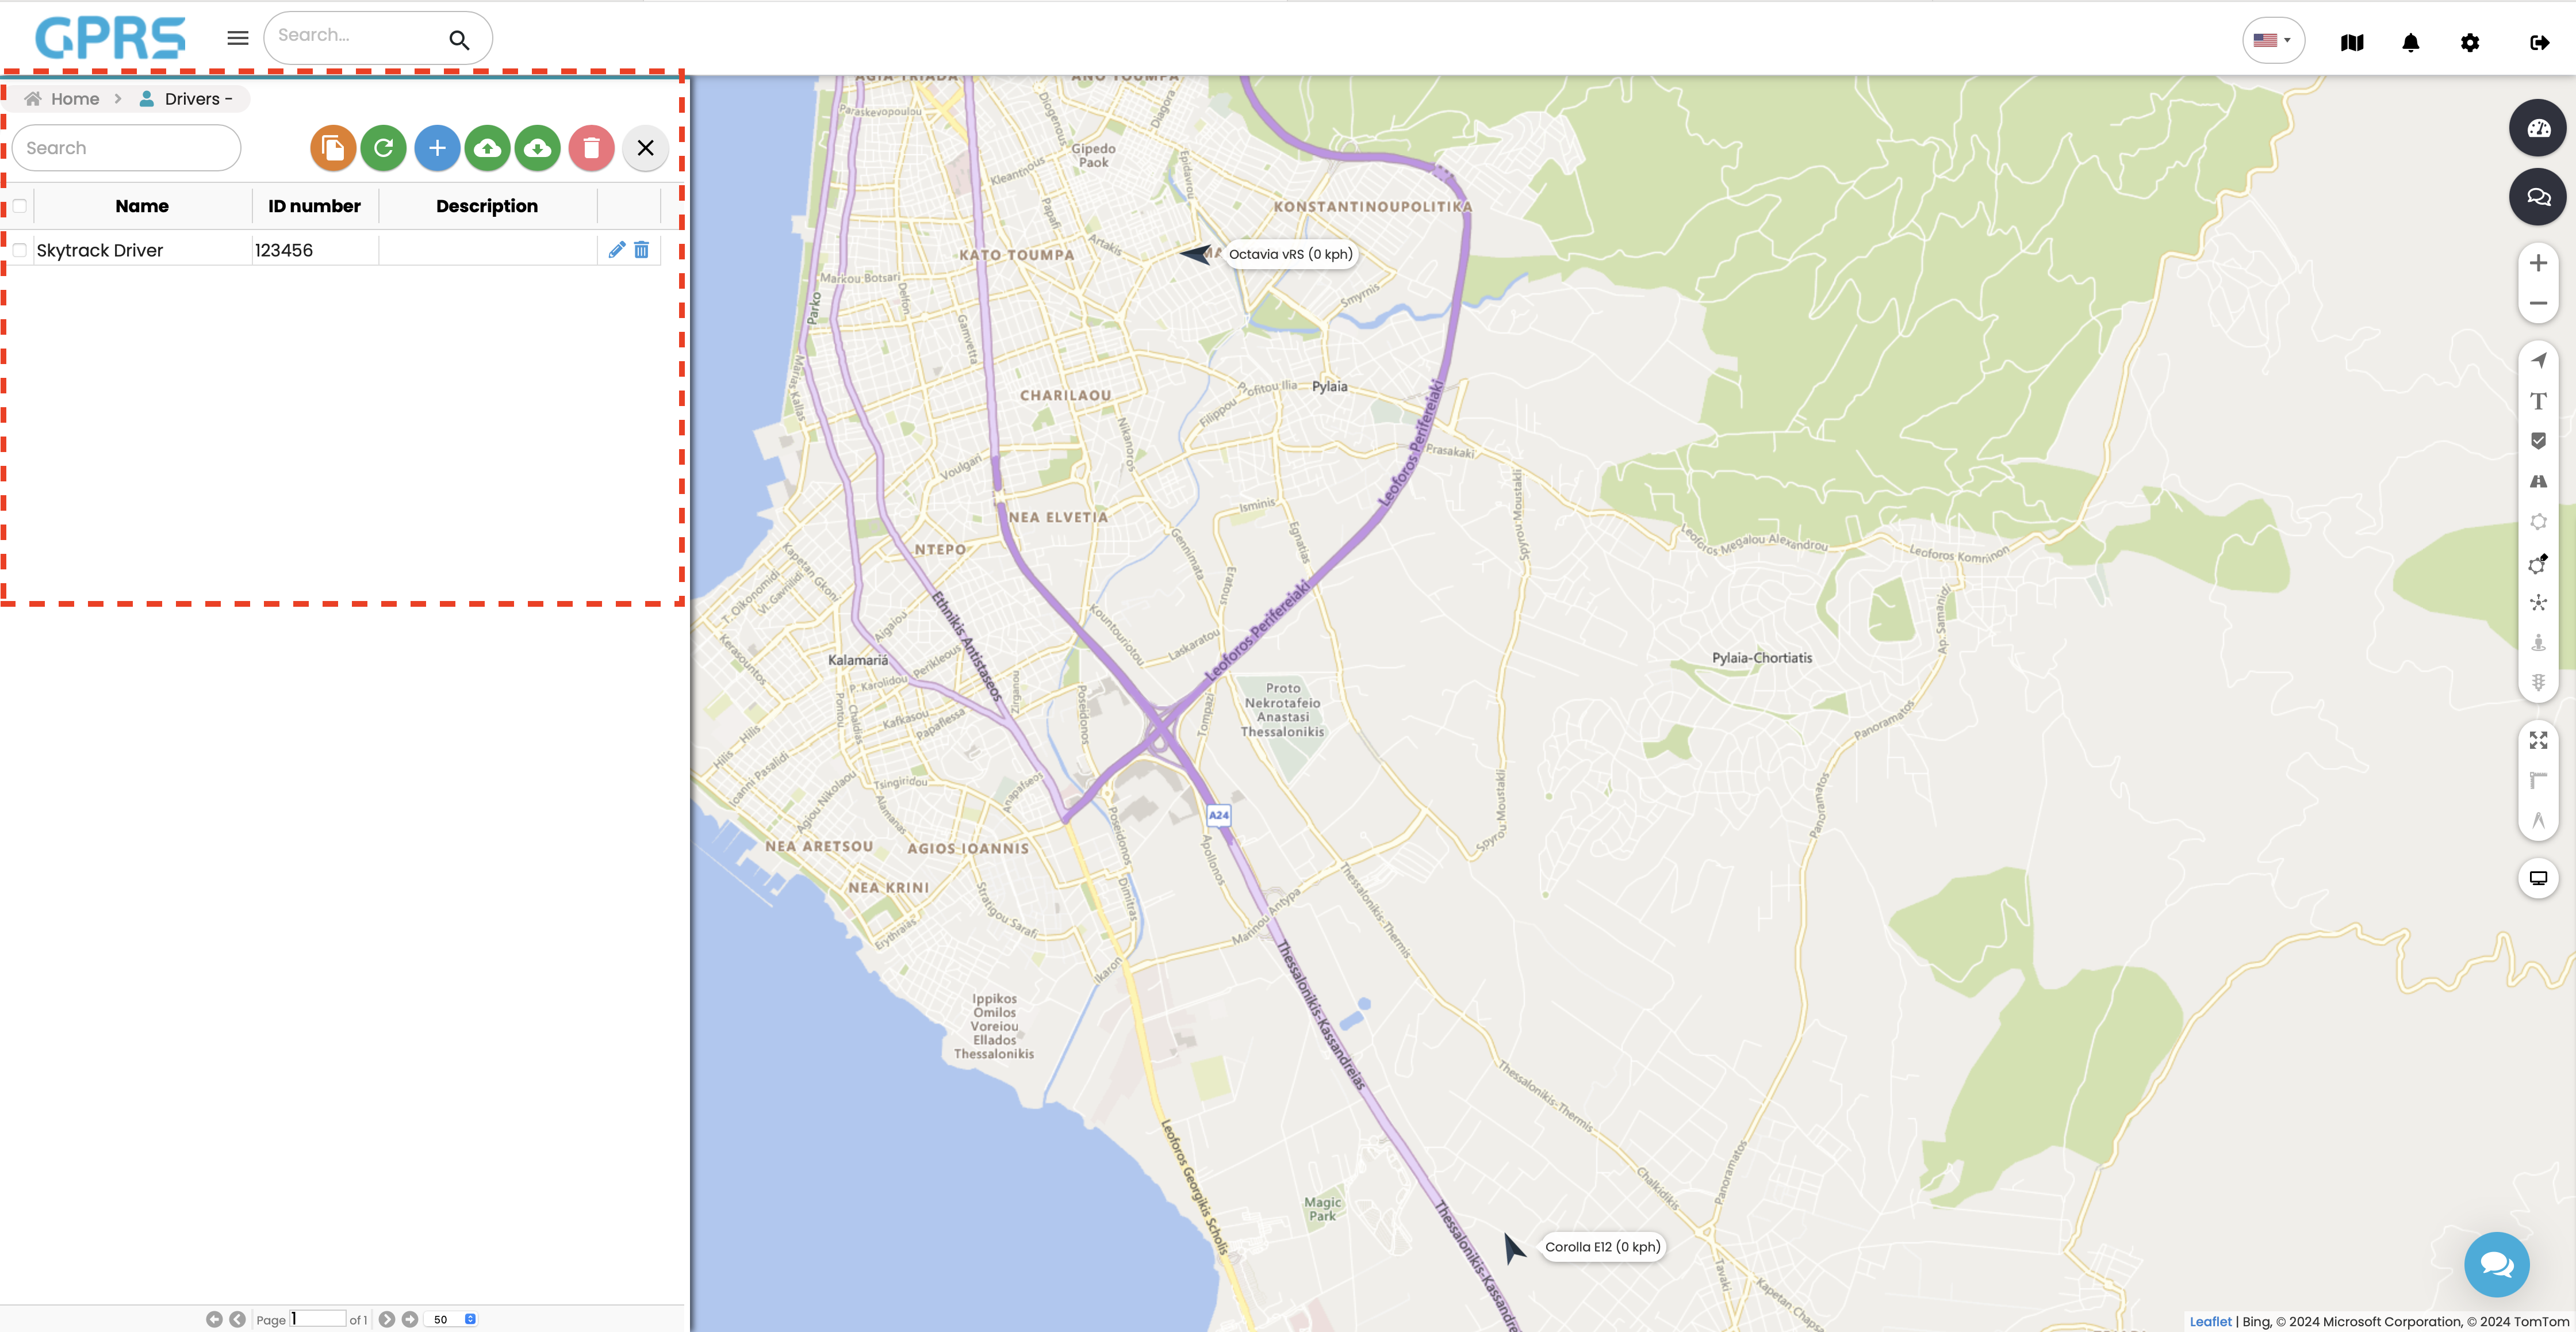
If you have several drivers you can search for them via the Search field (case sensitive)
You can use the import button ![]() to import drivers in bulk via an Excel file or the export button
to import drivers in bulk via an Excel file or the export button ![]() to export drivers
to export drivers![]() to an Excel file. You can select any relevant fields if you need to export specific drivers by clicking the box on the left of the driver name. If no driver is selected, all entries will be exported.
to an Excel file. You can select any relevant fields if you need to export specific drivers by clicking the box on the left of the driver name. If no driver is selected, all entries will be exported.
Adding a driver opens a new tab. The fields with an asterisk are mandatory (Name, ID, RFID or iButton).
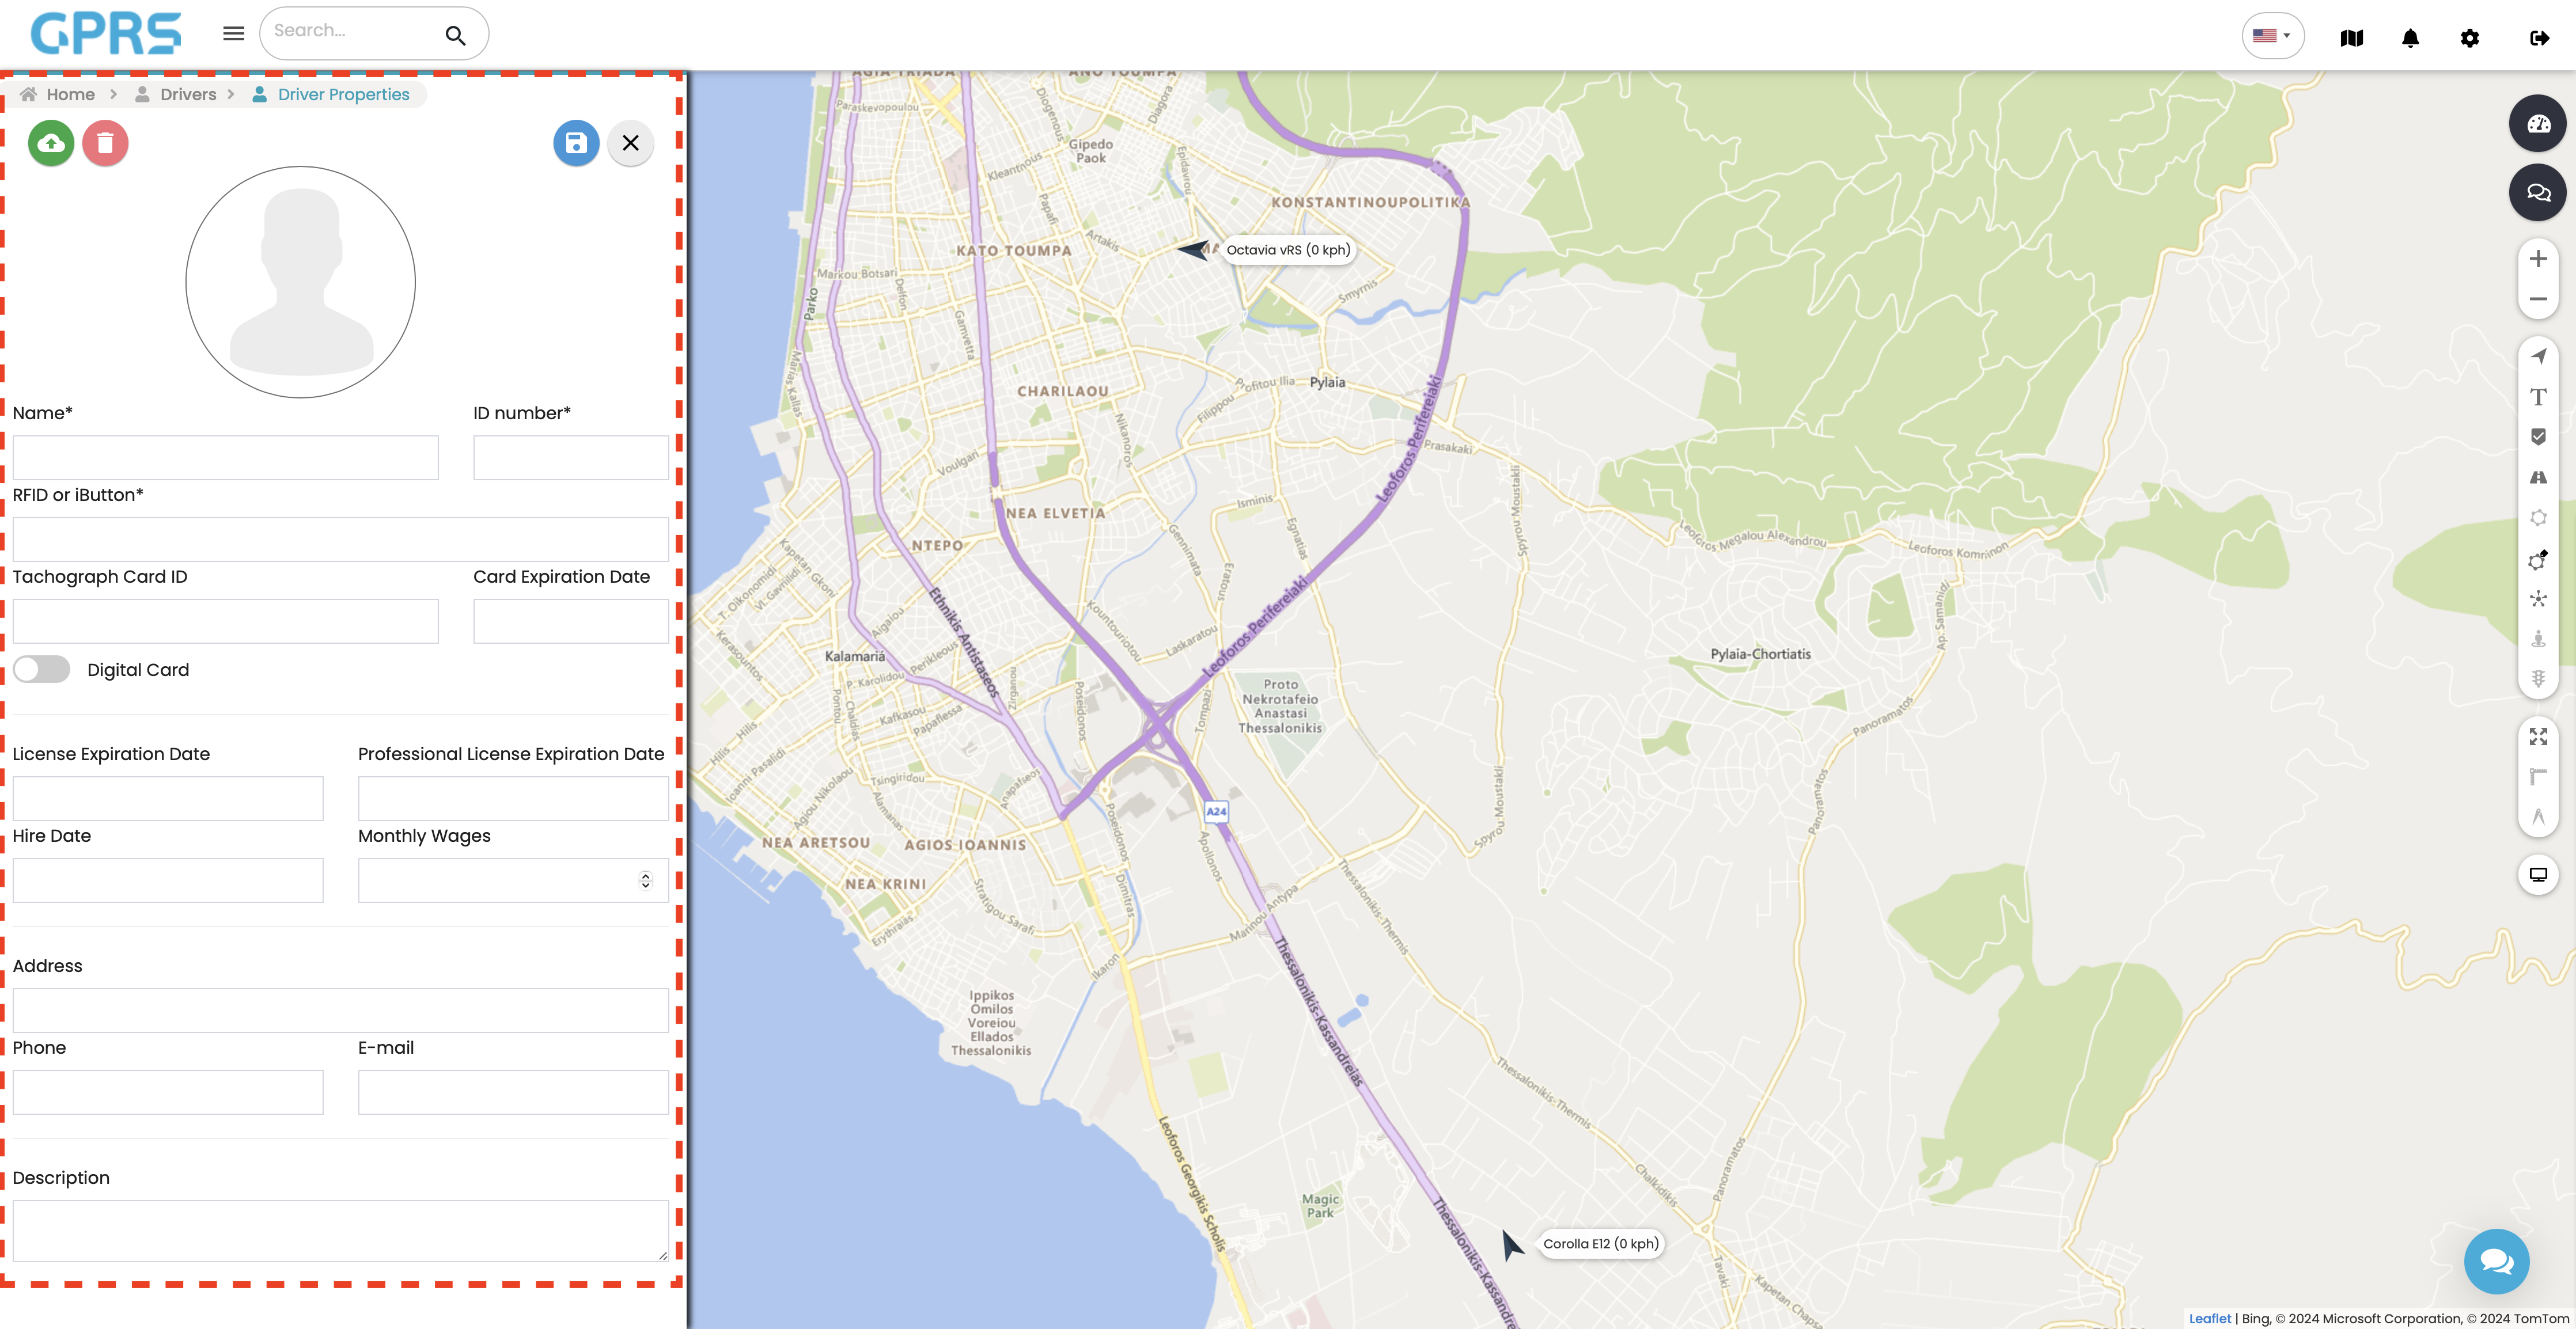
- Name: Driver name
- ID Number: Driver ID number (could be tag serial number etc)
- RFID or iButton field: RFID number or iButton number that the driver has. A driver may have an ID device in scenarios where multiple drivers are using the same vehicles.
- Tachograph Card ID: Tachograph card ID number (optional)
- License Expiration Date: Driver's licence expiration date (optional)
- Professional licence expiration date: Driver's professional licence expiration date, if the driver is assigned to heavy vehicles requiring special permits. (optional)
- Date of recruitment: Driver's recruitment date (optional)
- Monthly Salary: Drivers monthly salary (optional)
- Address: Driver's address (optional)
- Phone: Driver's phone number (optional)
- E-mail: Driver's email (optional)
After all relevant fields are edited, we can import a photo with the import function ![]() The photo needs to be in 640x480 in size. To save any changes, click on the save button
The photo needs to be in 640x480 in size. To save any changes, click on the save button![]()
In this menu you can view and manage all available trailers that are assigned to your account.
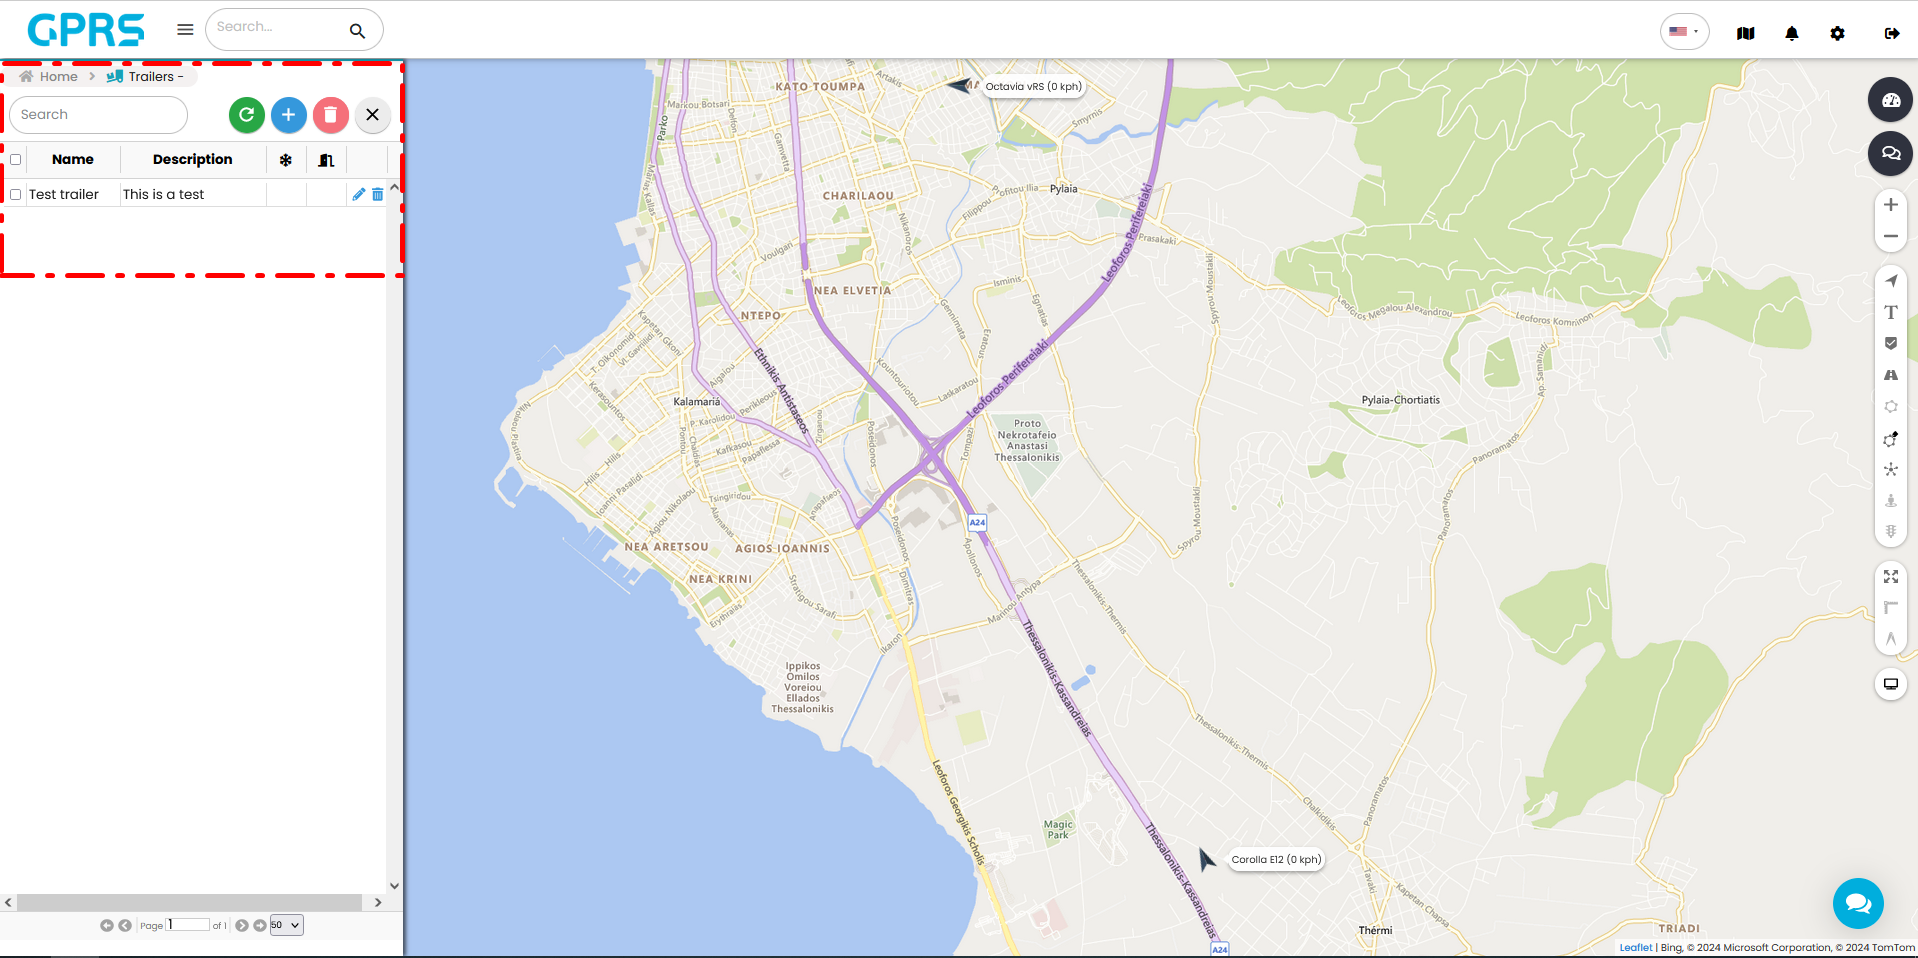
The refresh button ![]() refreshes the trailer list
refreshes the trailer list
![]() will add a new trailer
will add a new trailer
![]() will delete any selected trailers
will delete any selected trailers
![]() will close the trailer menu
will close the trailer menu
Clicking the ![]() button will present the following window.
button will present the following window.
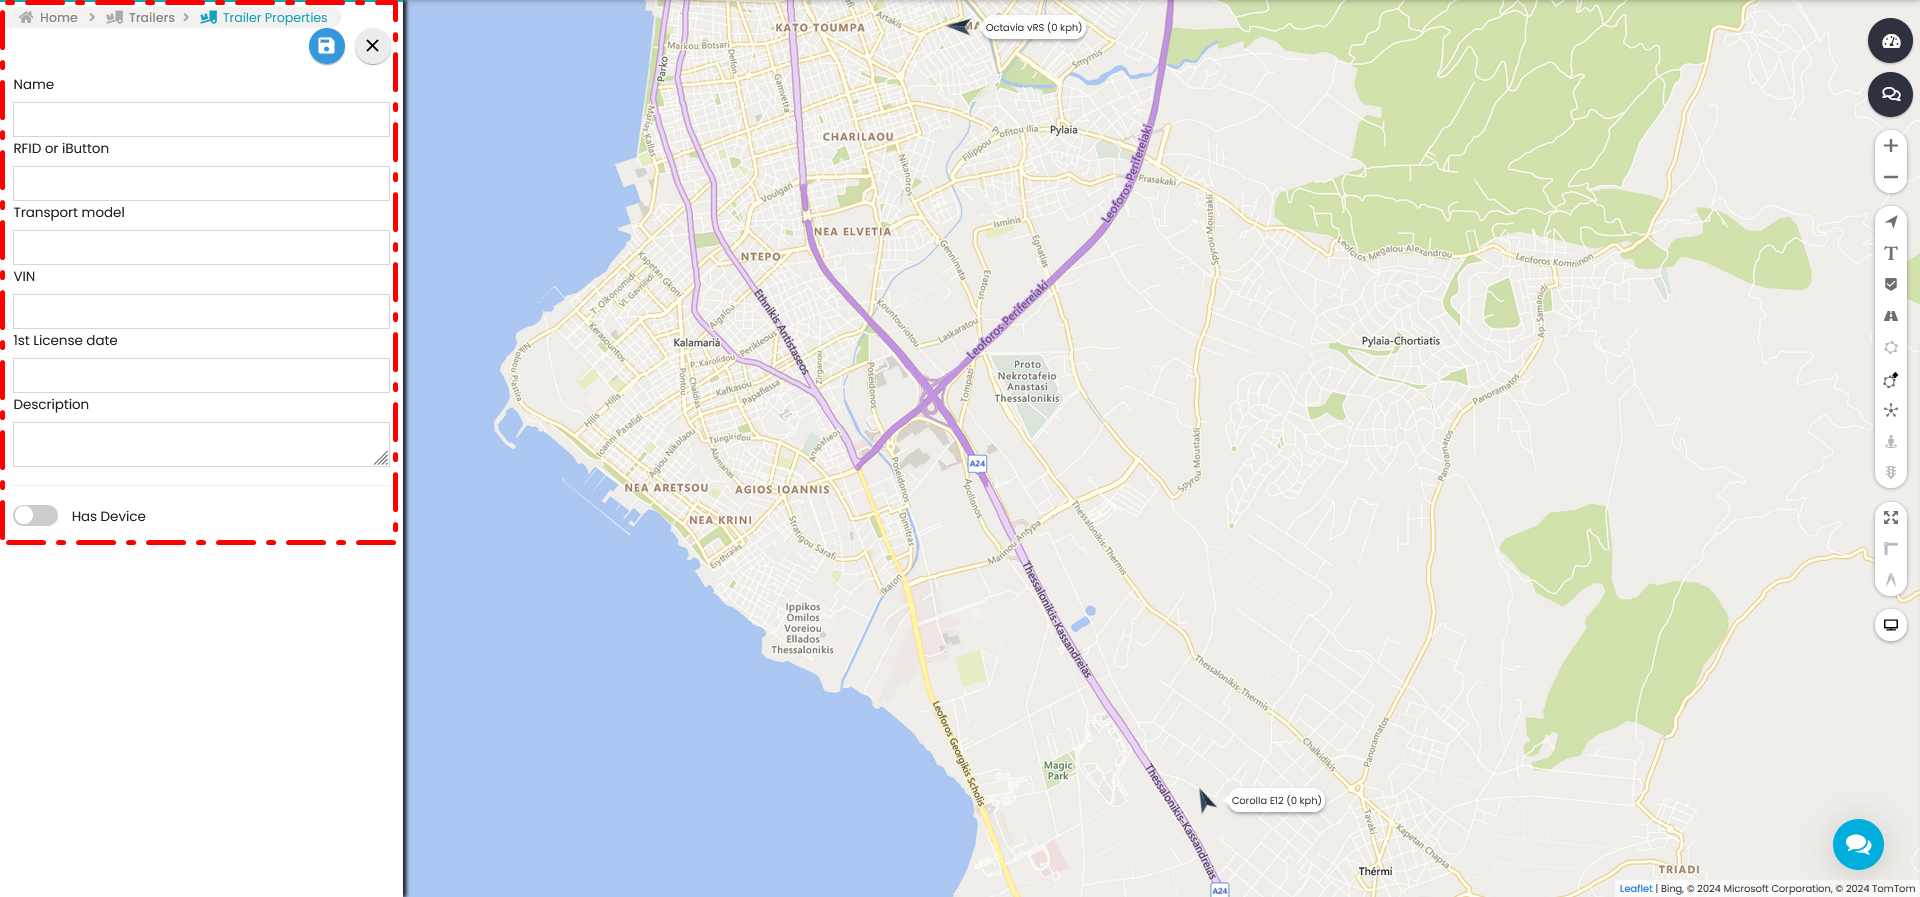
Name: Trailer name
RFID or iButton: RFID number or iButton number that the trailer has. (optional)
Transport model: The transport model name (optional)
VIN: Trailer's VIN (optional)
1st License date: Trailer's 1st licence date (optional)
Description: Trailer's generic description (optional)
Has Device (On/Off): This can assign the trailer to a vehicle with an installed tracker. If this is turnt on, the following options will be activated.
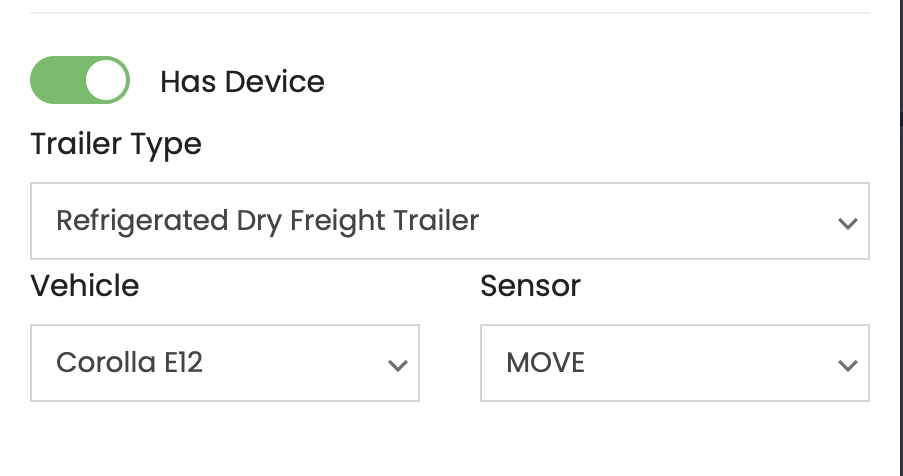
we chose the relevant trailer type 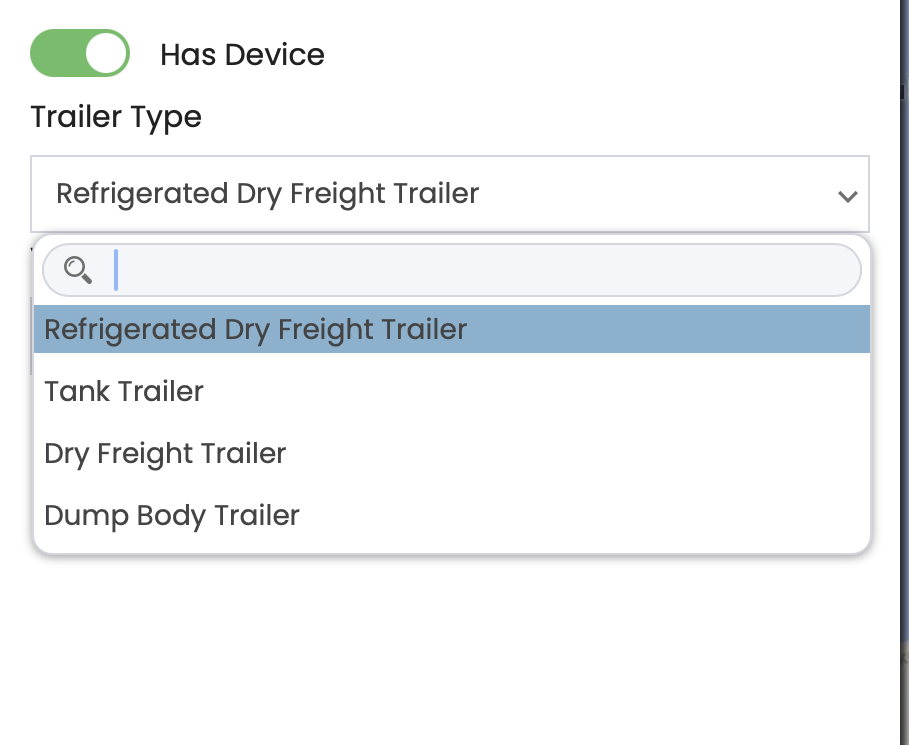
and then we assing a vehicle as well as the relevant sensor (temperature, weight etc.) To save any changes made, click the save button ![]()
This menu shows us the registered passengers in our account. The search field allows us to quickly find the desired entry. (case sensitive)
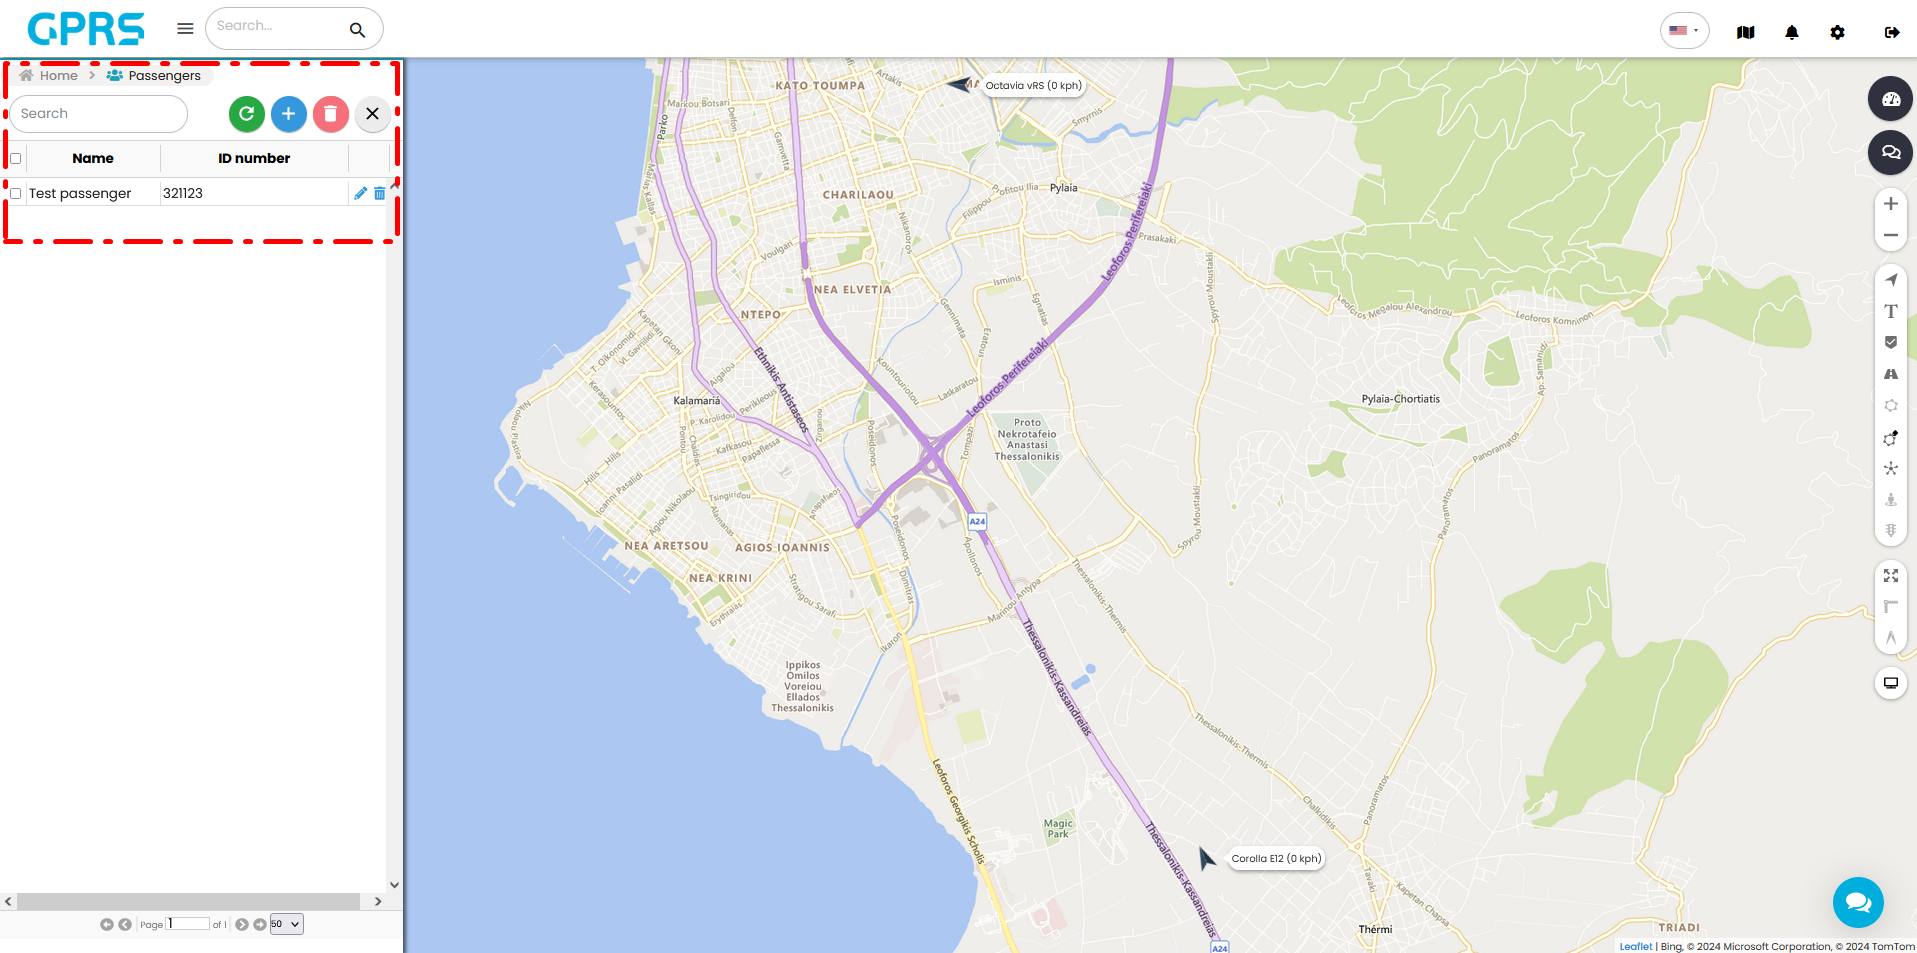
You can refresh the passenger list with ![]()
You can add a new passenger with ![]()
Finally you can delete a passenger with ![]()
If you wish to add a passenger, the following screen will appear.
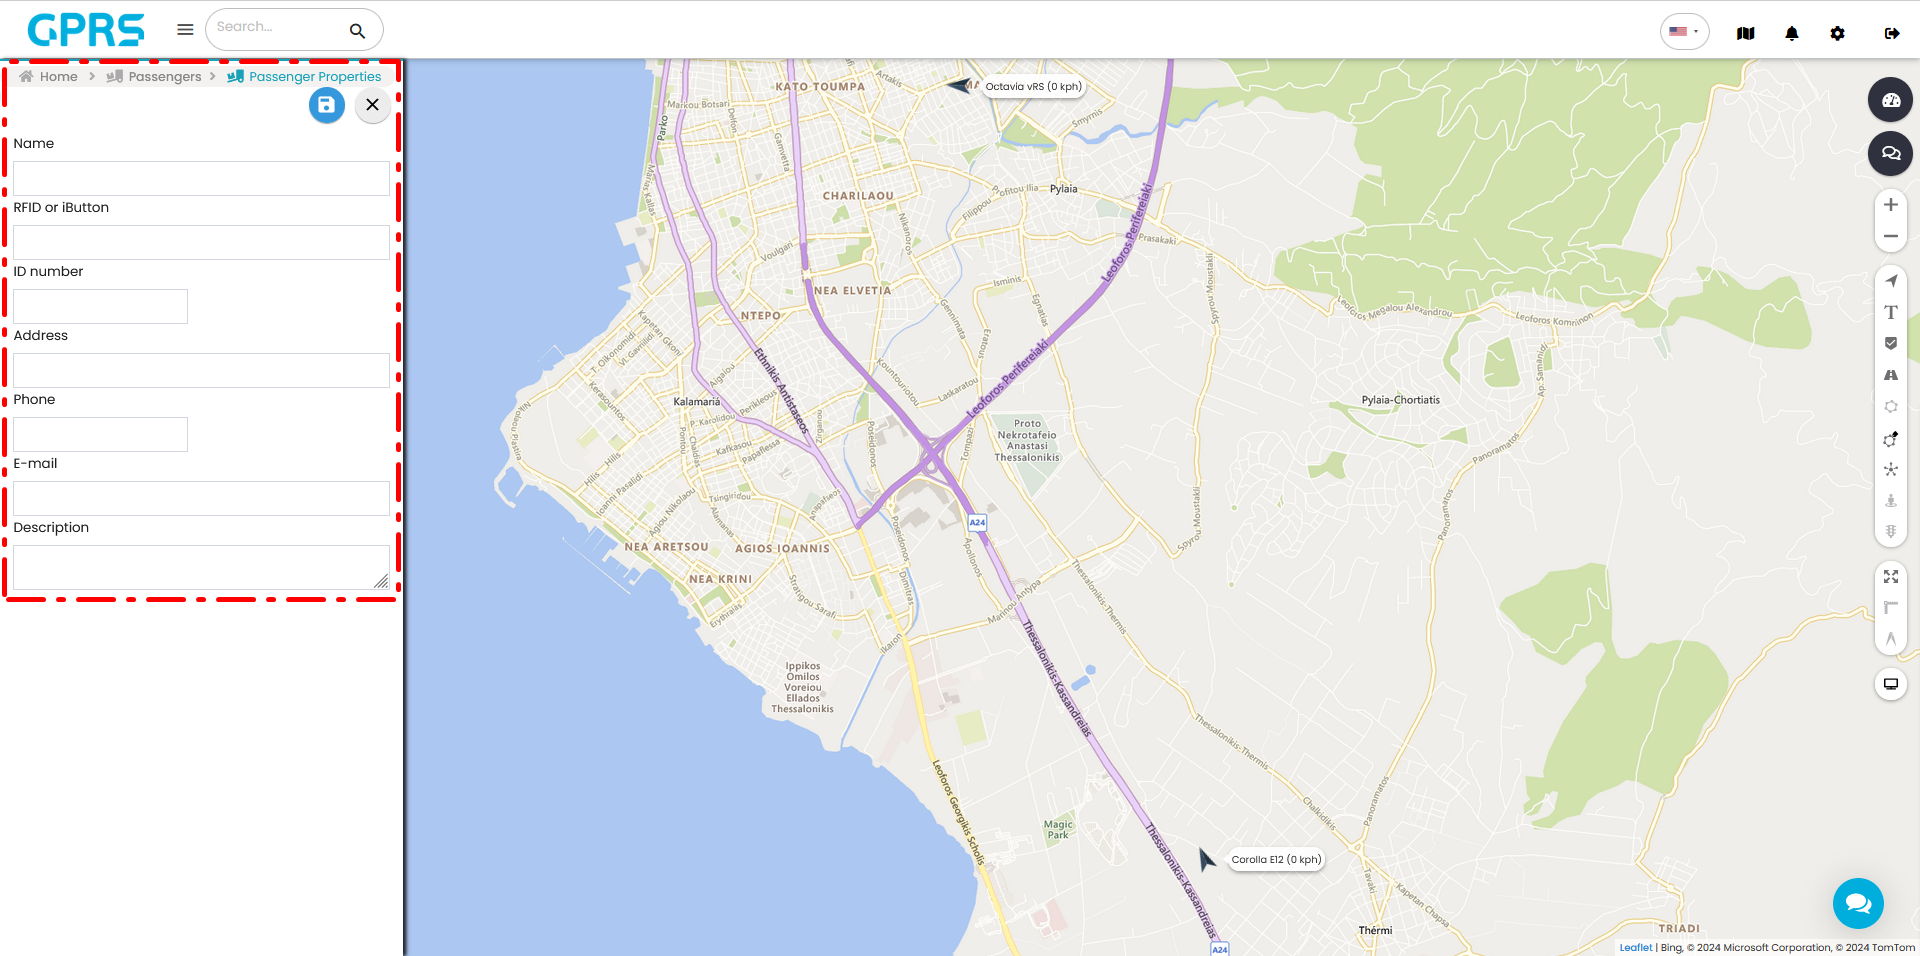
Name: Passenger's name
RFID or iButton: RFID number or iButton number that the passenger has for identification purposes (optional)
Identification Number field: Unique identification number related to the passenger (optional)
Address field: Passenger address (optional)
Telephone: Passenger's phone number (optional)
E-mail: Passenger's email address (optional)
Description: Custom field for any comments related such as workplace, pickup address etc. (optional)
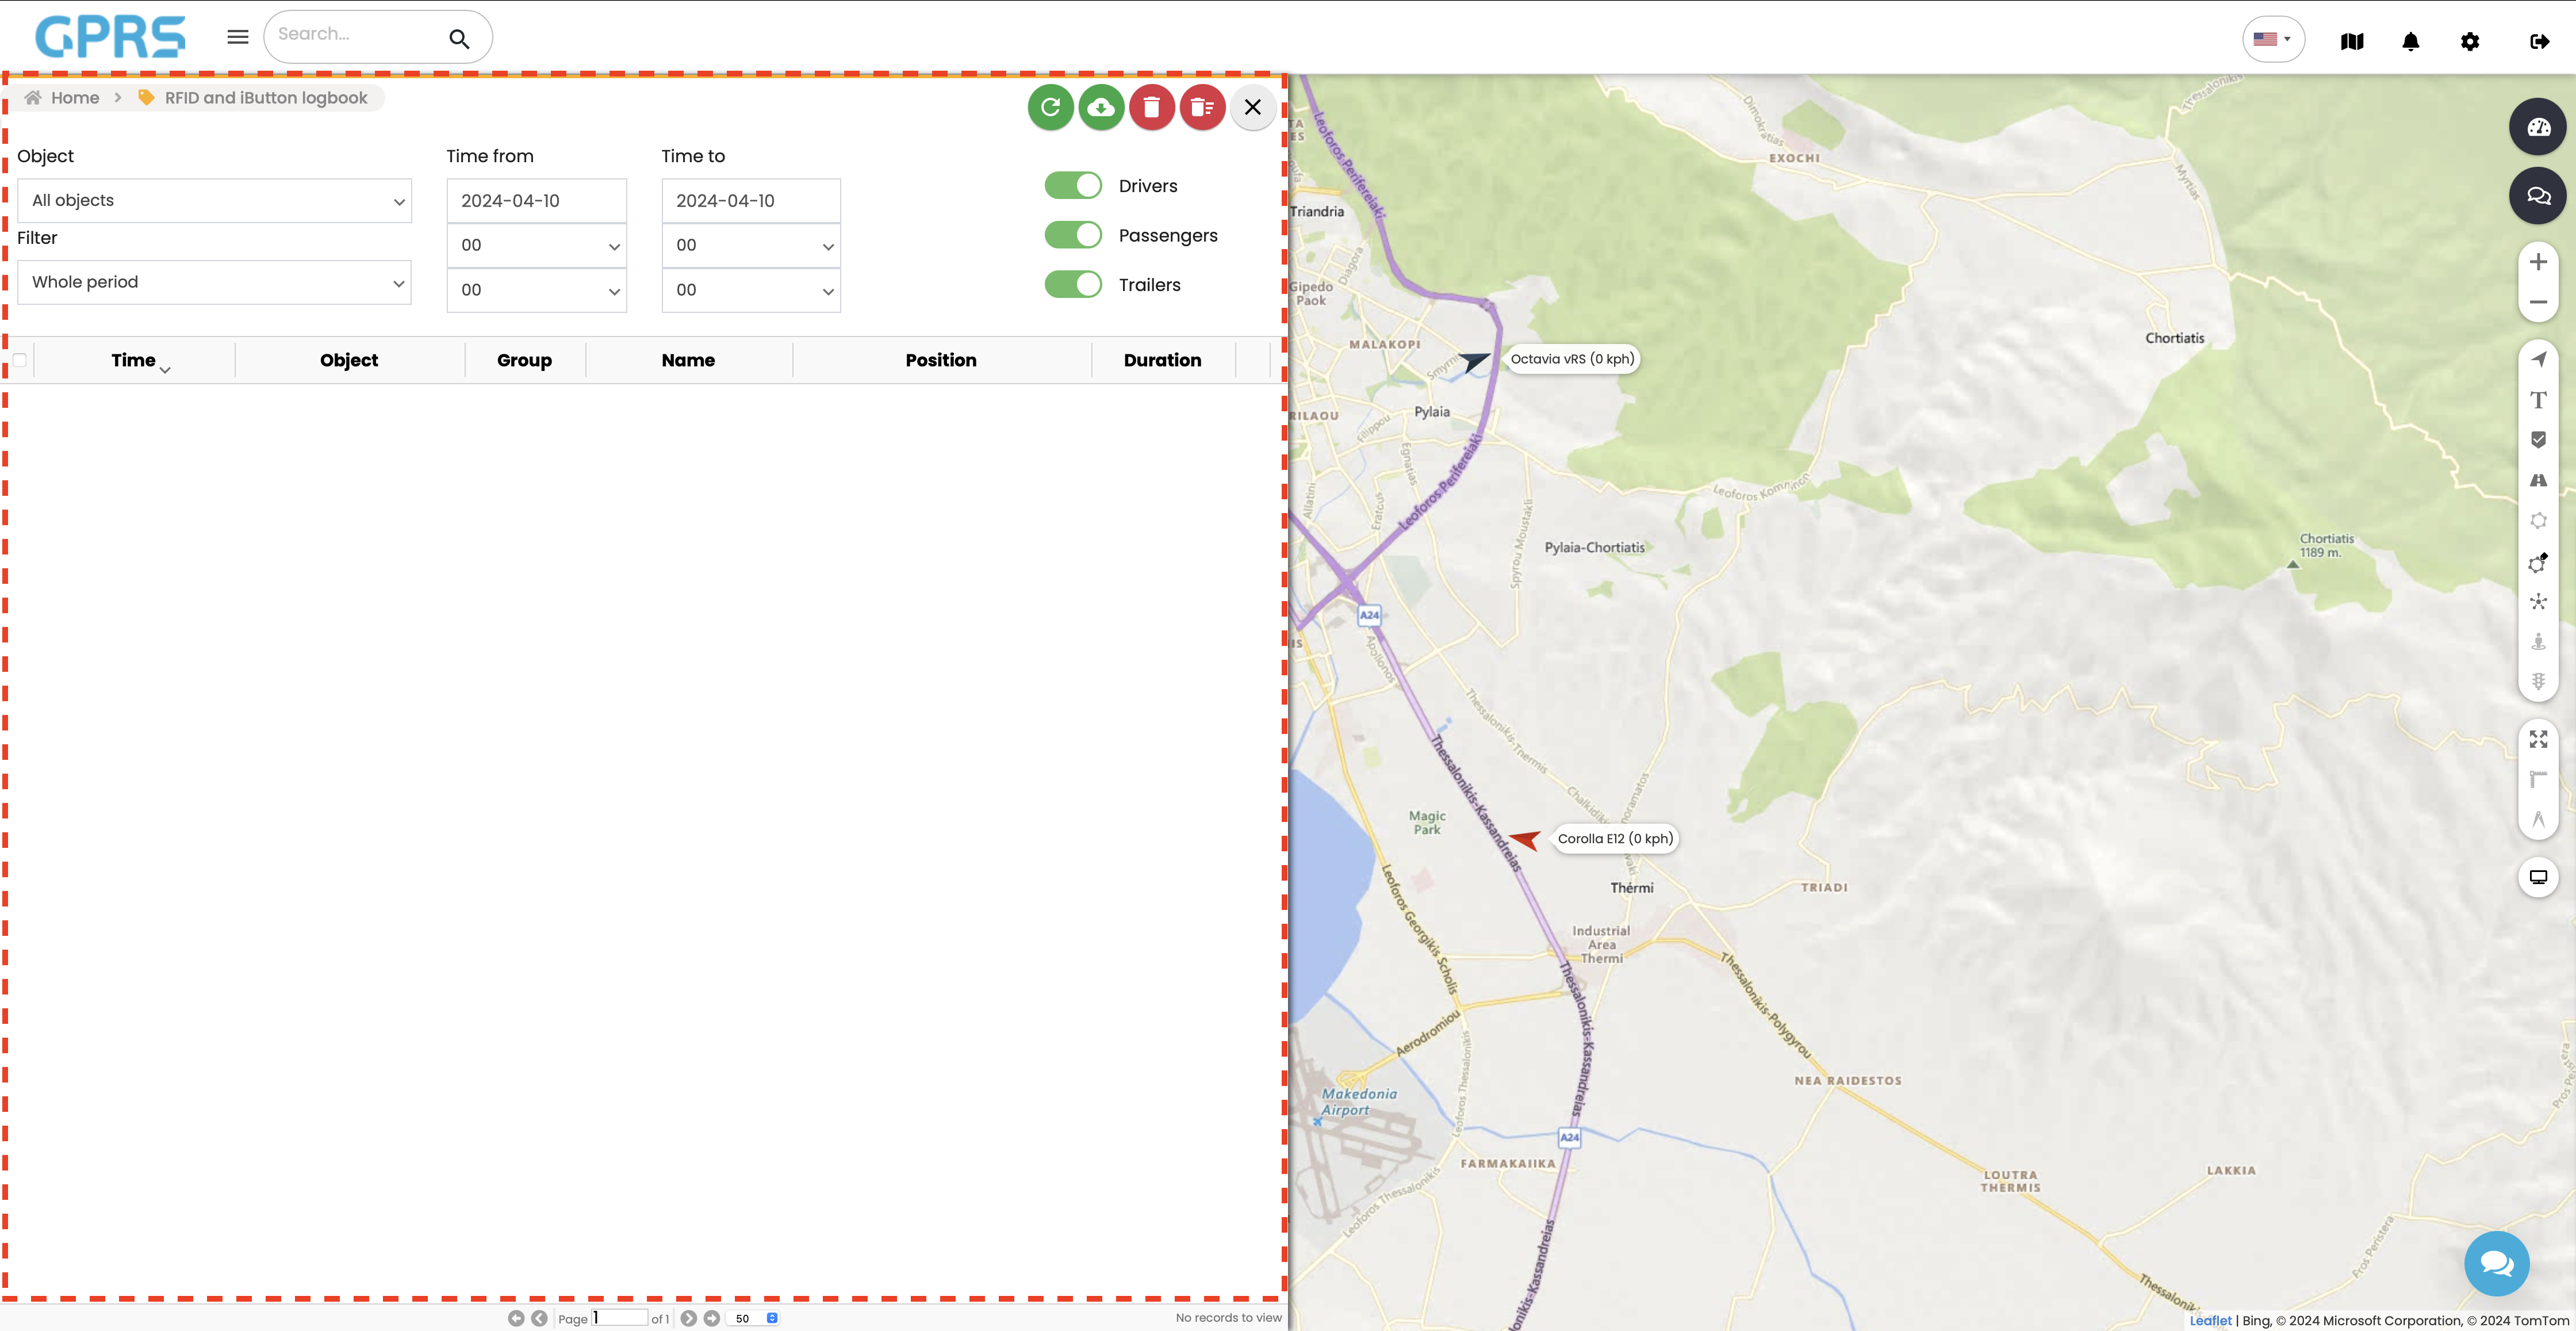
This shows all the RFID or iButton devices that we have registered in our account and are in Driver, passenger and trailer submenus.
History gives you a detailed display of your vehicle's route and stops on the map.
To access a vehicle's history:
Object: Select the desired object
Filter: Choose the desired timeframe. 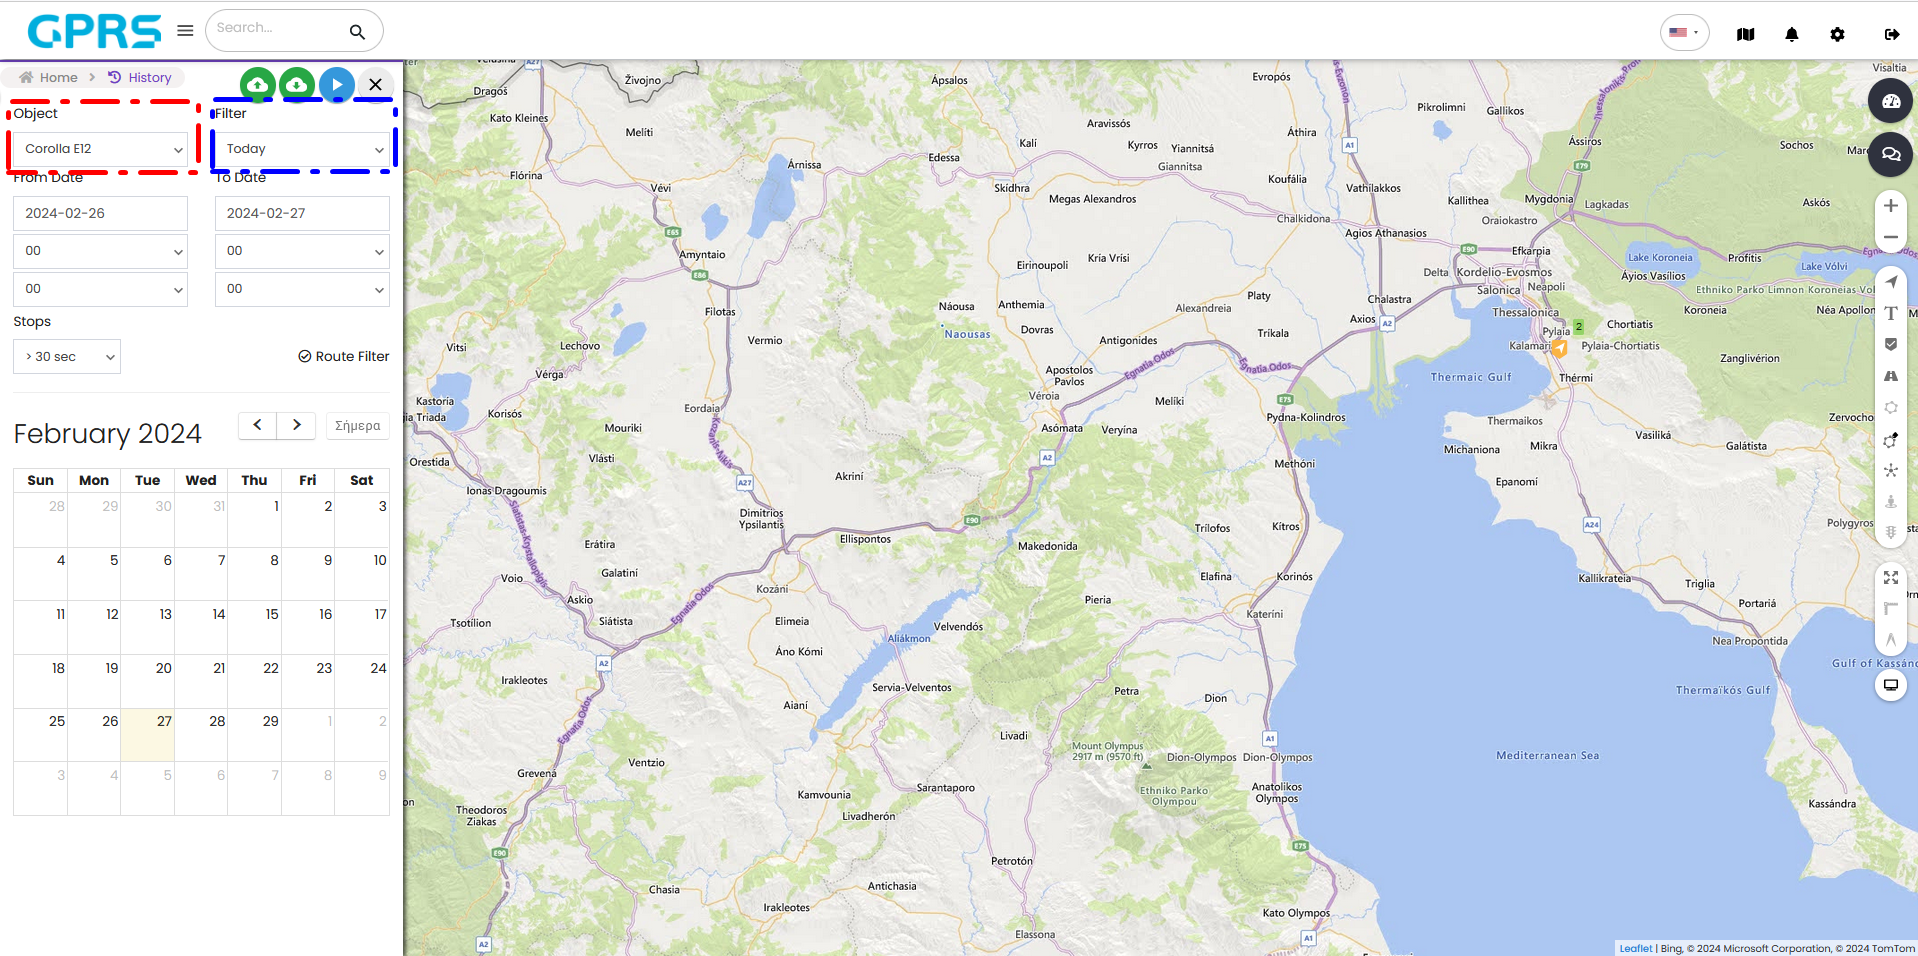
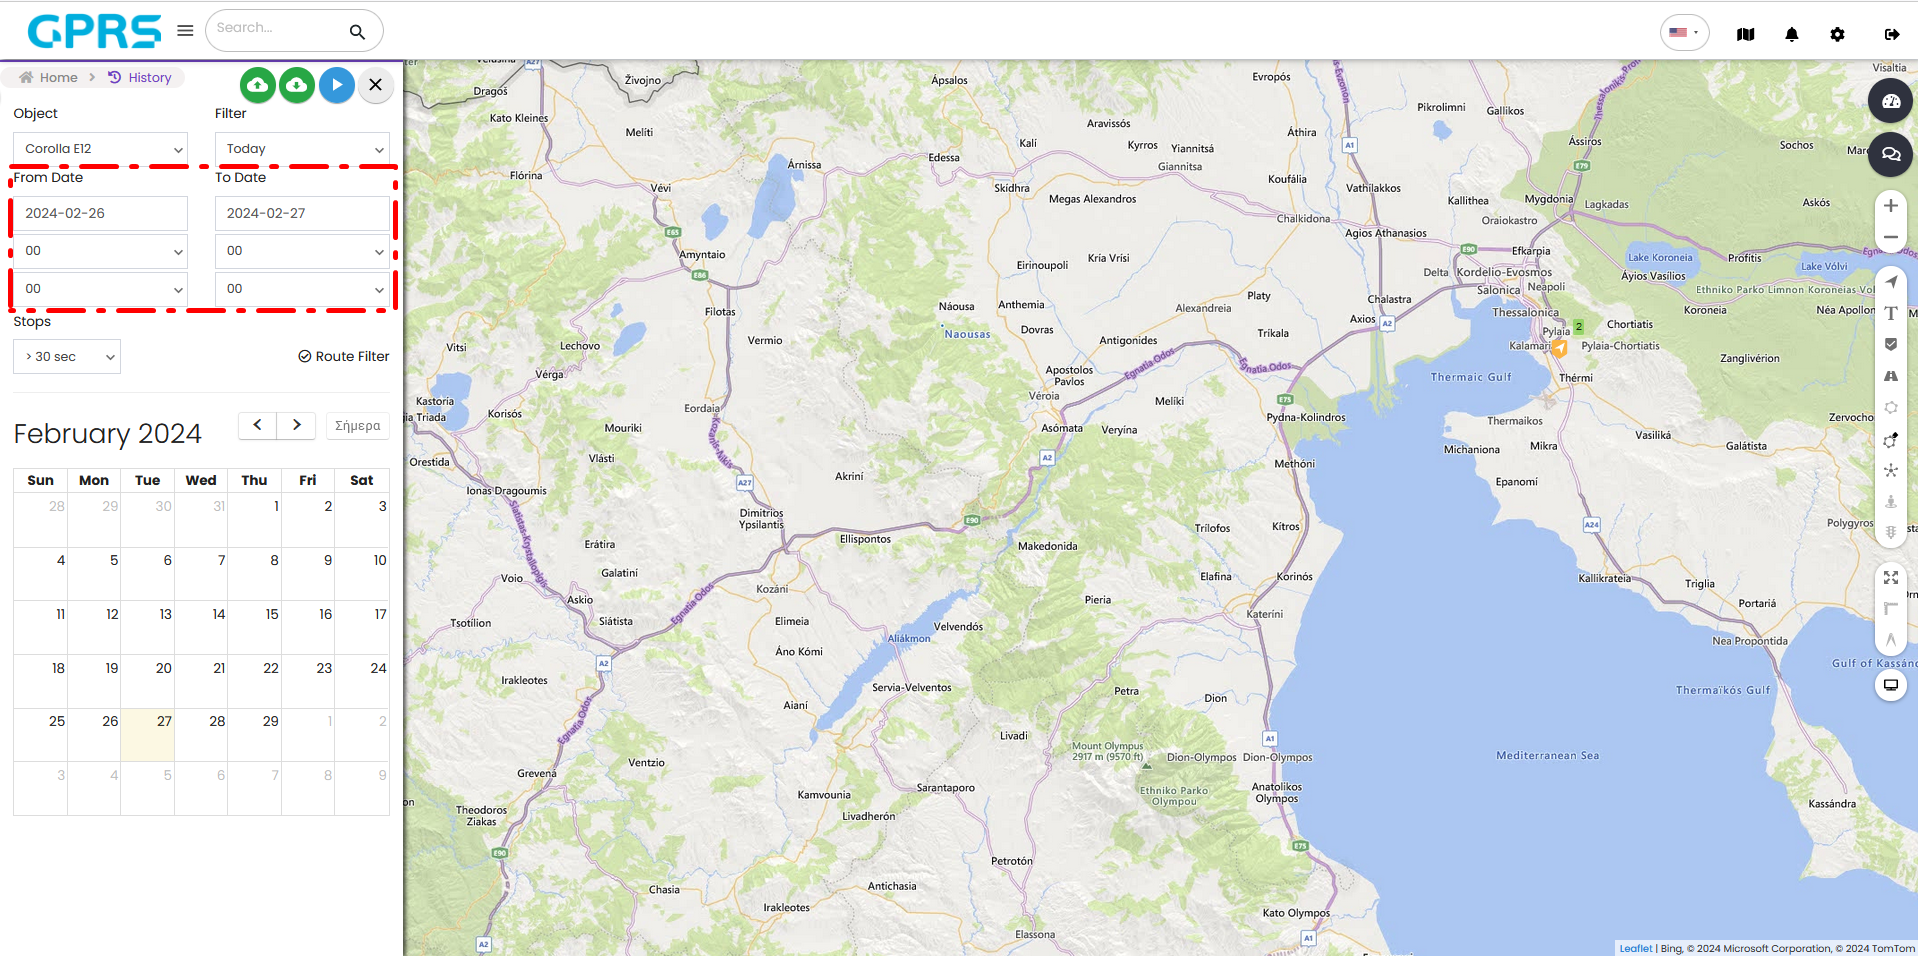
If you wish to narrow down your results, select the relevant date and time fields.
Stops: You can filter out stops shorter than the selected time. This will clean up the route, especially if the vehicle is making frequent stops.
Calendar: Displayed at the bottom side of the tab. Will allow you do
Tapping on the history ![]() will show you the results on the GPRS map, and tapping on
will show you the results on the GPRS map, and tapping on ![]() it will suggest various methods of importing data and also saving it to your computer.
it will suggest various methods of importing data and also saving it to your computer.
Data import is supported by a GSR (Golden Software format) file.
Data export ![]() is done in GSR, KML (Keyhole Markup Language), GPX (GPS Exchange Format), CSV (comma-separated values)
is done in GSR, KML (Keyhole Markup Language), GPX (GPS Exchange Format), CSV (comma-separated values)
The Save as route option allows us to save to GPRS a route that the vehicle took at a specific time in the past. Once we save the route, we will be able to see it in the Parts > Routes menu with the name we have given it.
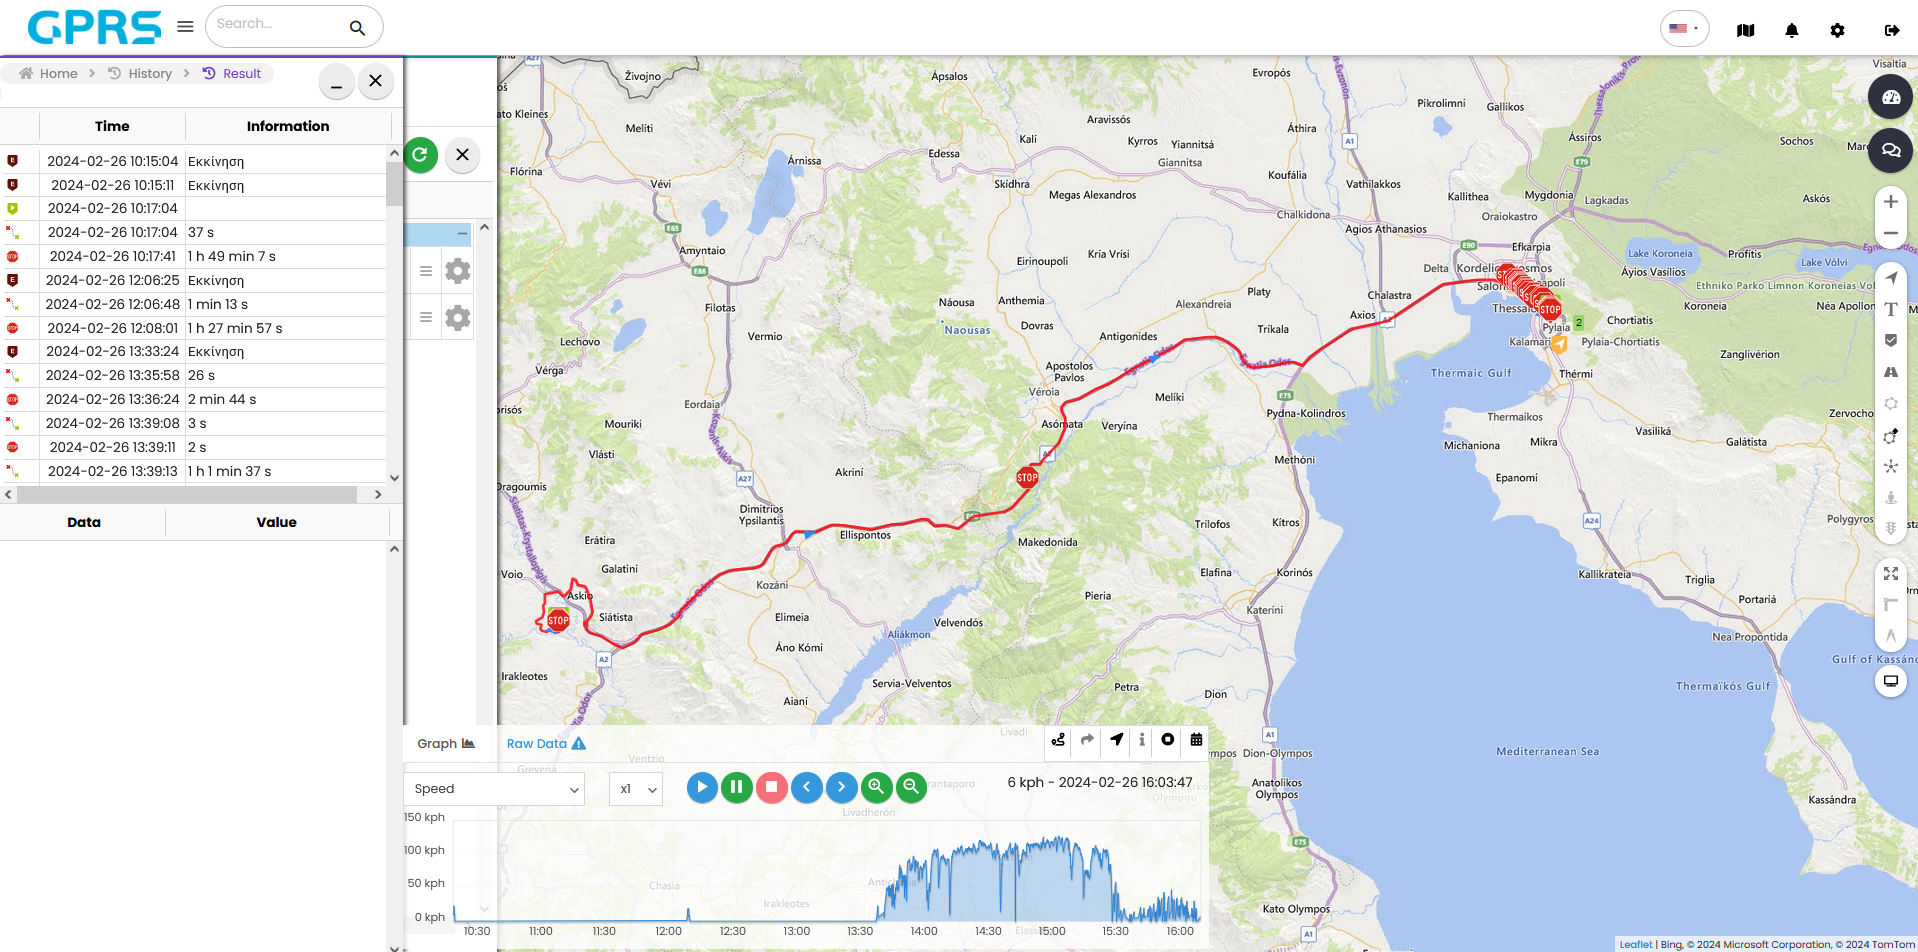
In the Result tab on the left we can see when the vehicle starts and stops moving within the time limits of the search.
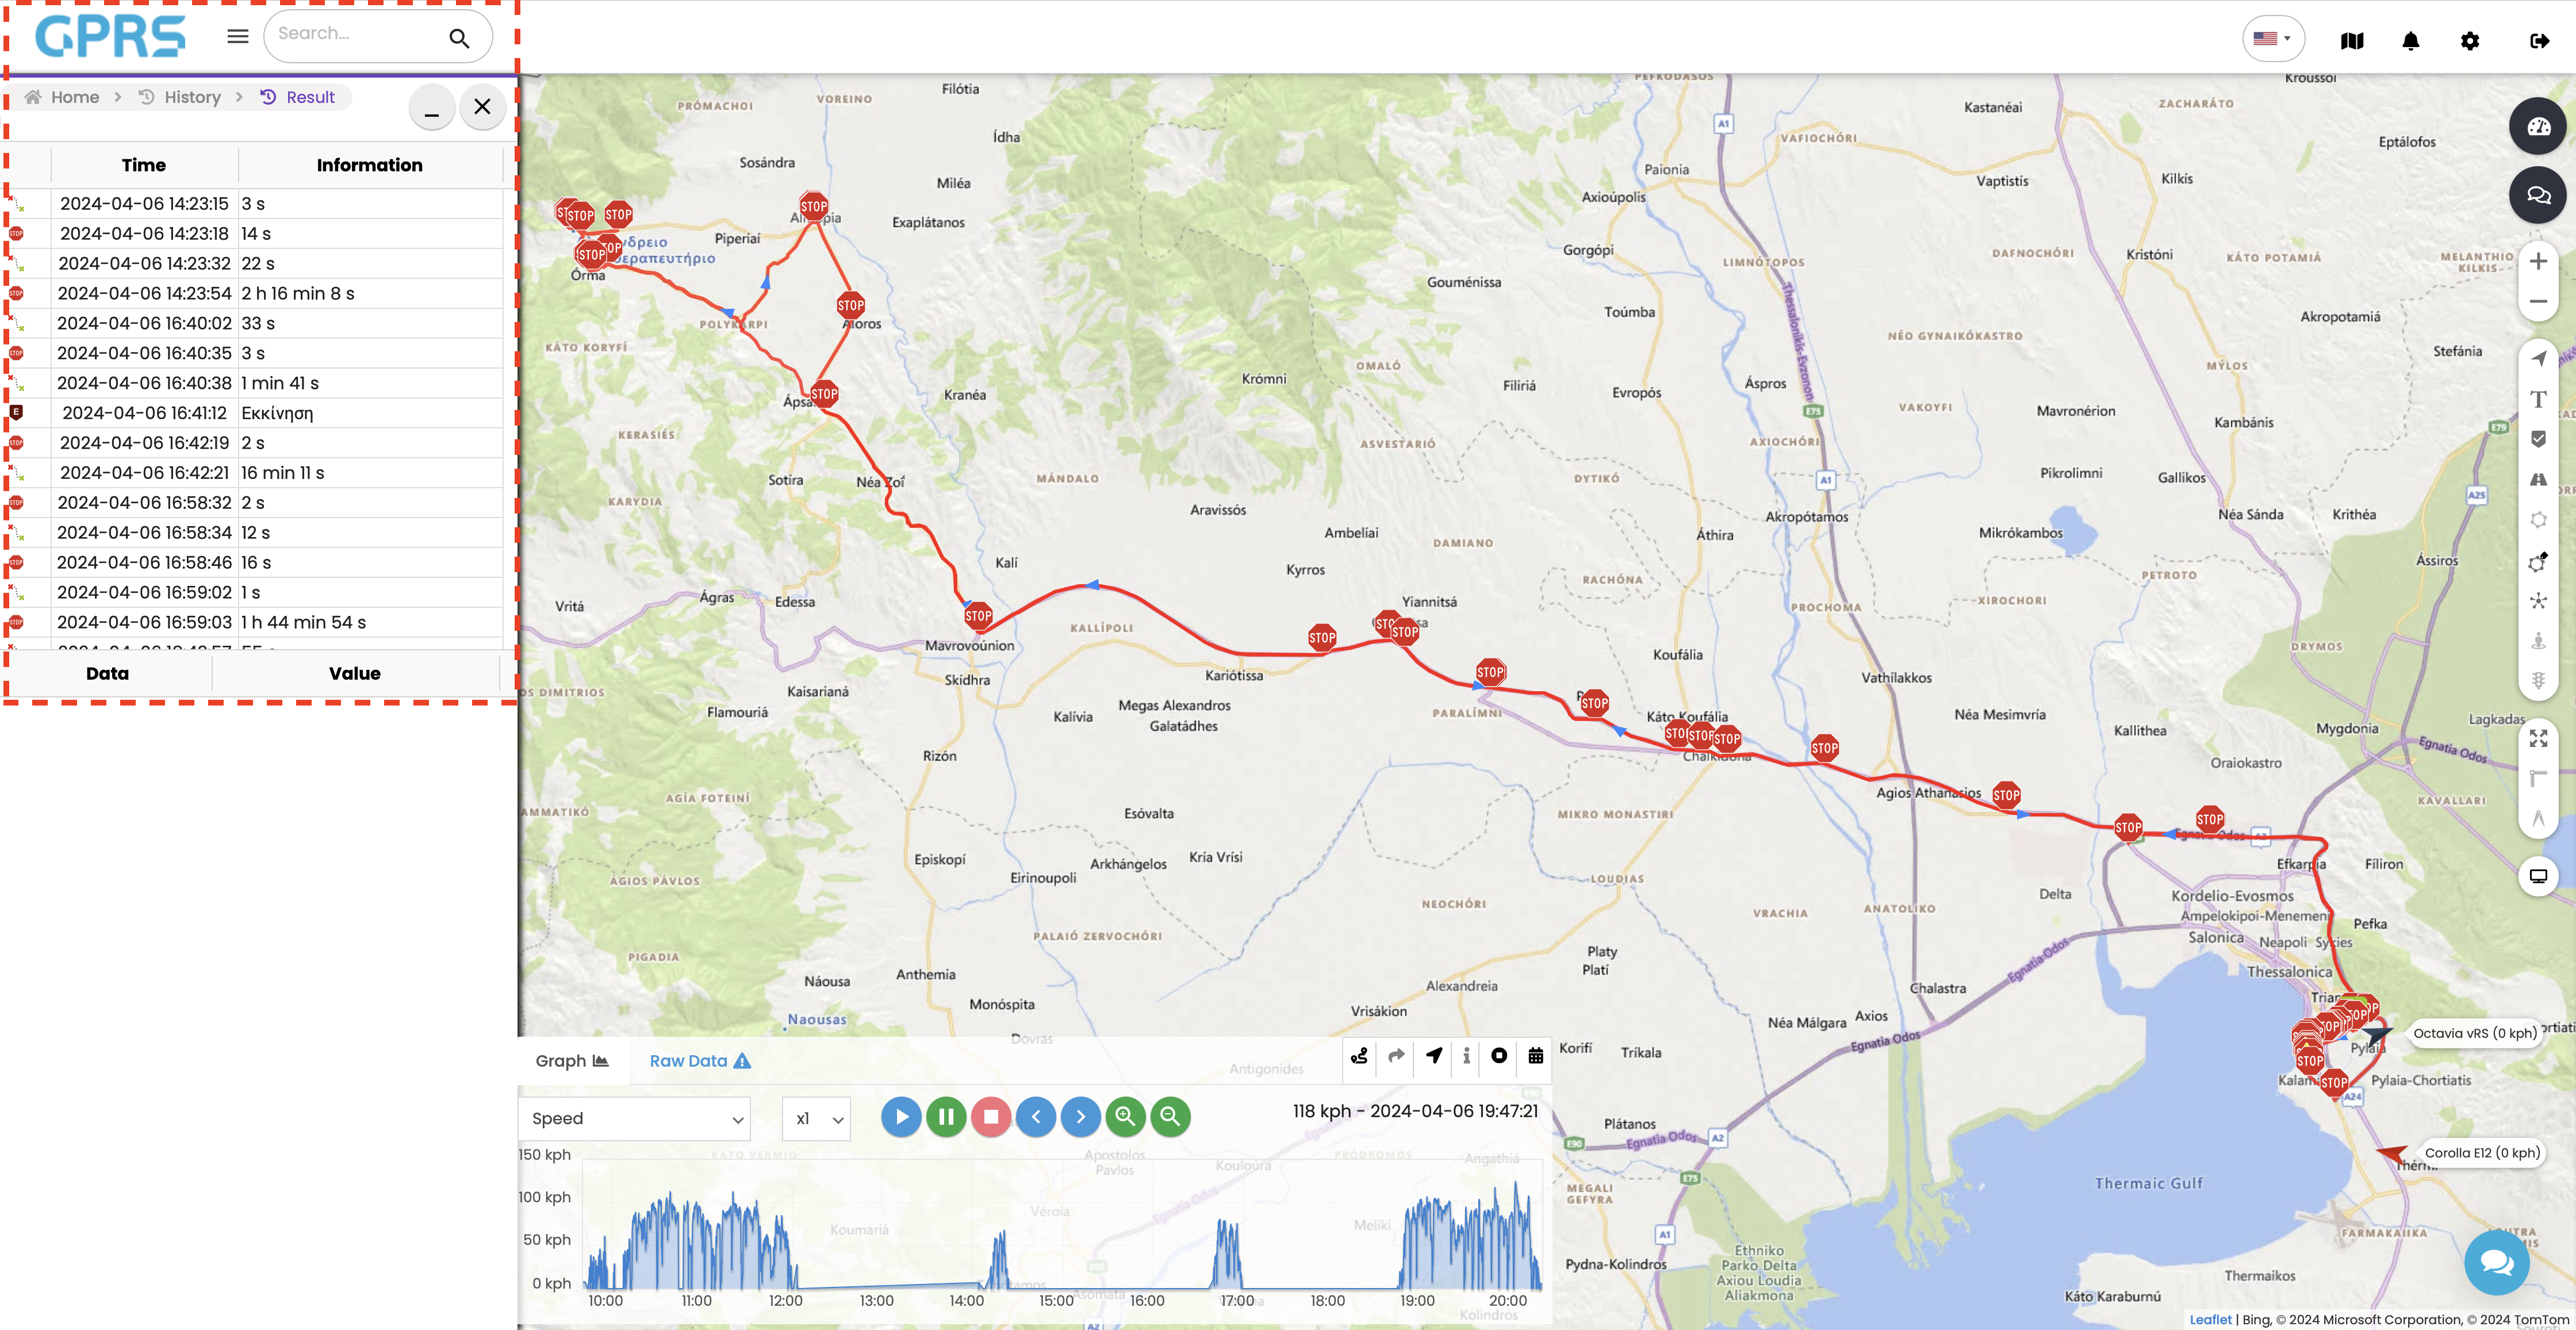
With ![]() we can see the duration of the stops of the vehicle. Hovering the mouse over the result, we see in a temporary pop-up window data on arrival, odometer data, departure from the point and how long the machine was waiting. Clicking on this result opens a menu on the map (at the stopping point) with short and detailed information about the vehicle at the point and also Cockpit View (if available).
we can see the duration of the stops of the vehicle. Hovering the mouse over the result, we see in a temporary pop-up window data on arrival, odometer data, departure from the point and how long the machine was waiting. Clicking on this result opens a menu on the map (at the stopping point) with short and detailed information about the vehicle at the point and also Cockpit View (if available).
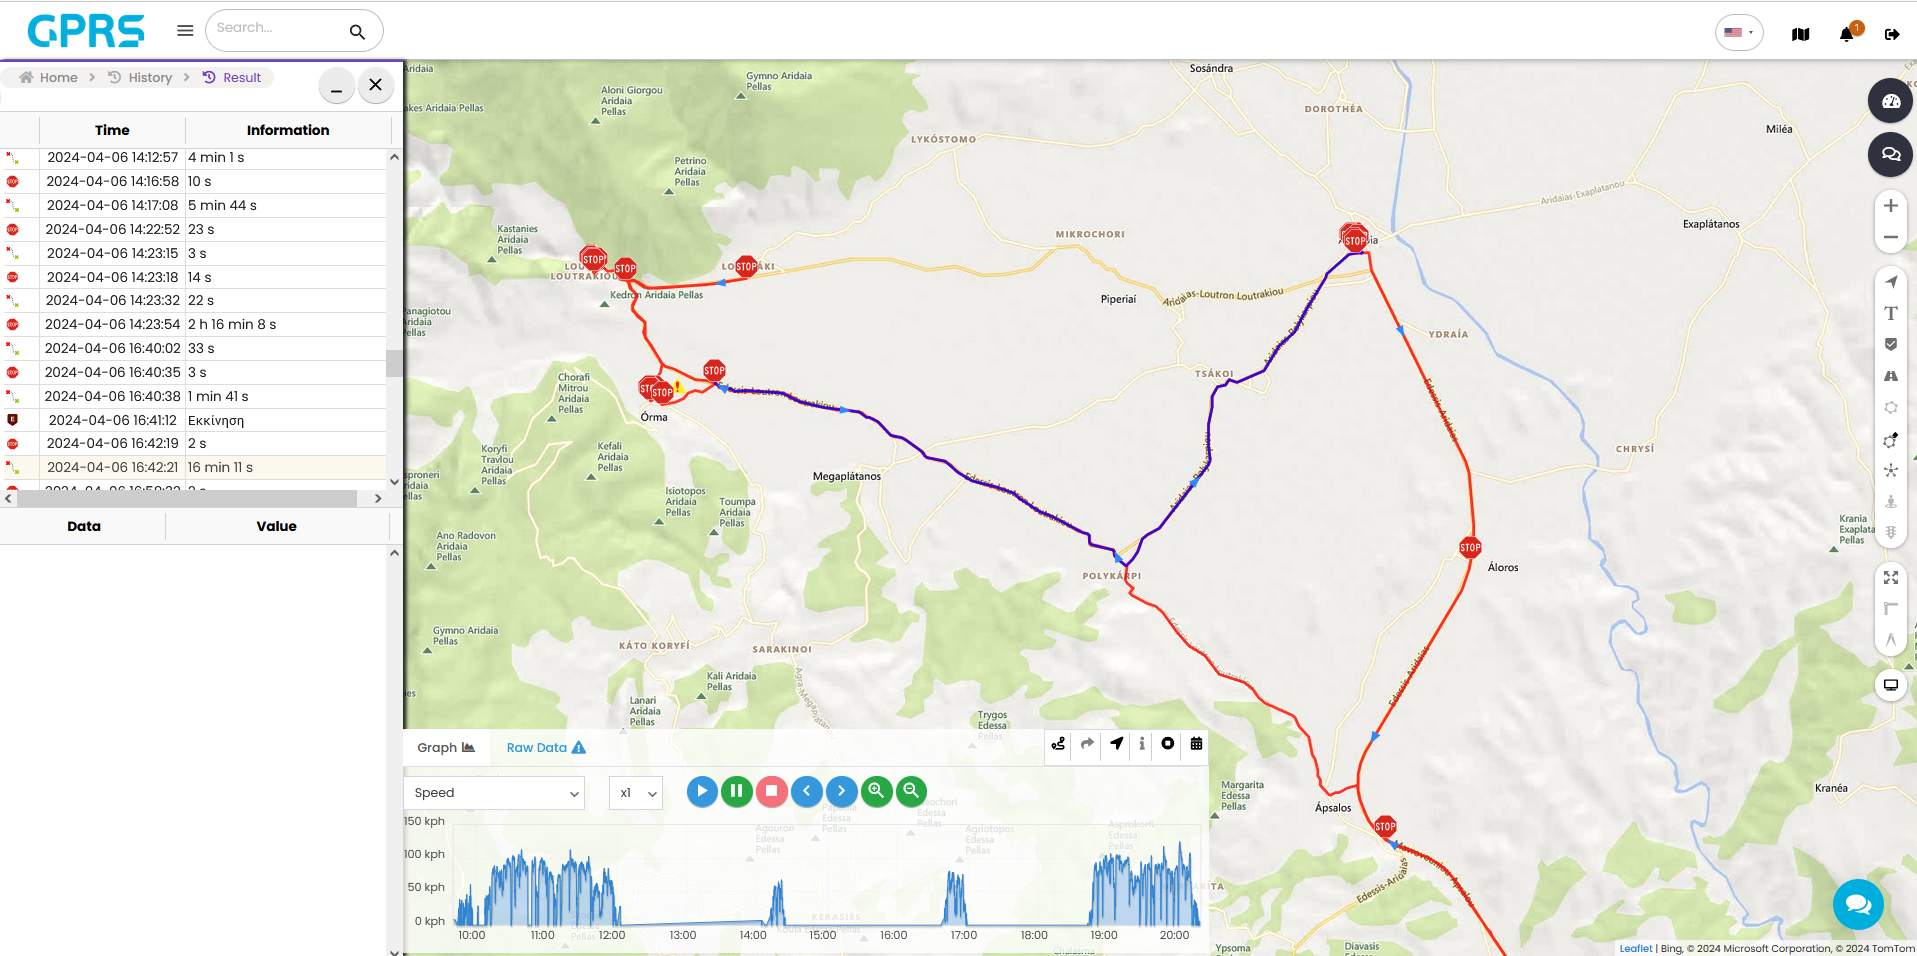
Correspondingly with ![]() we see the duration that the vehicle was in motion. Hovering the mouse over the result, we see in a temporary pop-up window data about the distance of the trip, the maximum speed, and the average speed. Clicking on the result highlights the route on the map in dark blue.
we see the duration that the vehicle was in motion. Hovering the mouse over the result, we see in a temporary pop-up window data about the distance of the trip, the maximum speed, and the average speed. Clicking on the result highlights the route on the map in dark blue.
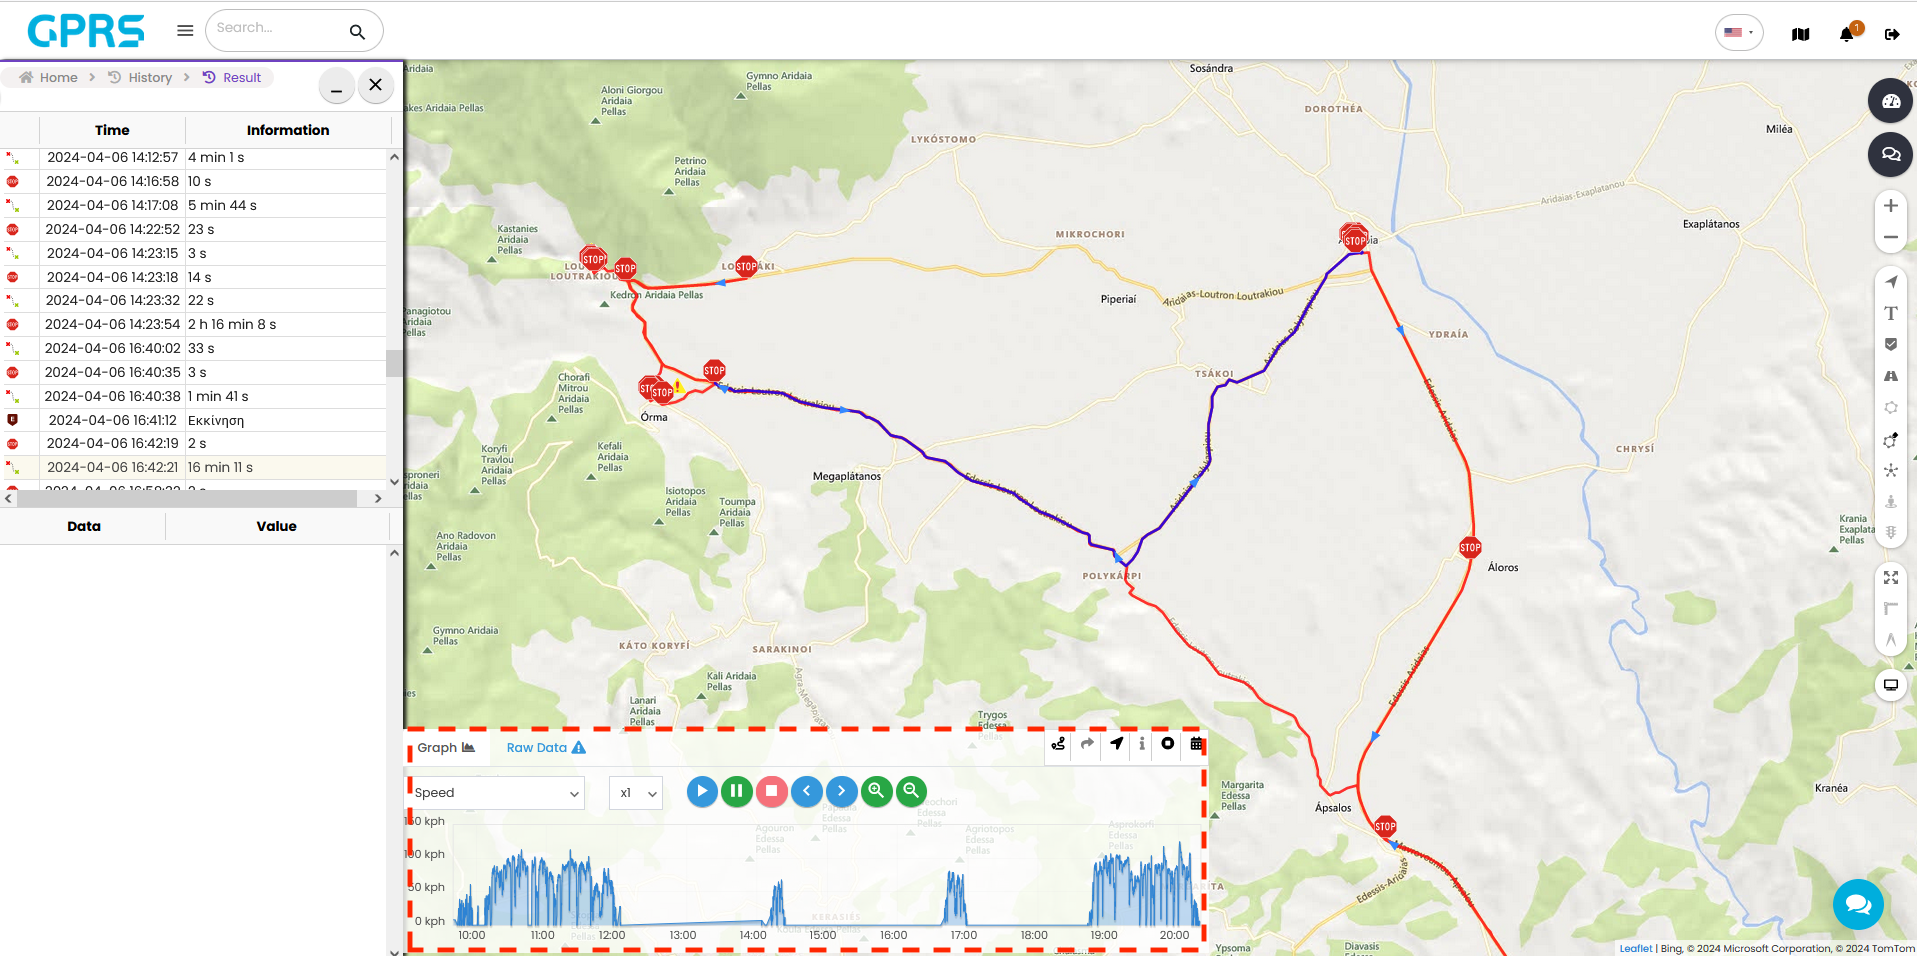
A window also appears below the route. This contains all available sensors in graph form. If we hover our mouse over the graph, we will see the individual sensor value with the relevant timestamp.
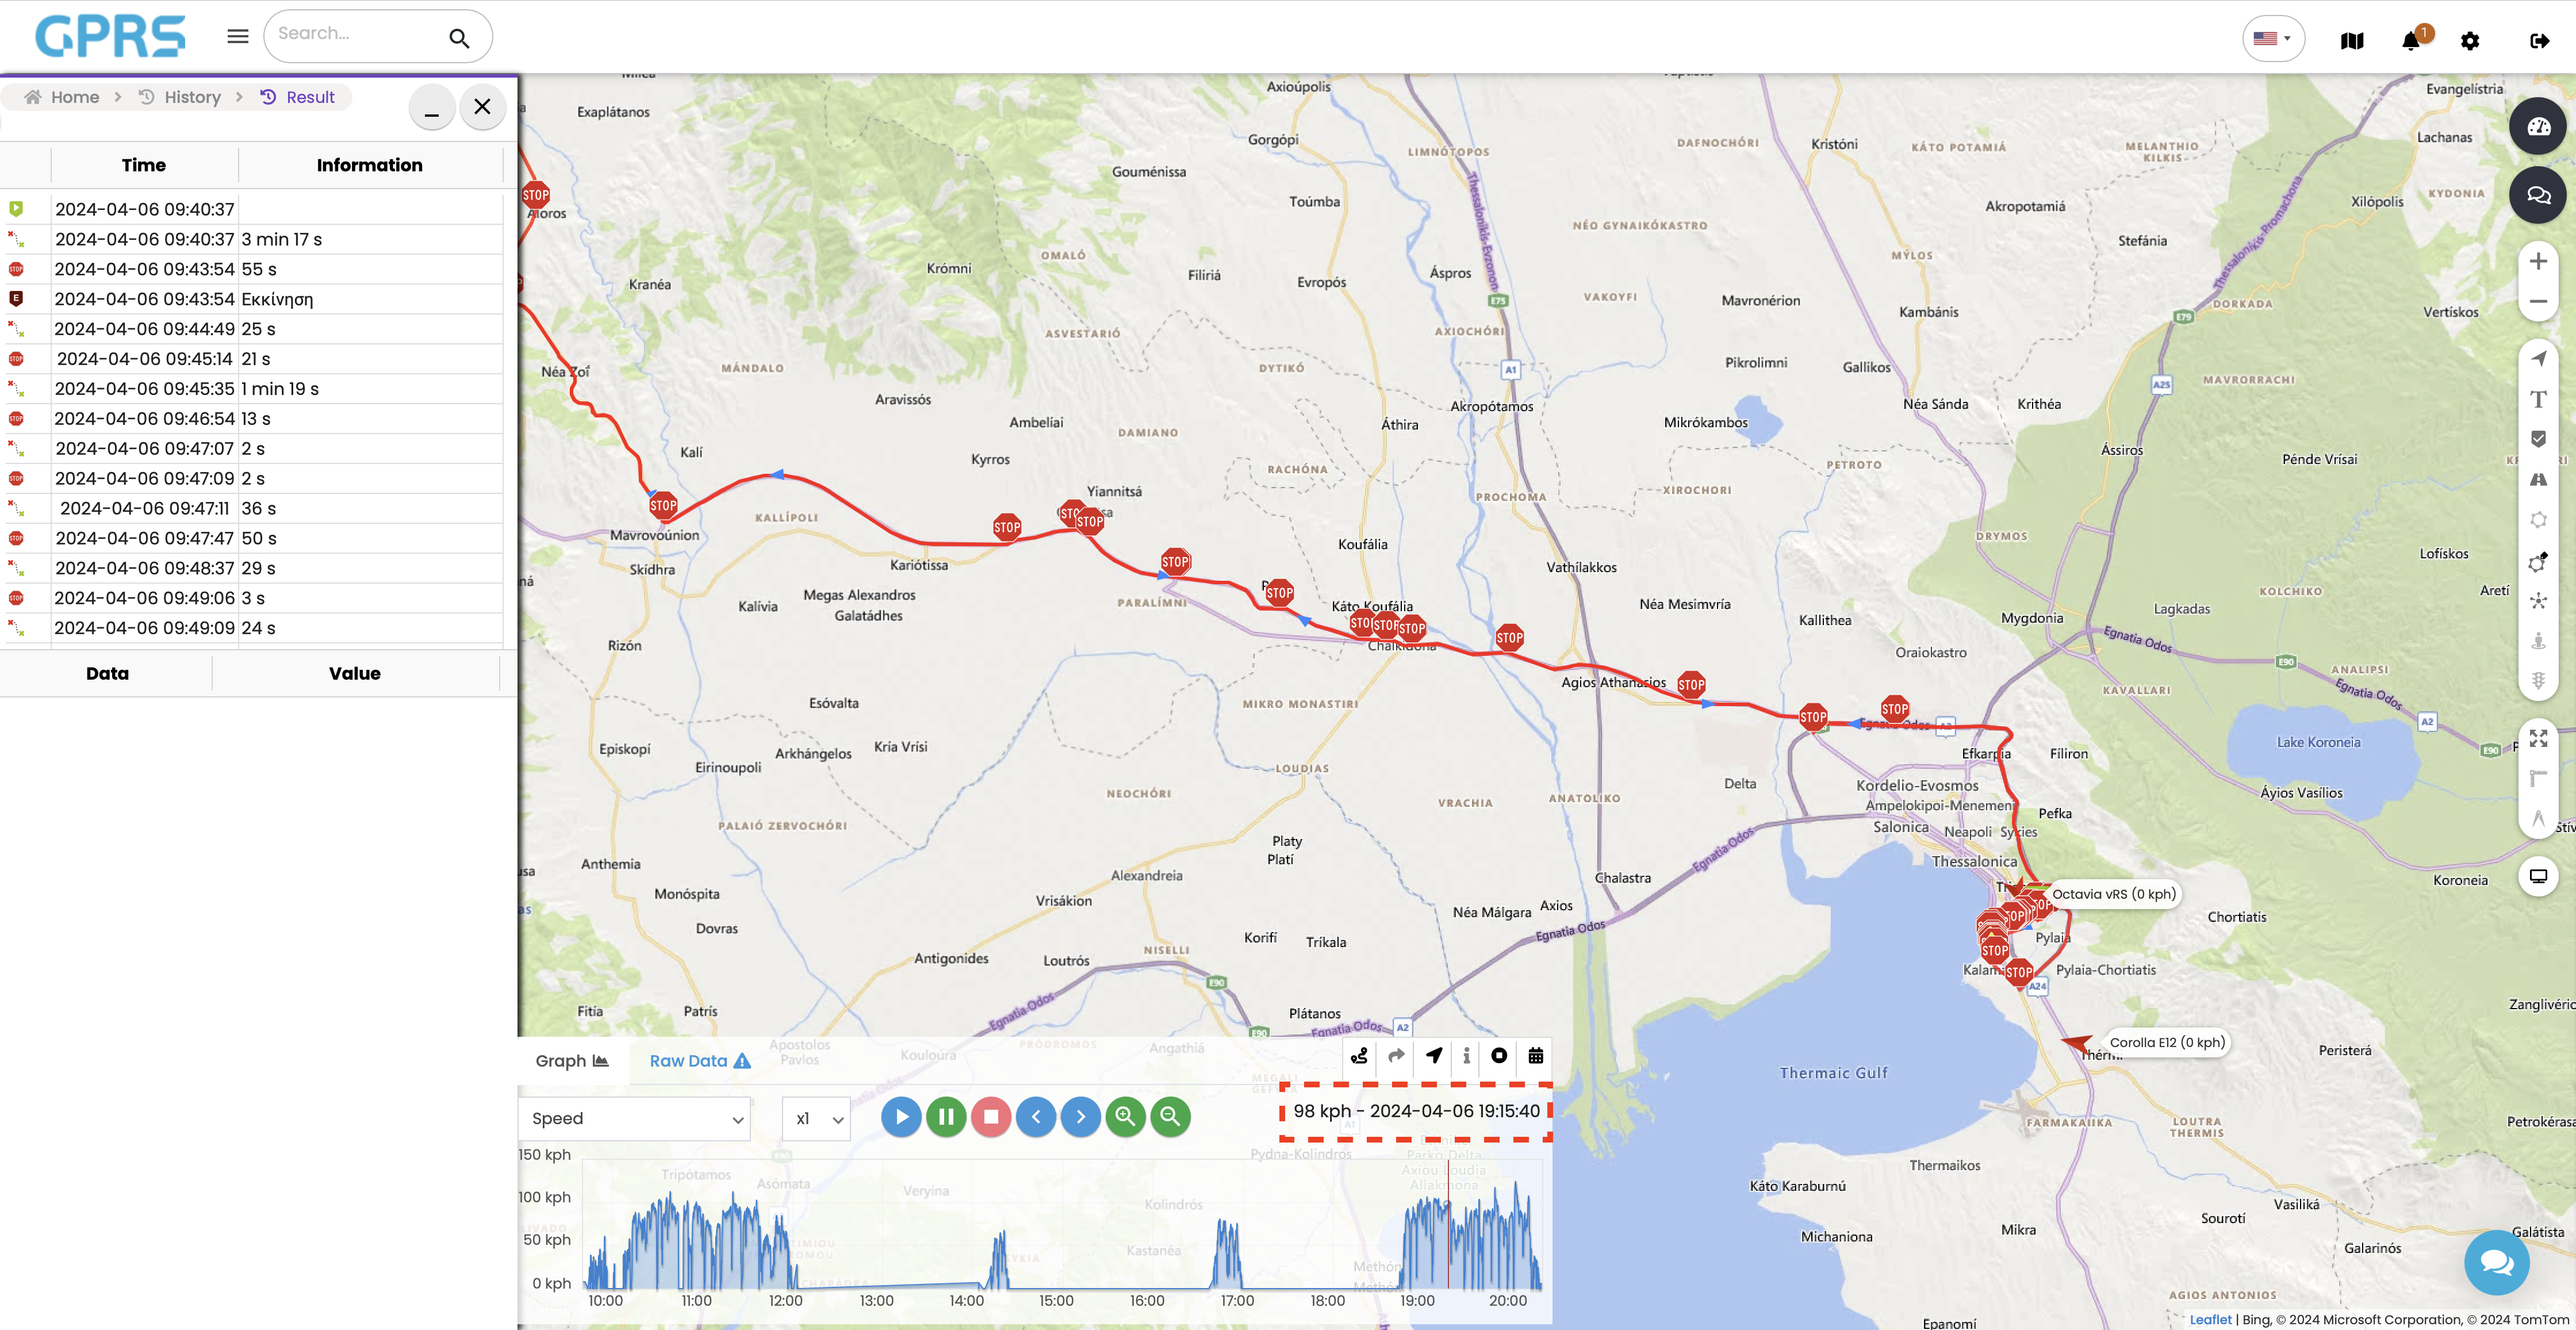
Also with the play ![]()
![]() , pause
, pause![]()
![]() and stop
and stop ![]()
![]() buttons , and by selecting the speed, we can play back the vehicle's route.
buttons , and by selecting the speed, we can play back the vehicle's route.
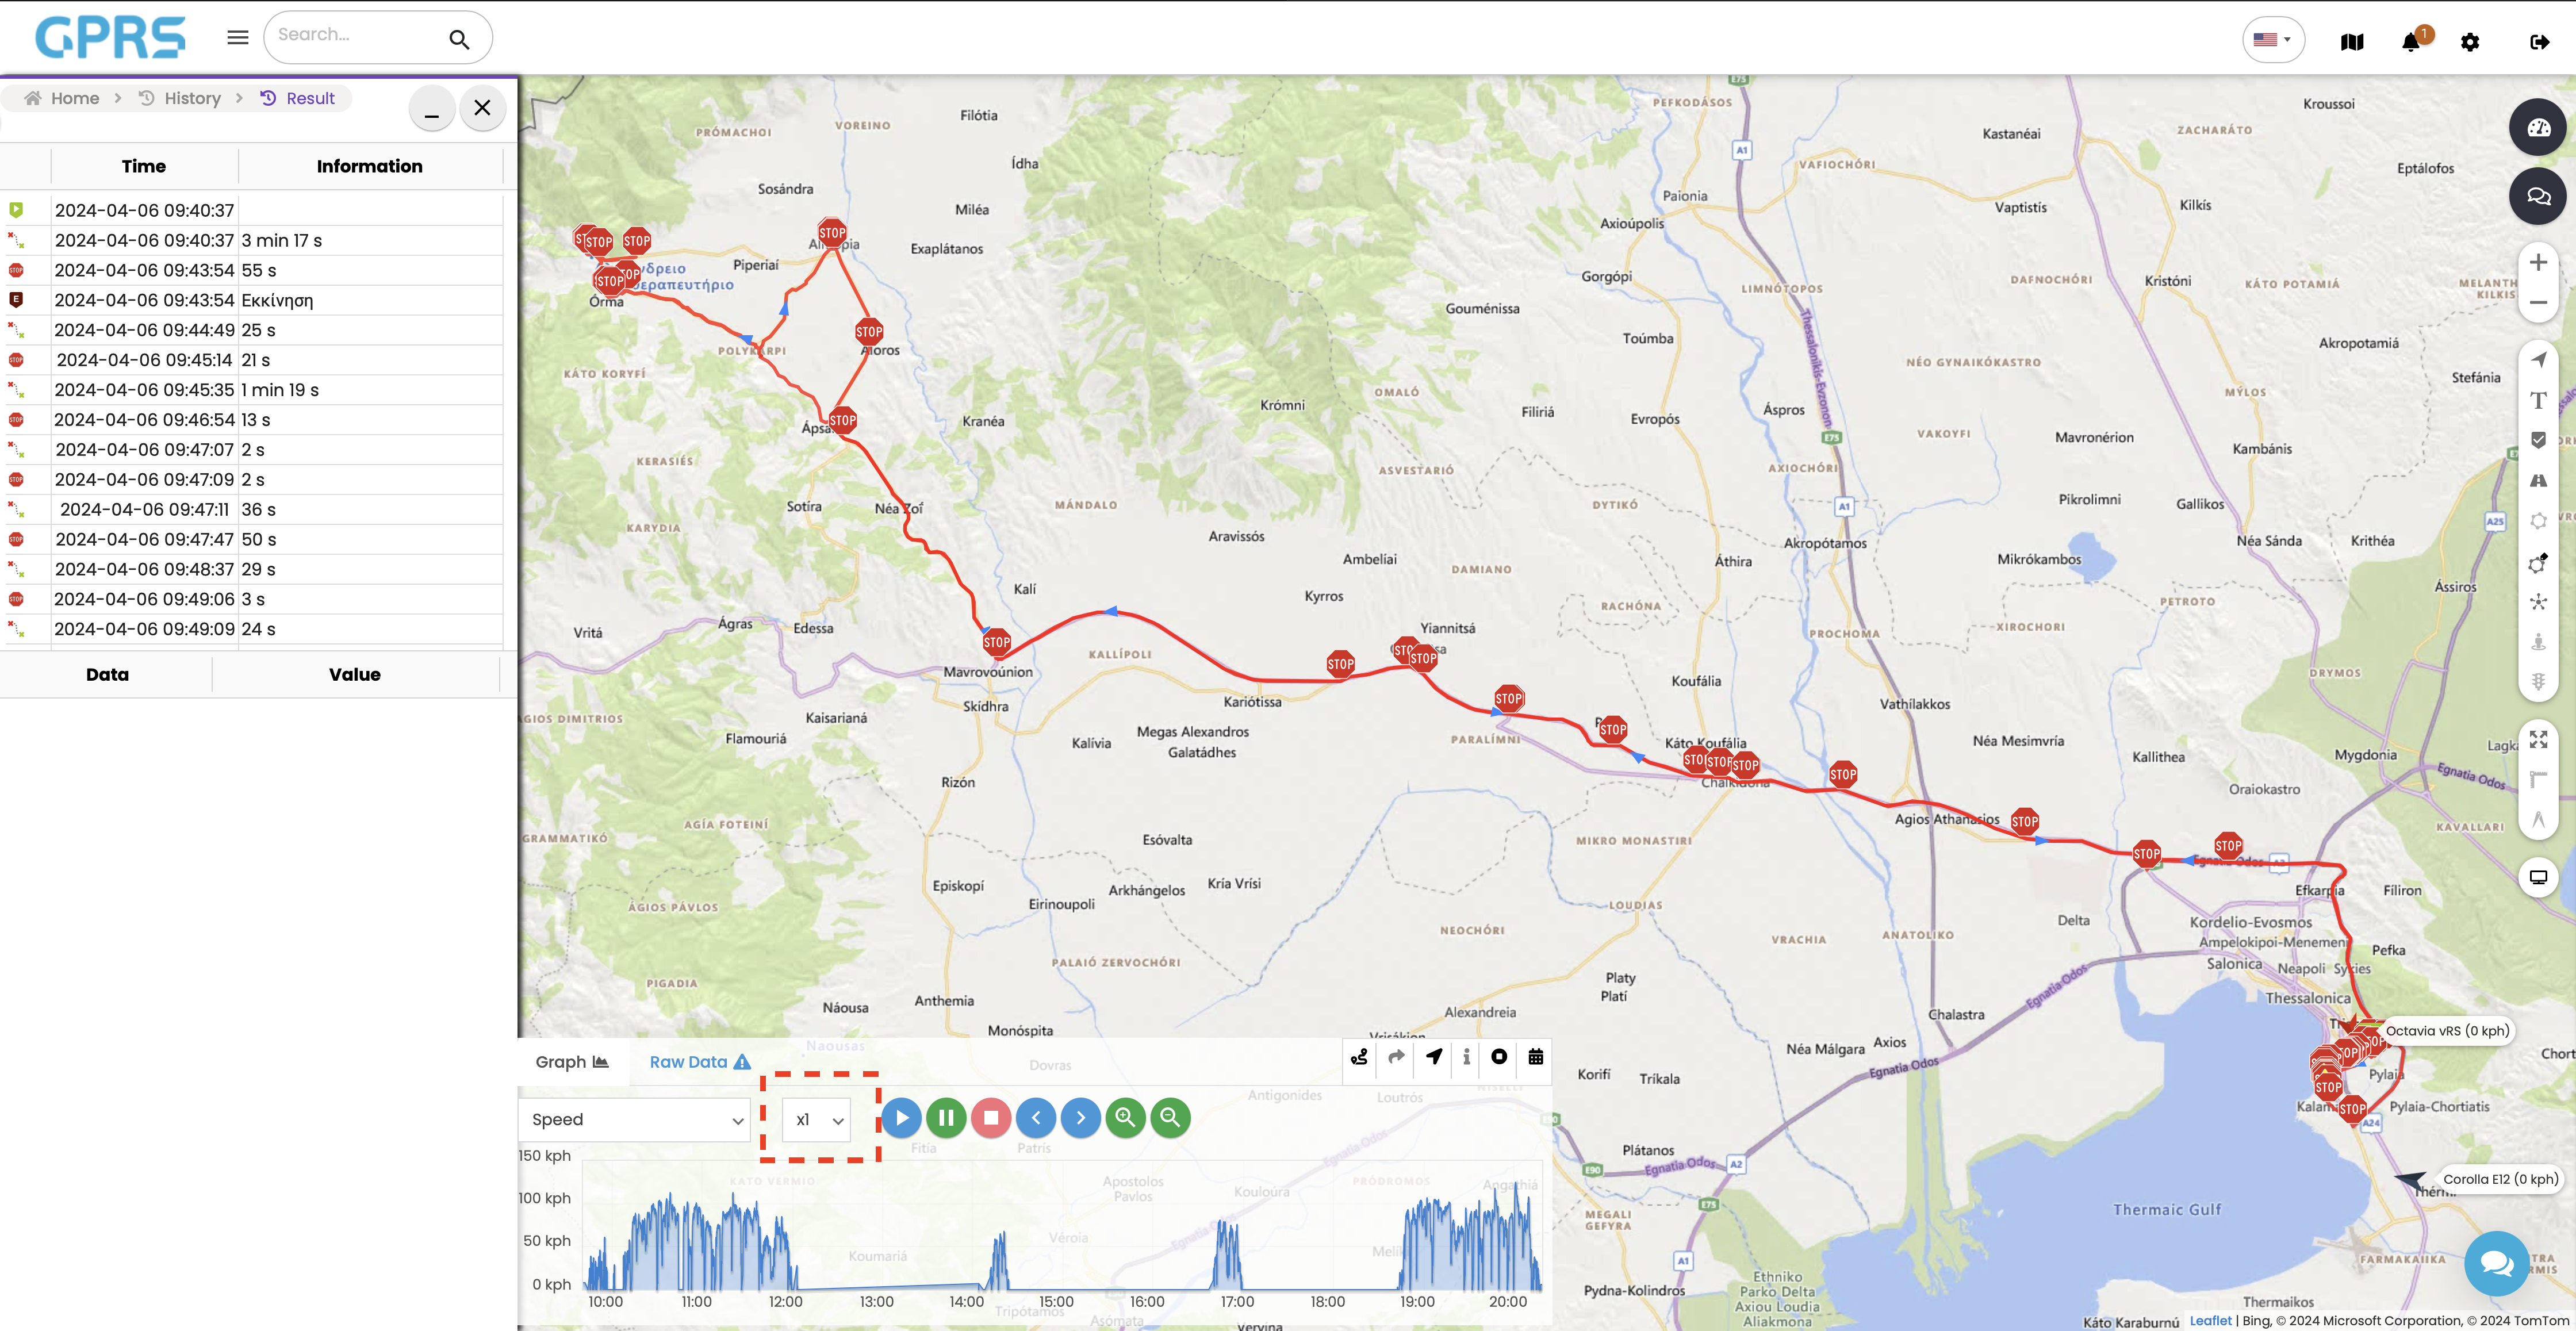
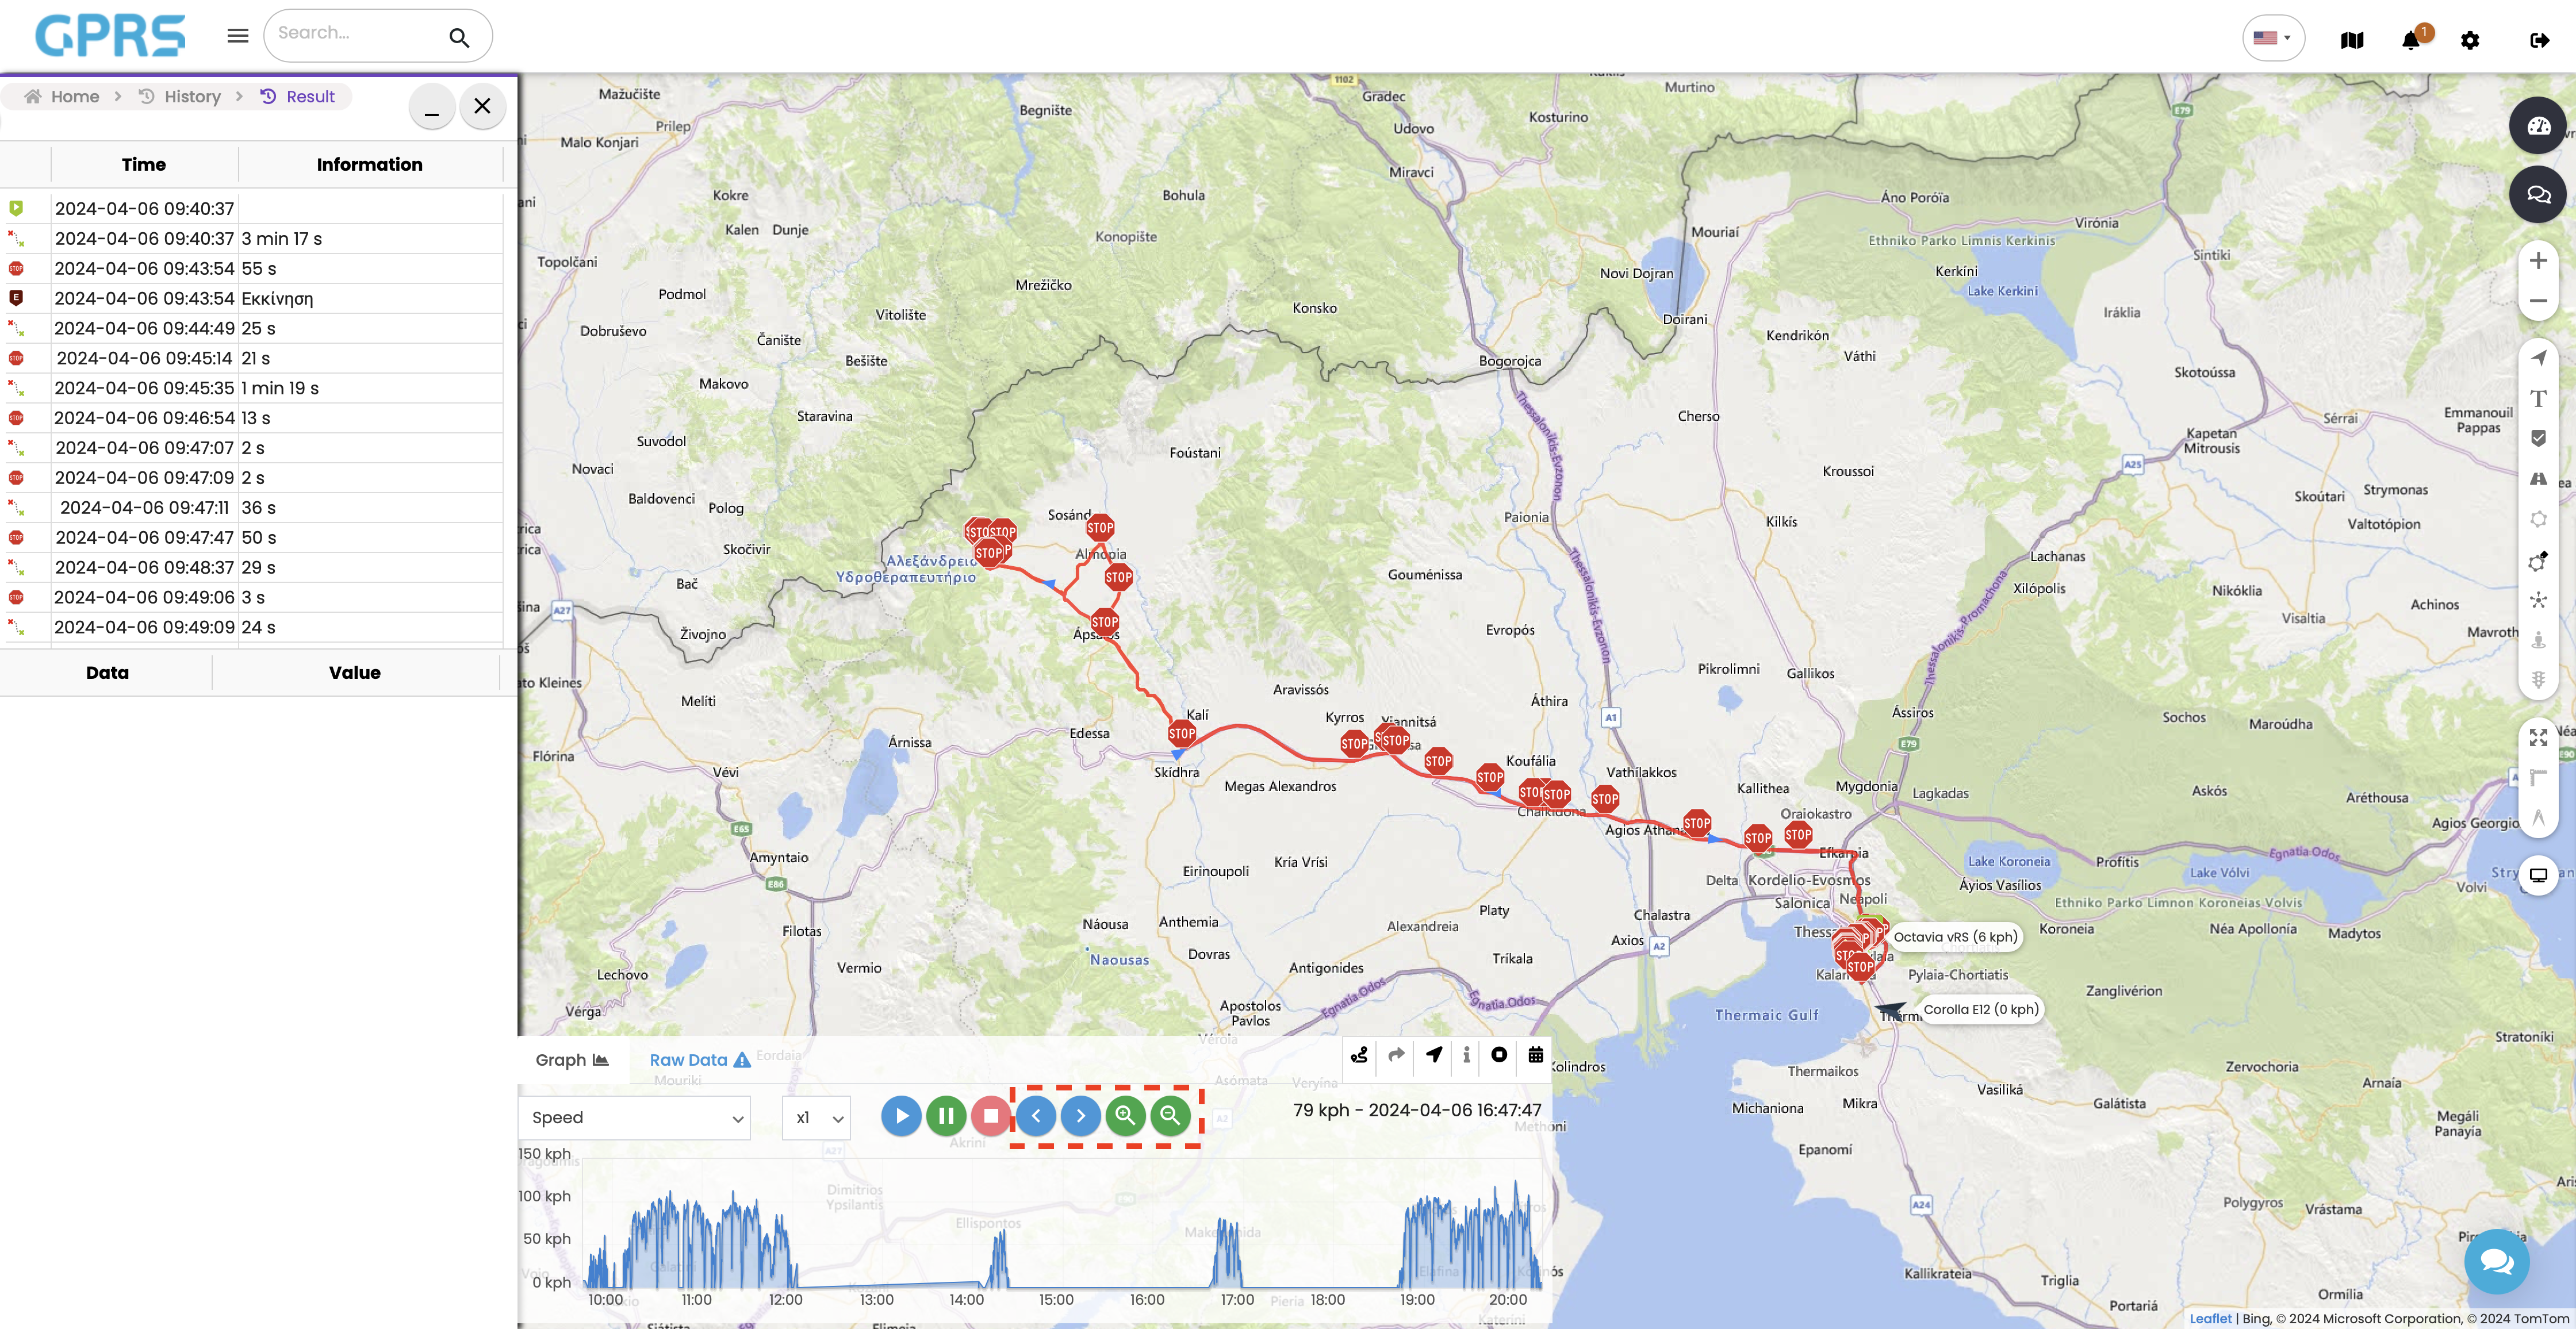
With the left right field buttons we can navigate further before or further after the playback point we are currently at. With the zoom in and zoom out buttons we can see more or less detail respectively in our graph.
On the right top of the graph window we see some icons that allow us to manage the way we see the route on the map.
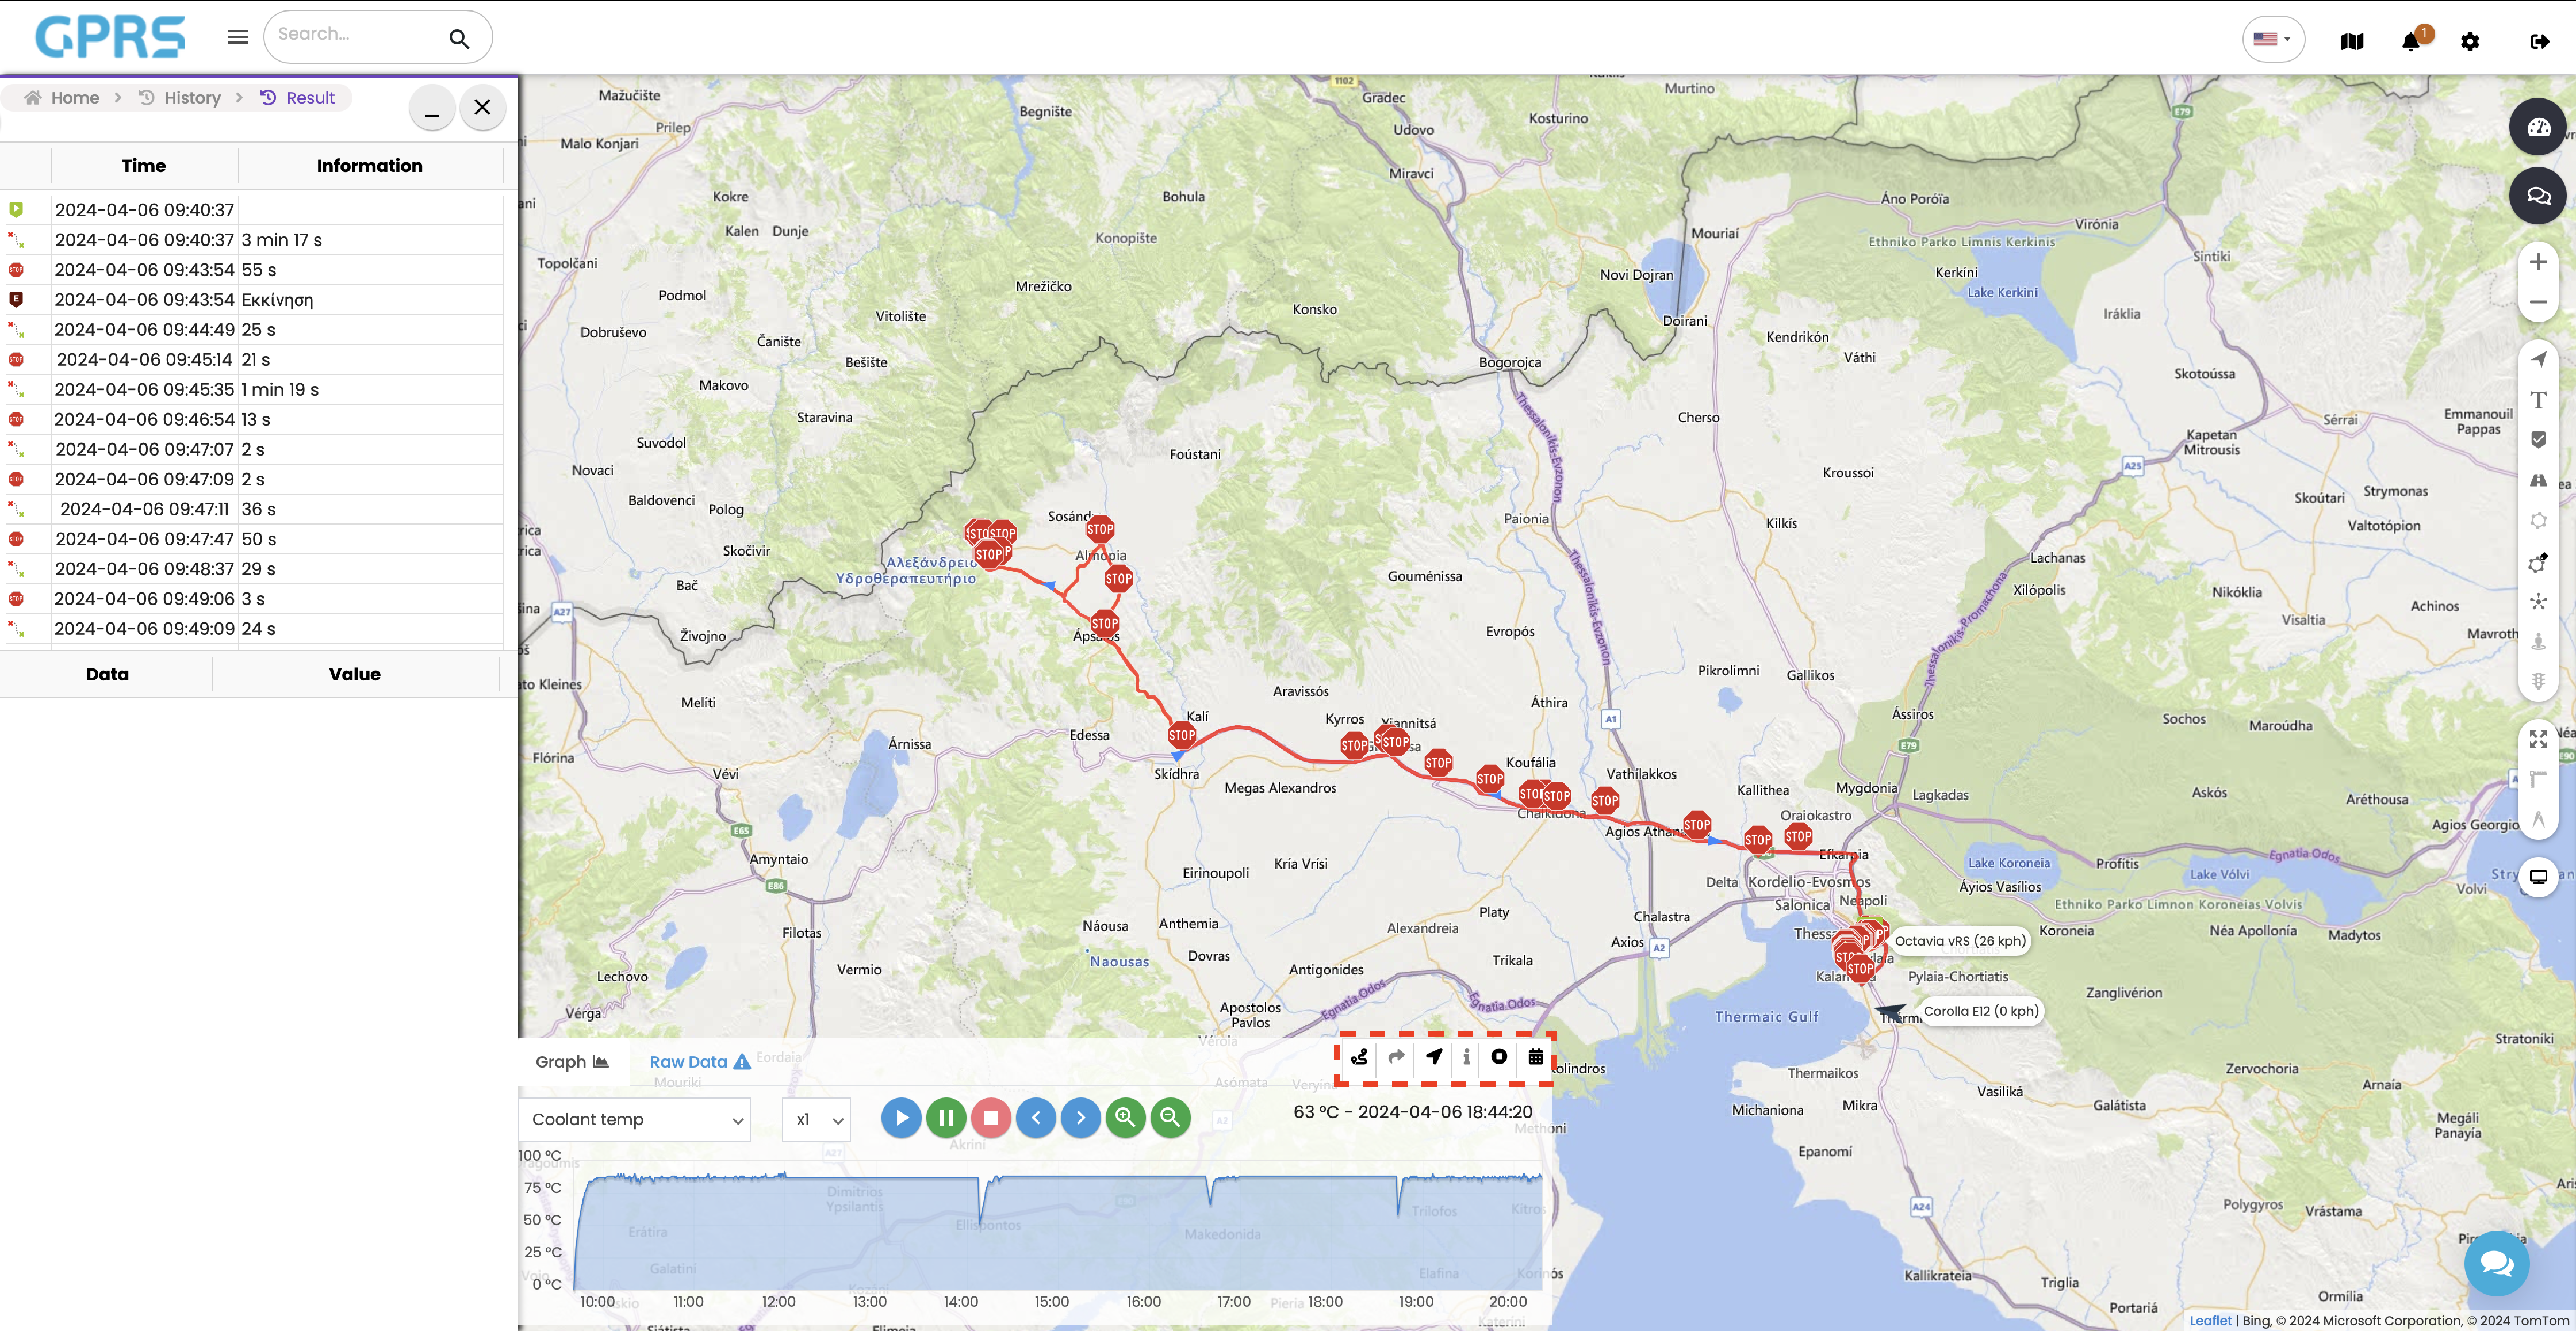
Clicking on the Route ![]() option highlights our selected route and all the rest of the route "disappears". Tapping the option again returns us to the previous view of the result.
option highlights our selected route and all the rest of the route "disappears". Tapping the option again returns us to the previous view of the result.
By tapping Open (Attach to road) ![]() the GPS track is aligned exactly with the roads on the map. If we tap it again we see the track exactly as received by the GPRS platform whether it is adjacent to a road on the map or not.
the GPS track is aligned exactly with the roads on the map. If we tap it again we see the track exactly as received by the GPRS platform whether it is adjacent to a road on the map or not.
Pressing the Arrow ![]() button shows us the direction of the vehicle on the map at each point of the route with arrows.
button shows us the direction of the vehicle on the map at each point of the route with arrows.
Tapping on Data Points shows the points on the map where the vehicle provided data to the GPRS platform.
By tapping the Stops ![]() we can show or hide the stops of the vehicle on the map.
we can show or hide the stops of the vehicle on the map.
By clicking on Events ![]() we can choose to show or hide events that may have been created during the specific route.
we can choose to show or hide events that may have been created during the specific route.
In Events menu, you can see all kinds of notifications your account has active.
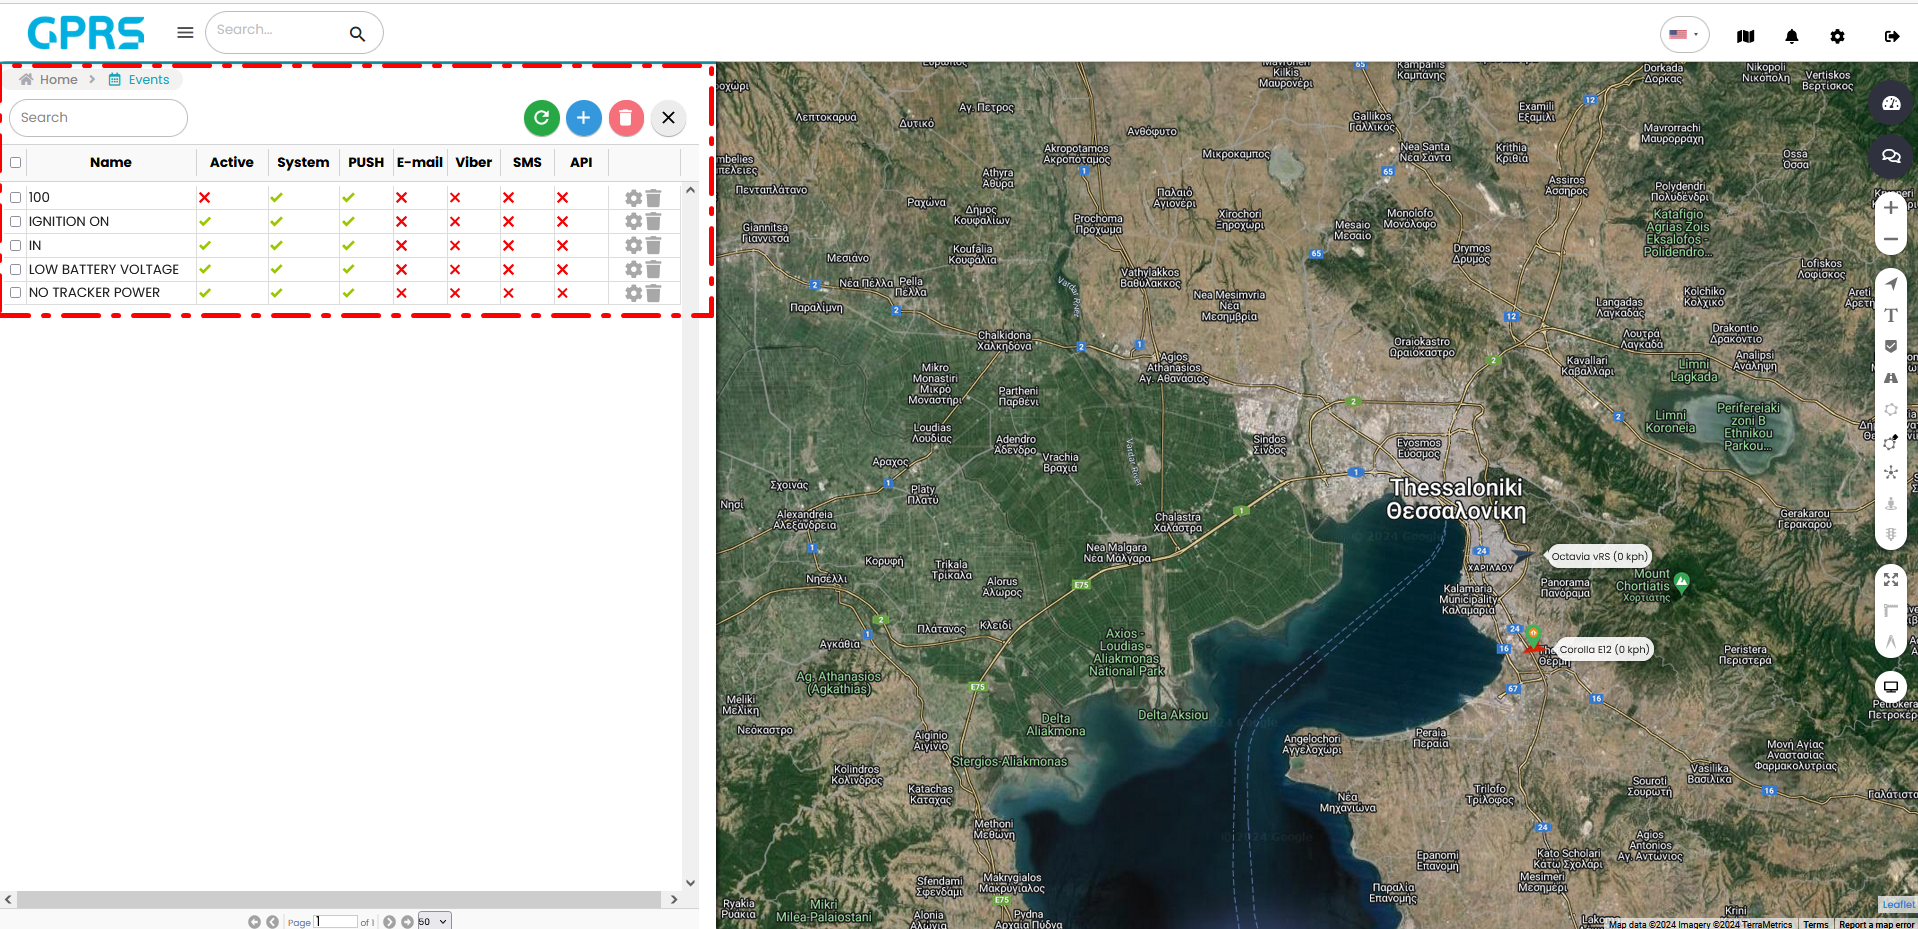
If you have multiple events you can search for them via the Search field. Case sensitive.
However, it is recommended that the creation and management of events be done through the Settings menu (Settings>Events>Event Add-on).

Selecting an event reports the data of your vehicle at the bottom left and displays its location on the map at the time it happened.


In the lower left part there is information about altitude, odometer, vehicle model, battery, nearest marker, nearest zone, inclination, whether the engine was running, geographical position, SIM card number, server and location time, GSM and GPS values.*
A window appears on the map at the location where the event occurred, which includes various information:

Brief tab (Device, Event, Address, Location, Altitude, Inclination, Speed, Time and Odometer, etc.), Detailed tab (Device, Event, Address, Location, Altitude, Inclination, Speed, Time, Odometer, GPS, GSM, Automatic Geofence, Engine, Battery, etc.), Detailed tab (Device, Event, Address, Location, Altitude, Inclination, Speed, Time, Odometer, GPS, GSM, Automatic Geofence, Engine, Battery, etc.). a)*, as well as Cockpit View, which shows you the roads and the surrounding location of your vehicle. By double clicking on the window, it opens a new tab in our browser with the location of our vehicle in Street View.


*(results may vary depending on your device model, installation and programming)

Pressing the event search button , opens the filter window to specify the devices, time along with the calendar interval and the type of event for which you would like the program to show you notifications.

You can select multiple devices and multiple zones or routes if you have them. In the Type pop-up menu, you choose which type of event you want to search for from the available events you have scheduled.

Once you have selected the ones you are interested in, you can either press the search button ![]() to display the results on the GPRS platform, or press the button
to display the results on the GPRS platform, or press the button ![]() to choose to export and save the search to your PC in Excel file format.
to choose to export and save the search to your PC in Excel file format.
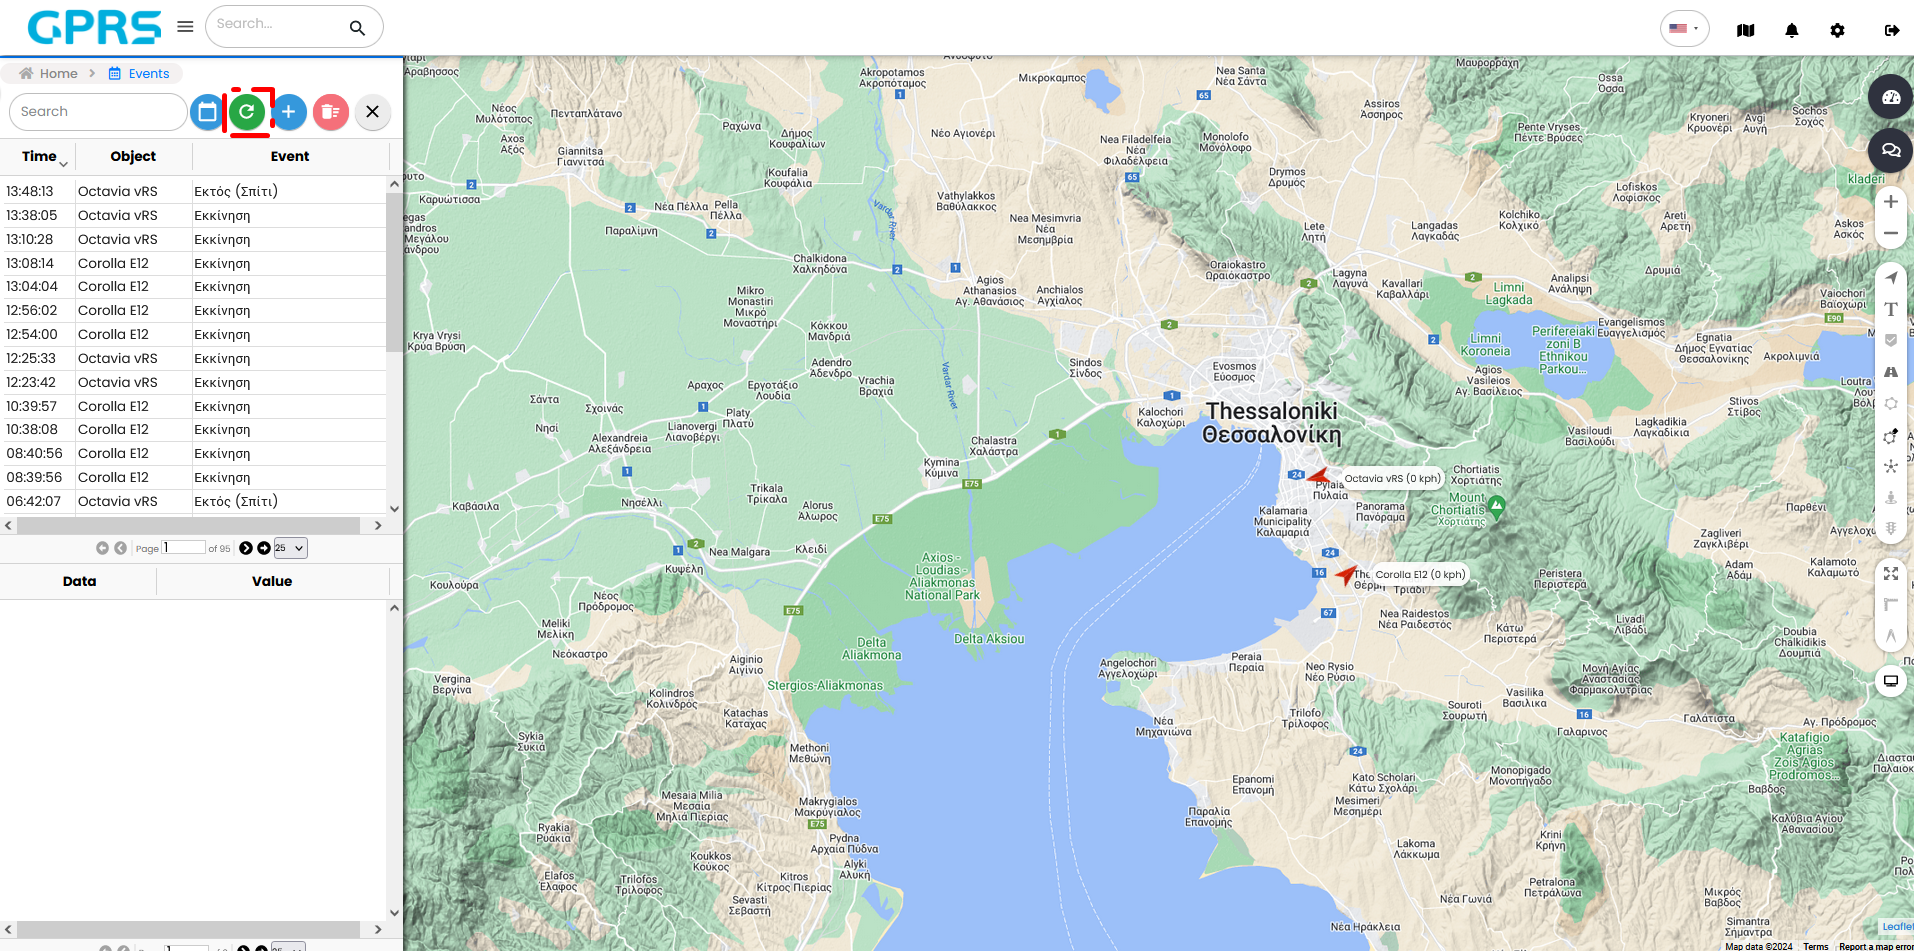
This button clears the filters you have set, reloading all the events generated by the tracking platform.
The plus symbol at the top of the menu , opens a sub-menu for entering a new event.


This sub-menu consists of four tabs: Main, Time, Notifications and Device Control.

In the Central tab, you can define whether this event will be active or not, its name and its type. Also, you can select which devices it will affect, which routes and zones. At the bottom of the tab, you can set a set of conditions, which when satisfied will send you the notification.

On the Time tab, you can choose in the first part of the tab to receive the next notification for this event after the time interval you have selected. (If you have set a speeding alert and the speed of the vehicle is constantly "playing" above and below the limit you have set, to avoid generating an excessive number of alerts, we set to send us an alert for that event after, say, 5 minutes) In the second part of the tab you can select the days of the week for which you want to receive notifications, and if you are interested in specific times, you can activate the "Time of day" option in the third part of the tab, the desired days and times.

In the Notifications tab, you can enable the means by which you want to receive notifications. By activating the option the button shows green. If not enabled it is grey.

Push Notifications: instant push notifications. It refers to the ability of your device (mobile, tablet) through the application to push notifications to your desktop.
Messaging system: Enables the ability to be able to see notifications once we click the top right button in the browser . This option must be enabled to be able to have a history of notifications and Push notifications.
Auto hide: It gives us the option to allow the events that are created to be automatically hidden after a certain amount of time or we need to hide it by clicking the X in the top right of the pop-up event window.
Reporting system: It gives us the ability to have the system hold alerts and recall them when we want to see them in a report.
Alarm sound: Here it is possible via the menu by clicking on it to select one of 15 different sounds. The corresponding sound will playwhen there is an alert.
E-mail message: The system here gives us the possibility to receive from the GPRS platform an email message to the email account we have registered. It is necessary to indicate our email address in the field on the right.
Send SMS: By choosing to send SMS, the system sends the notification in a message to our mobile phone. It is necessary to indicate our mobile phone number in the field on the right. (We need to purchase a messaging package to be able to activate this service. More details in the Settings menu)
Viber notifications: The system here allows us to receive messages in our Viber account as well. To register the Viber account we need to contact Skytrack's technical support department at +30 2310 365 067 or the respective Manager to which you belong.
Webhook-api system: Here the system gives us the possibility to create a command which through Webhook-api technology can communicate with any of our devices which are connected to the Internet. E.g. "smart" garage door that will open via GPRS when our vehicle is in a certain zone.
Security Signal Centre: GPRS enables us to send email and SMS to a company that receives signals generated by the alerts. For example a security company.
The options called E-mail Form and SMS Form have a drop-down menu when we click on ![]() . Forms are a message template that we create when we want to be notified of specific events with custom text and data. For example we may have prepared a form for a speeding alert and another for an out of zone vehicle. The forms are explained in detail in the Settings > Forms menu.
. Forms are a message template that we create when we want to be notified of specific events with custom text and data. For example we may have prepared a form for a speeding alert and another for an out of zone vehicle. The forms are explained in detail in the Settings > Forms menu.
With the colors we have the ability to change the color on the vehicle arrow and the item list when the event occurs so that it is easily distinguishable when looking for the event.
On the Device Control tab the system gives us the ability to send a command to the device on your vehicle. We can arm/disarm the alarm, turn off the engine, take a picture, start or stop vehicle monitoring, or even turn on/off a custom function that we have set up exclusively for our own vehicle. (The above functions must be supported by your device and provided for during installation and programming) These options are located in the pop-up menu of the Form field.

In the gateway field we have the option to send the command via GPRS or SMS (it is recommended to use GPRS).
The Type field gives us the option to select the code in which to send the command ASCII or hexadecimal (HEX). In the Command field we put the command we want to send.

This button deletes all events created by the GPRS platform.
Here are the menus to make settings and to see all the markers, routes and zones that you want to control in your account.

Clicking on the Markers option displays a menu with the available actions.
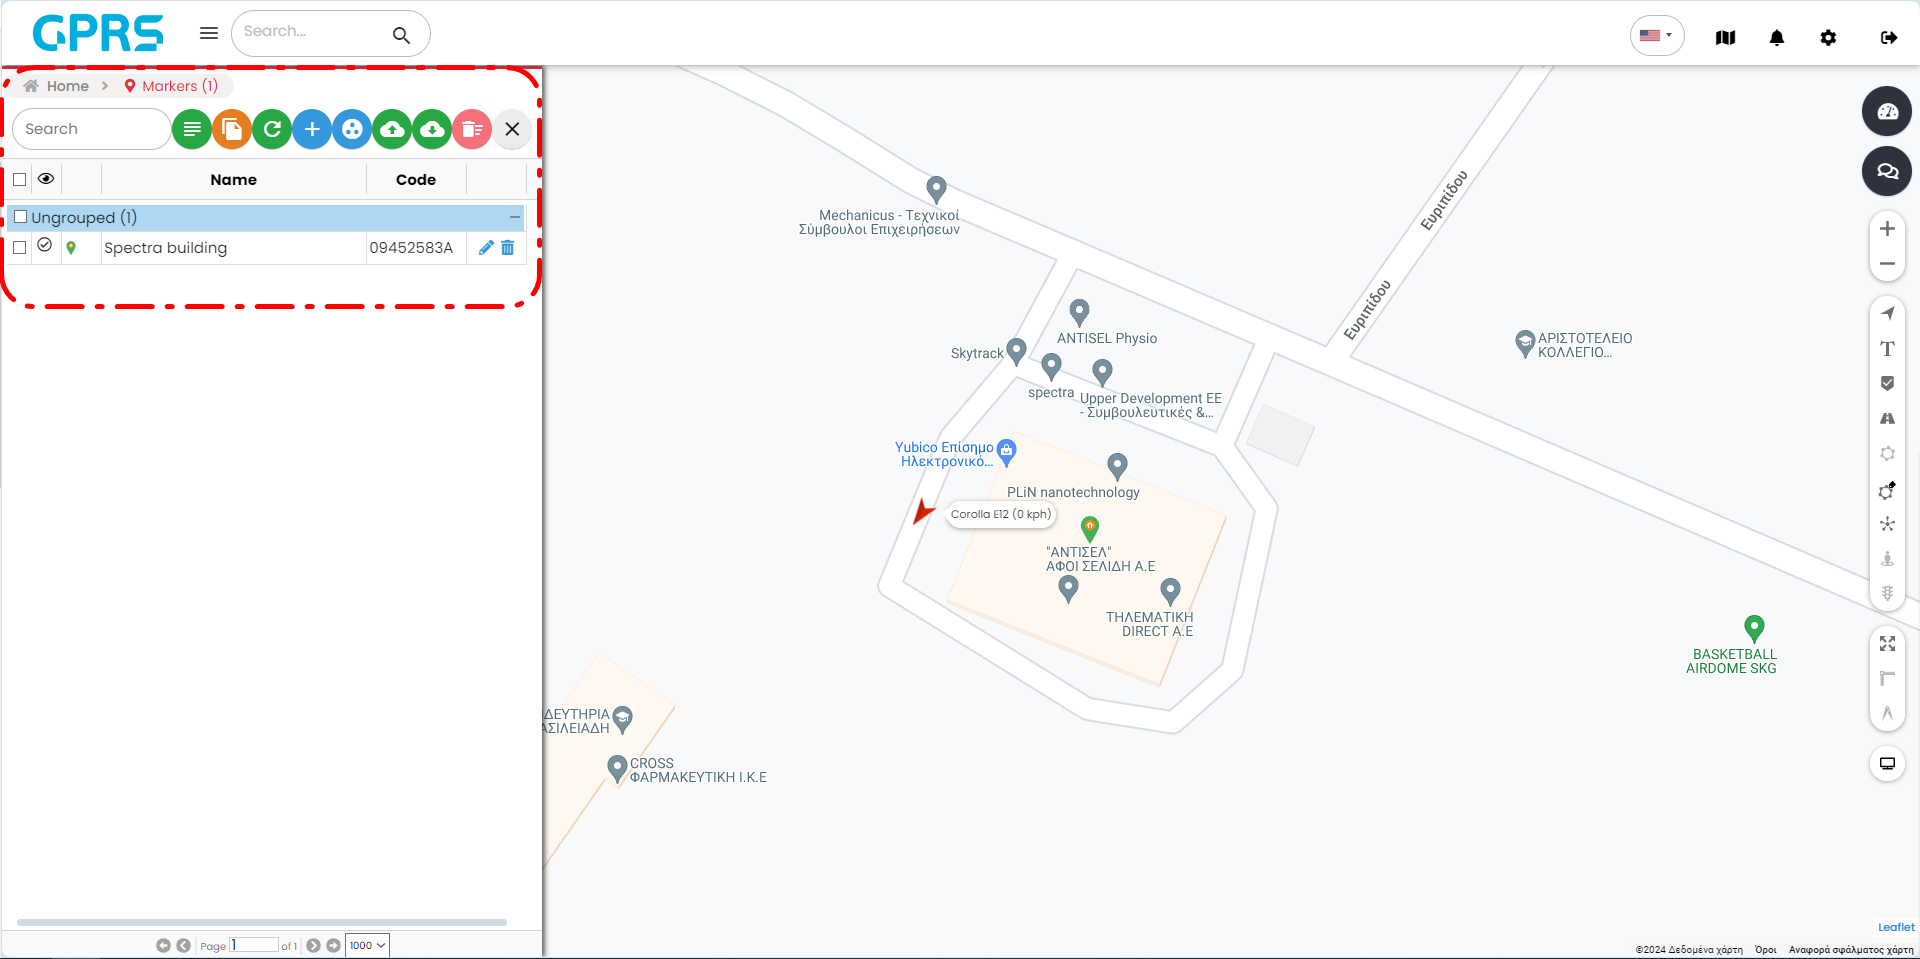
At the same time you can see the markers you have already added to your account. If you have multiple indicators you can search in the Search field.

With the Convert option ![]() you can create a Zone from a marker. Selecting at least one marker (you can make multiple selections) and clicking Convert opens the Marker Grouping menu.
you can create a Zone from a marker. Selecting at least one marker (you can make multiple selections) and clicking Convert opens the Marker Grouping menu.
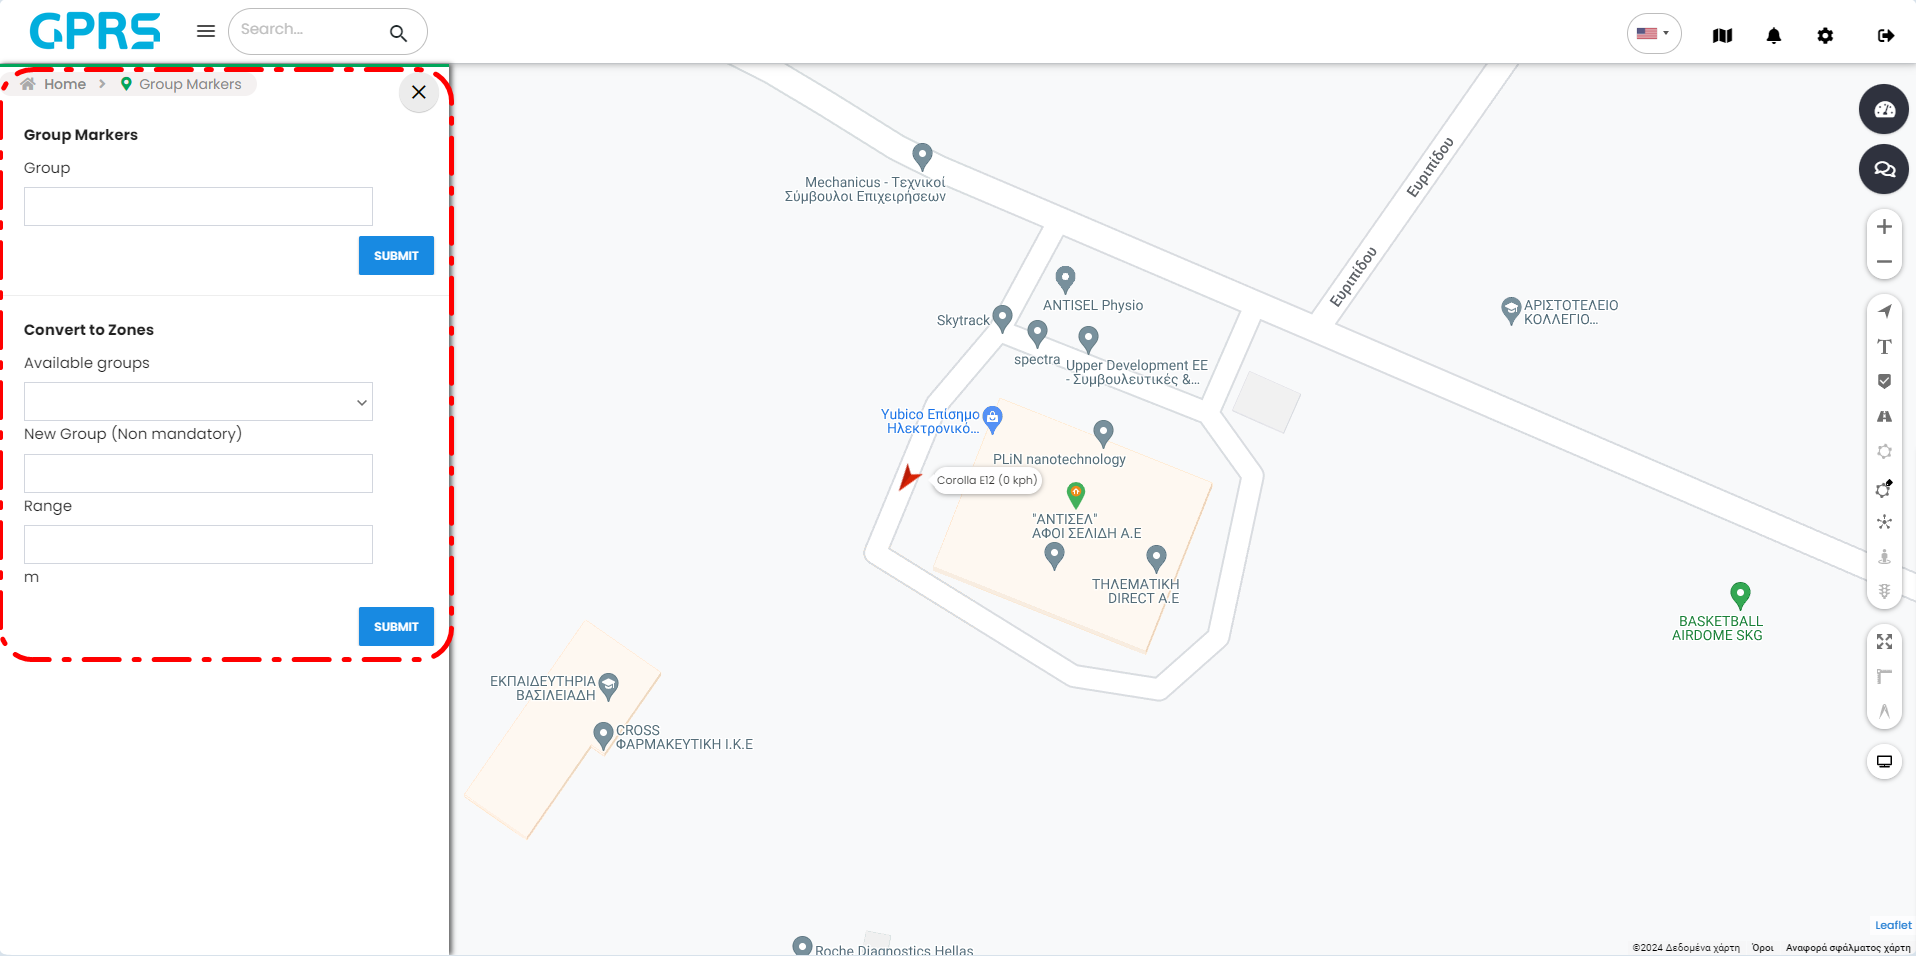
If there is more than one marker then in the Group field of the Index Grouping submenu we can give them a common name. By clicking on ![]() it we can insert the markers into an existing group. If we don't have any groups we can in the New Group field, give a name to the zone group we are creating. The distance field allows us to set the size of the zone to be created. E.g. 25, our zone will be a 25×25 meter square.
it we can insert the markers into an existing group. If we don't have any groups we can in the New Group field, give a name to the zone group we are creating. The distance field allows us to set the size of the zone to be created. E.g. 25, our zone will be a 25×25 meter square.

The program allows you to click on the Excel Template button to save an excel file called Places Excel Template.xlsx. This file is the template for entering points of interest into GPRS en masse.
The Reload button refreshes the list of markers we see.
By pressing the add new marker button you can add markers ![]() (you can choose the type of icon) to the points of interest (e.g. Home, Company Headquarters, Warehouse etc.) and the menu for adding a new marker opens. In the Name field we write the name of the indicator and below in the Description field, we give a short description about the indicator. If we want and we already have groups by clicking on we can select the group we want the new index to belong to. To the right of it we can choose if we want the marker to be visible on the map or not. Just below we see the available icons that will indicate the point on the map. Last step is to left click on the map with our mouse on the point we want. Then by clicking save, we save our new marker.
(you can choose the type of icon) to the points of interest (e.g. Home, Company Headquarters, Warehouse etc.) and the menu for adding a new marker opens. In the Name field we write the name of the indicator and below in the Description field, we give a short description about the indicator. If we want and we already have groups by clicking on we can select the group we want the new index to belong to. To the right of it we can choose if we want the marker to be visible on the map or not. Just below we see the available icons that will indicate the point on the map. Last step is to left click on the map with our mouse on the point we want. Then by clicking save, we save our new marker.

With the Groups button ![]() , you can group, put your markers in groups with the name of your choice.
, you can group, put your markers in groups with the name of your choice.

Importing one or several indexes you have in an Excel format file (based on the template) from your PC is done with the Import button ![]() . Saving the selected indexes to an Excel format file on your PC is done with the Export button
. Saving the selected indexes to an Excel format file on your PC is done with the Export button ![]() . To delete indexes click anywhere on the index line to select it, the box on the left shows one and then the Delete button is used to delete the selected indexes.
. To delete indexes click anywhere on the index line to select it, the box on the left shows one and then the Delete button is used to delete the selected indexes.
Editing a marker can be done with the Edit button and deleting it with the Delete button.

In the Routes menu you can add routes that you run frequently or that interest you (e.g. home-company, truck routes, etc.) and manage existing routes.


At the same time you can see the routes you have already added to the system. If you have many routes you can search in the Search field. There is a pedestrian-capital distinction.

Clicking Reload refreshes the list of routes you see.
Tapping Add New Route allows you to add the routes you are interested in to the New Route Import menu. In the Name field we enter the name of the route and if we want to and we already have groups, by pressing ![]() we can select the group we want the new route to belong to. Just below we are given the option to set the color that the route will have on the map. We can also choose if we want the route and its name to be visible on the map or not. In the deviation we set the limit that the vehicle's signal can have from our route. Last step is to left click on the map with our mouse at the point where we want the start of the route to be and another one at the end of the route.
we can select the group we want the new route to belong to. Just below we are given the option to set the color that the route will have on the map. We can also choose if we want the route and its name to be visible on the map or not. In the deviation we set the limit that the vehicle's signal can have from our route. Last step is to left click on the map with our mouse at the point where we want the start of the route to be and another one at the end of the route.
If our route contains turns we can hold down the left mouse button and drag the intermediate points of our route (boxes) to form the turn. Then by clicking save, we save our new route.

With the Groups ![]() button , you can group, put your routes, in groups with the name of your choice.
button , you can group, put your routes, in groups with the name of your choice.

Importing one or more routes you have into an Excel format file (based on the template) from your PC is done with the Import button ![]() . Saving the selected routes to an Excel format file on your PC is done with the Export button
. Saving the selected routes to an Excel format file on your PC is done with the Export button ![]() . To delete routes by clicking anywhere on the route line to select it, the box on the left shows one and finally click the Delete button. Editing a marker can be done with the Edit button and deleting it with the Delete button
. To delete routes by clicking anywhere on the route line to select it, the box on the left shows one and finally click the Delete button. Editing a marker can be done with the Edit button and deleting it with the Delete button  . More specifically, you can edit its name, the group it will belong to, the colour it will appear in on the map, as well as its deviation in kilometres (km).


In the Zones menu you can add the geofences you are interested in and manage the existing ones.
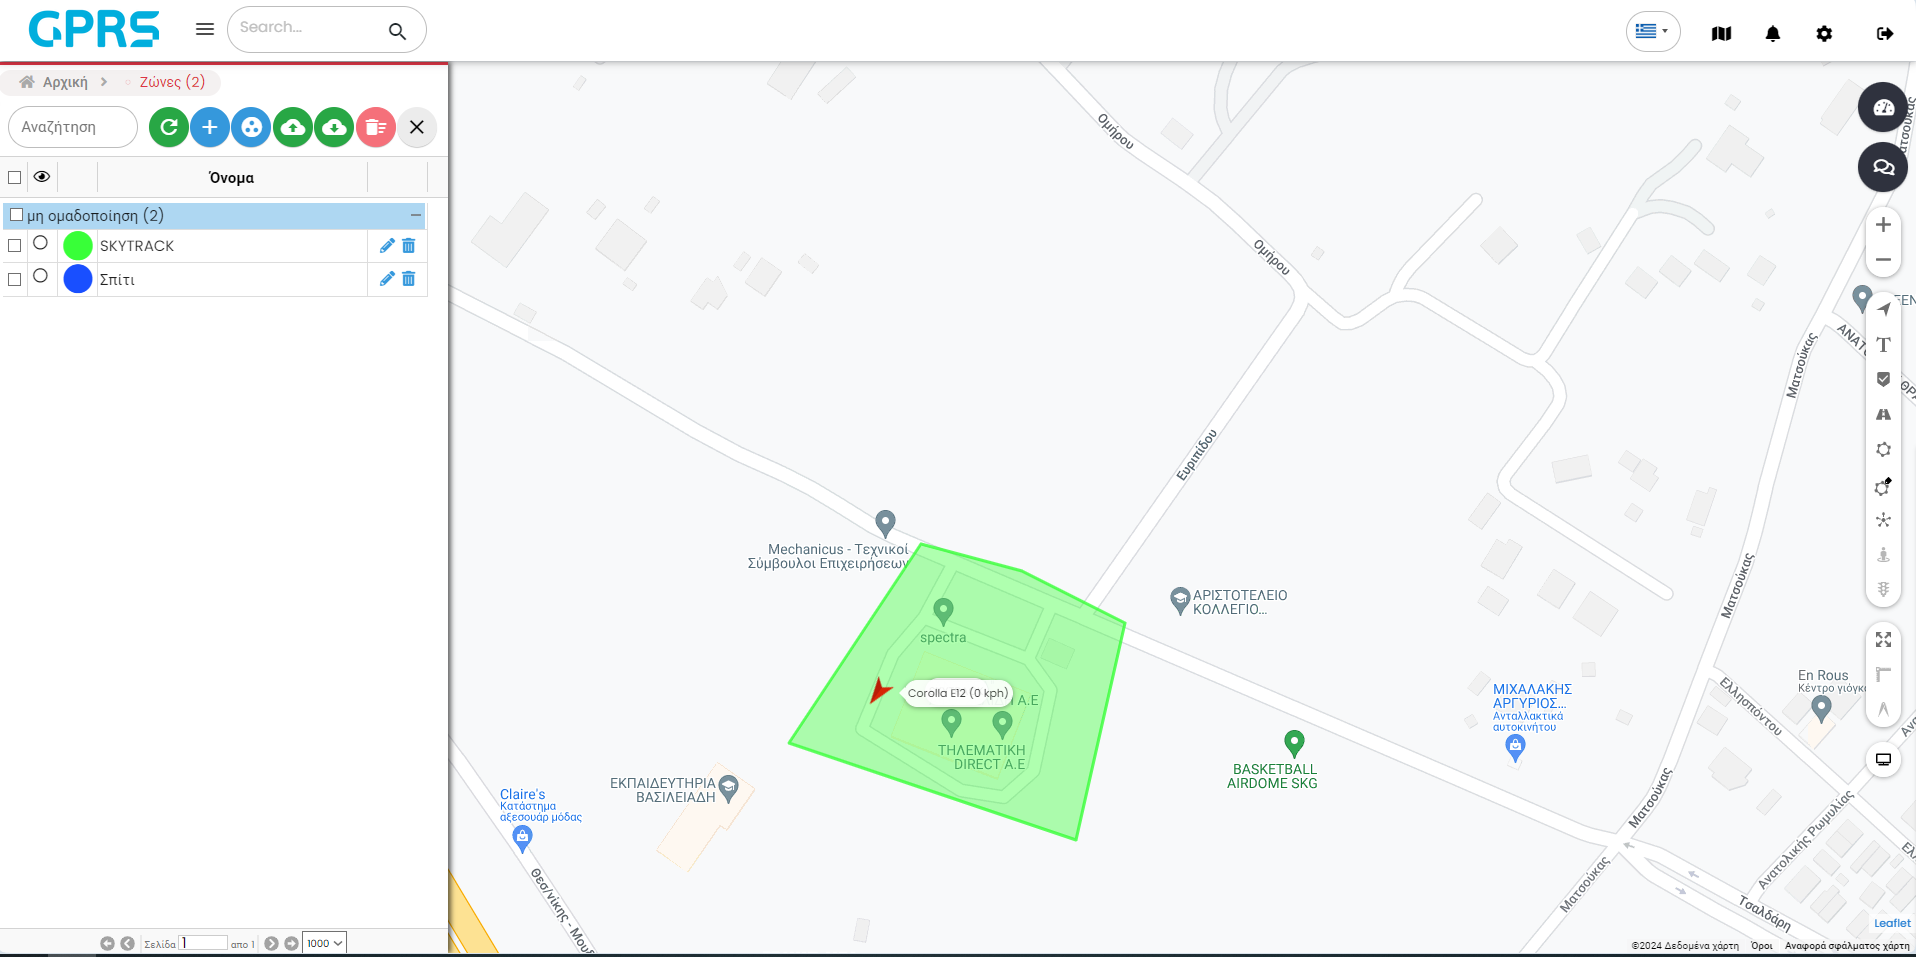
If you have many geofences you can search in the Search field. r
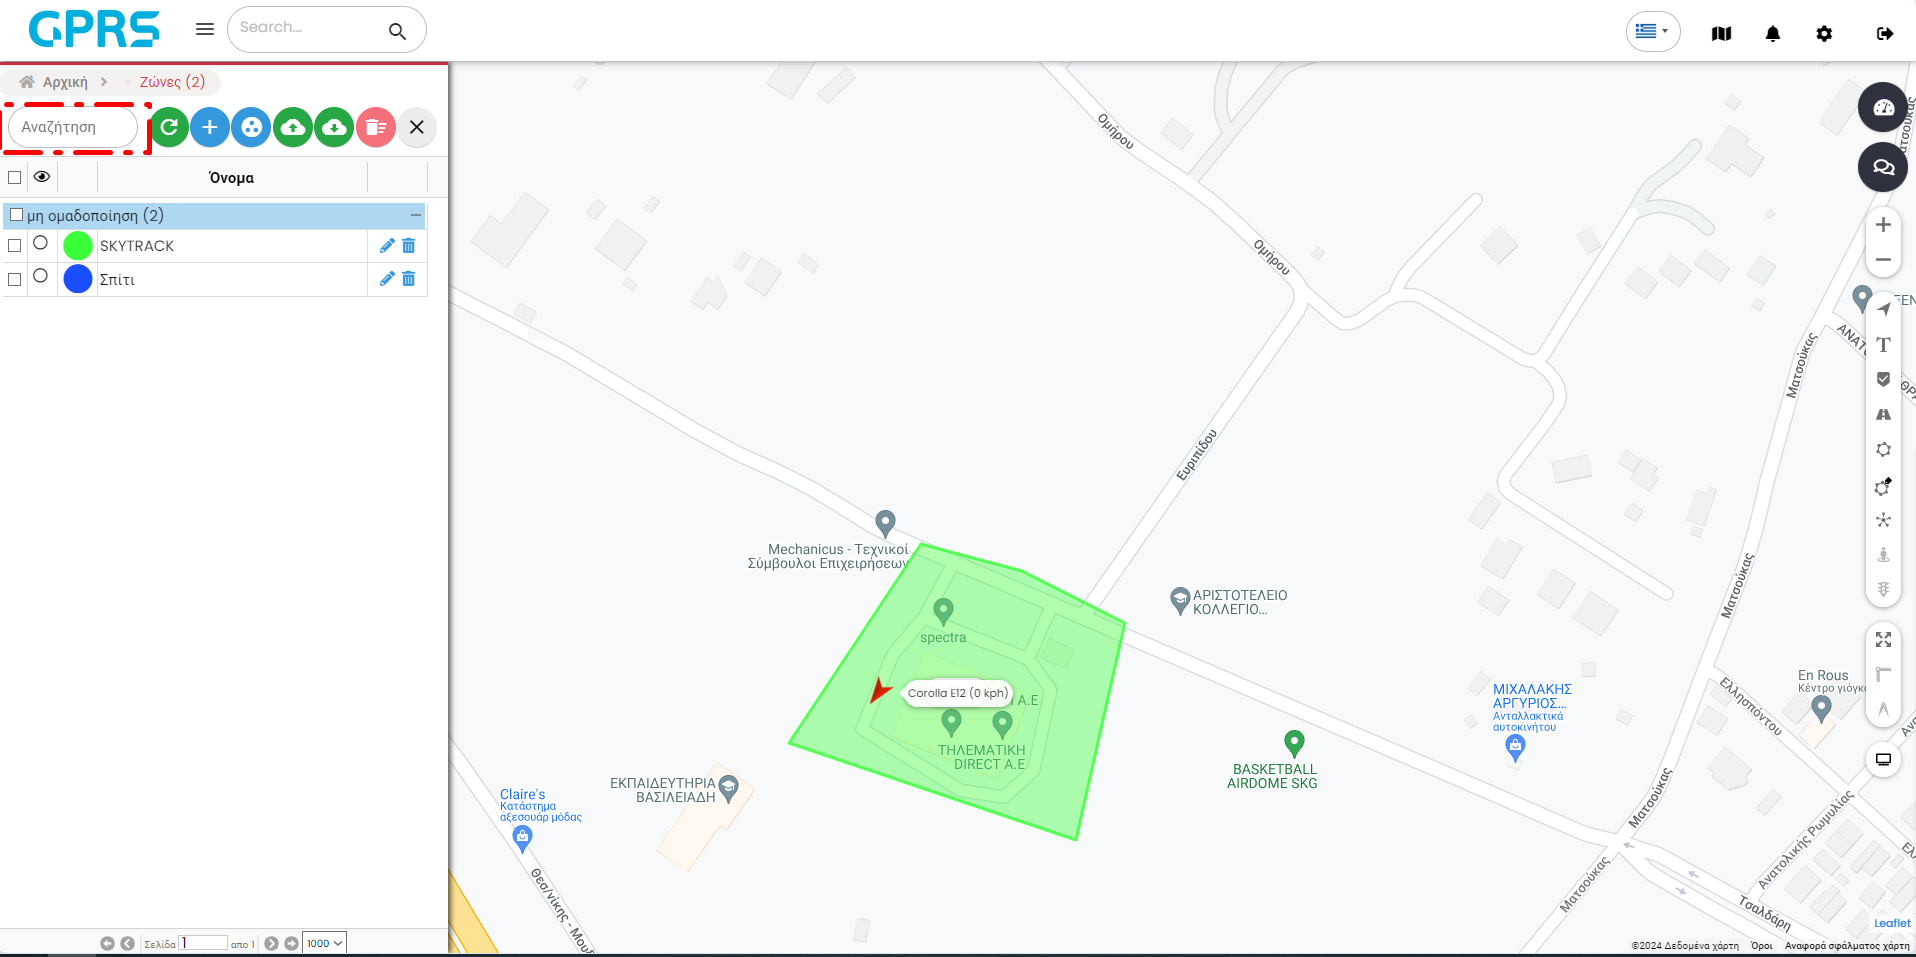
You are given the option to add a new zone by pressing the add button , import a ready-made zone from your PC ![]() from an Excel file, save (export) the selected zones
from an Excel file, save (export) the selected zones ![]() to an Excel file, and delete the selected zones by pressing the Delete selected zones button
to an Excel file, and delete the selected zones by pressing the Delete selected zones button ![]()
With the Groups button ![]() , you can group, put your routes, in groups with the name of your choice.
, you can group, put your routes, in groups with the name of your choice.
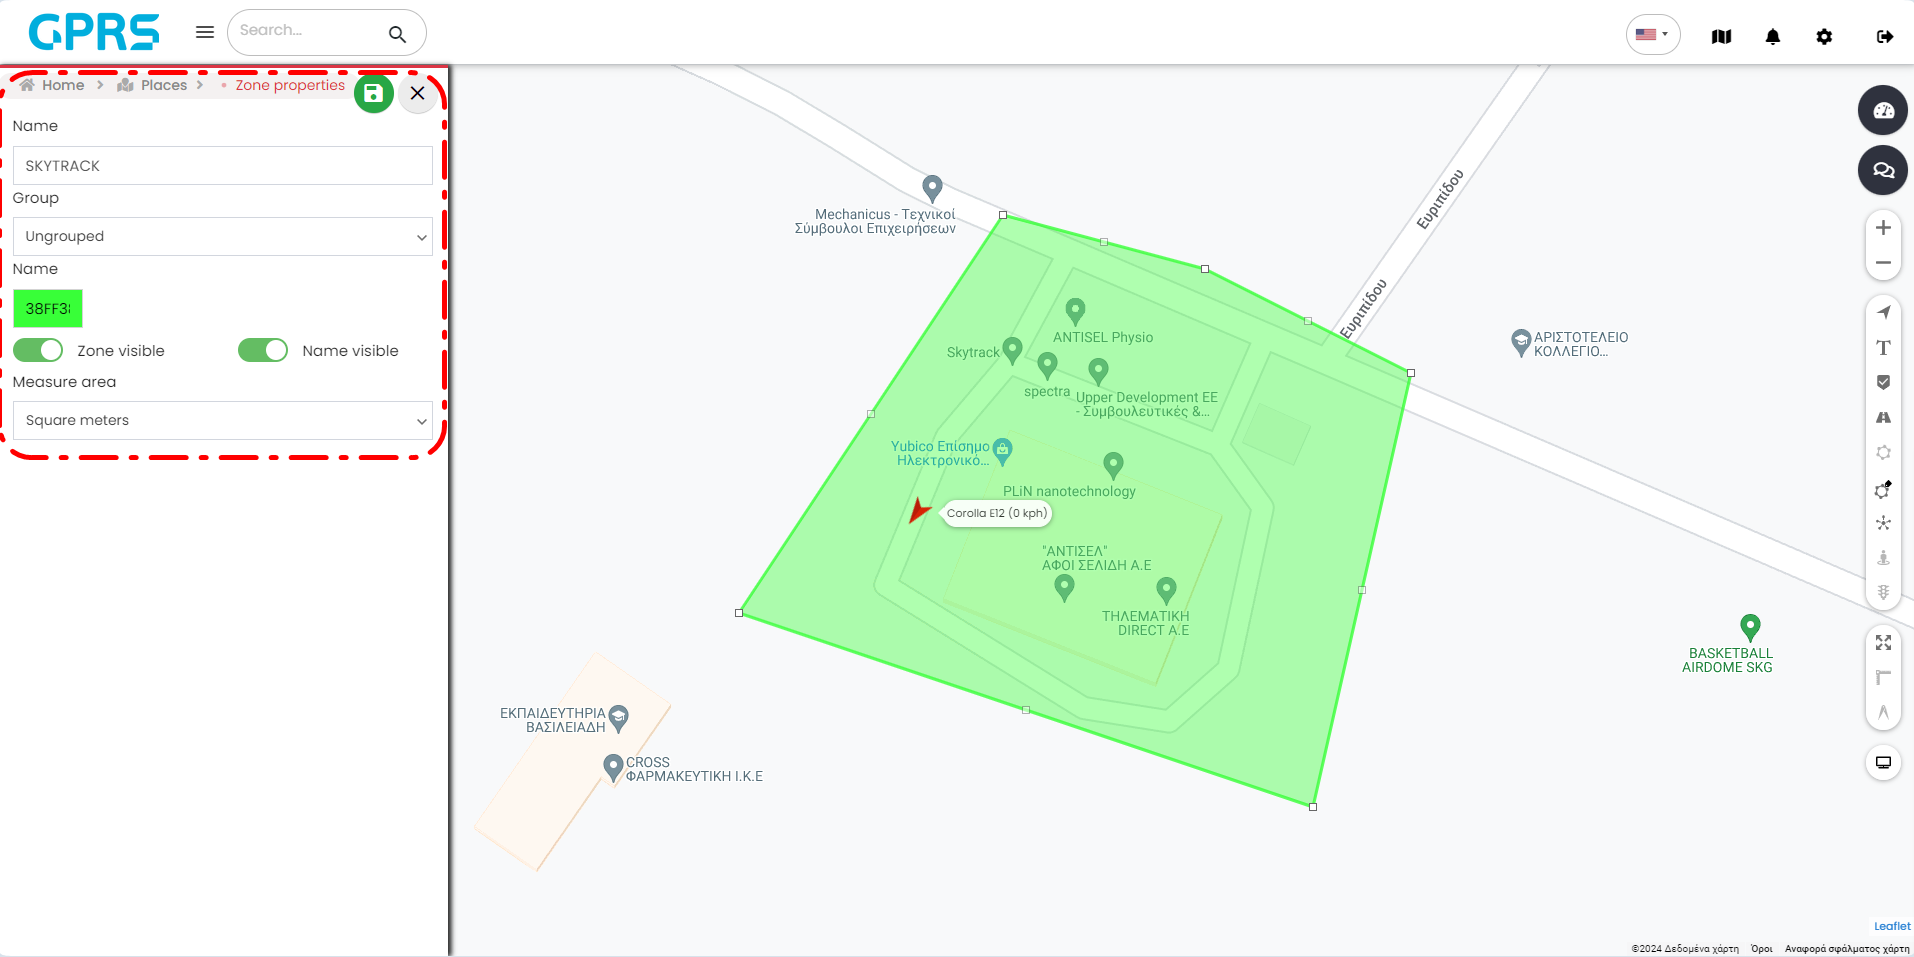
In the list of zones, from the pencil icon you can edit a specific zone and delete it by pressing Delete .Υou can edit its name, the group it will belong to, the colour in which it will appear on the map, as well as the unit of measurement of the measurement area.
In the task menu, the platform administrator can create and assign tasks to his drivers. It is possible to create, edit and live monitoring of their progress, as well as the vehicle that performs them.

Opening the Tasks field, you will be presented with three submenus.

This menu displays all the tasks created by the administrator. There is a search bar and the table gives the basic information about the registered tasks. In particular, at a glance it is displayed:
- the date of creation of the task,
- the name and IMEI of the assignment device,
- the start location and the destination,
- the priority of the assignment as well as
- the status of its progress.
The status of the task is described by the following attributes:
- New: A task that has been created but not yet started.
- In progress: A task that is in progress, within the defined time and space constraints.
- Completed: A task that has been successfully completed, within the defined time frame.
- Failed: A task that has strayed from the start or finish time or spatial frames.

Task Search: You can search for tasks that you have created.

You can search and view tasks based on the following filters.

Export and download tasks based on the filters below.

Filters
- Device: Select the device or devices you want.
- Filter: Select the search or export session.
- From Time: Selects the date and time of the search.
- From Time: Selects the date and time of the search.
- Calendar: Alternate month and date selection for the Job search.


Reload: reload the table to display new or updated jobs.

Add Task: opens the Add New Task menu, described below.

Delete: deletes selected tasks.

In the last column of the table, there are two buttons for managing each task.

Edit: you can edit the task you have created.

Delete: delete a task.

Opening the New task field opens a window where you have to fill in some fields.
- Name: fill in the name of the task you wish to create.
- Priority: a menu appears in which the priority of execution of the task is set.
- In particular, a task can have Low, Medium or High priority.
- Address: to fill in this field there are two possibilities:
- In the first case, indexes must be defined, a list of which is displayed by pressing the key
 . Then the starting point of the task is selected.
 - Alternatively, pressing the button
 will find an address on the map if no markers have been defined. By pressing the above button a point on the map is selected, the left click is pressed and the address is automatically filled in.
- In the first case, indexes must be defined, a list of which is displayed by pressing the key
- From: Selecting a start date for the routing of your job.
- To: Select an end date for your job routing.
- Select Route: select a route you have already created (route creation is listed above).
- Device: select the device you wish to use to run your task that you own.

Task creation:
- Enter the task menu and then select the New Task submenu.
- Enter the desired name for the task you want to create.
- Select the desired priority from the menu.
- Describe the task that the wizard will do.
- Select a starting point for the route.
- Select a start and end time for the job.
- Select a route that has already been defined.
- Select the device that will perform the task.
- Press the save button.
This service is not yet available, but we will be able to use it fully in the future.
This service is not yet available, but we will be able to use it fully in the future.
This service is not yet available, but we will be able to use it fully in the future.
This service is not yet available, but we will be able to use it fully in the future.
In the "Income/Expenses" menu you can see and manage all the income and expenses you have registered.
You can select to display income/expenses for specific devices from the pop-up menu by pressing the ![]() button. The application shows at the top, the total income and expenses for all your vehicles. In the upper right part of the menu, you will find auxiliary buttons for various tasks.
button. The application shows at the top, the total income and expenses for all your vehicles. In the upper right part of the menu, you will find auxiliary buttons for various tasks.
This menu allows you to enter income/expenses generated by your vehicles.

Selecting New Income/Expenses opens a new window in which we can choose whether the entry we make will be an expense or an income.

After selecting Expense, then in the Device pop-up menu you choose which of your devices (if you have more than one) the expense will be charged to. From the Category menu you select the type of expense (Fuel, Maintenance, etc.). In the Price field you enter the cost of the expense. Optionally you can put a description to your expense (e.g. Aegean 95 RON) in the Description field. You select the Date, Time and Minutes in the respective fields and to save the entry click on the icon.
Immediately the expense is entered into the system and you can see it in the list of expenses and revenues.
To enter an Income, click on New Income/Expenses, a new window opens in which we select Income.

In the Device drop-down menu, choose which of your devices (if you have more than one) will receive the revenue. From the Category menu you select the type of revenue (Receipt, Other Revenue). In the Value field, you enter the amount of the revenue. Optionally you can put a description to your revenue (e.g. Receipt from customer) in the Description field. You select the Date, Time and Minutes in the respective fields and to save the entry click the icon. Immediately the revenue is entered into the system and you can see it in the list of expenses and revenues.

DTCs (Diagnostic Trouble Codes) ![]() require the installation of a specialised device in a specific way and provide us with fault information on our vehicle.
require the installation of a specialised device in a specific way and provide us with fault information on our vehicle.
In this tab you can search for faults that may have occurred in your vehicles. From the Device field you select an individual device or all devices and to select the search interval you can select from the Filter menu or for a more specific search you can specify the interval in detail from the Time from and Time to fields.

With the buttons on the top right of this tab we have the ability to search by pressing the search button ![]() , or to save the results on the PC in an Excel file with the button
, or to save the results on the PC in an Excel file with the button ![]() . After the results are displayed with the search button, we can see the time when the fault occurred, on which vehicle (device), what is the fault code and where the vehicle was at the time of the fault.
. After the results are displayed with the search button, we can see the time when the fault occurred, on which vehicle (device), what is the fault code and where the vehicle was at the time of the fault.
If we have more than one different breakdown and once we have seen them, we can delete them, one by one with the Delete selected button if we have selected it , or delete them in bulk by pressing the delete all button (here we do not need to have selected them).
In this menu you can view and manage all the maintenance tasks you have created for your vehicles.

You can select the vehicle or vehicles at the top of the menu to search for the maintenance tasks you are interested in.

Above the list of maintenance there are buttons to refresh the list , add a new maintenance (described in detail in the New Maintenance menu), delete the selected ones , import and export maintenance to and from an Excel file to and from your PC.
In red we see the maintenance that is overdue. In blue we see the overdue maintenance.
This menu allows you to enter a maintenance task for your vehicle(s).

Clicking on the New Maintenance option opens a new tab. From the Device menu, select the device you are interested in and add a name for the maintenance in the Name field. Otherwise from the pop-up menu you can select a name from the existing ones. You can even enter a new maintenance name. Press Enter to save it. If you want to delete the name you created, right-click on the name while the menu is open.
Select Data List to save your maintenance and the Popup option to see a small window in the upper right when a maintenance notification occurs.
In Maintenance Scheduling we have the ability to schedule our maintenance in three ways.
Using the odometer (By odometer option), based on the hours the engine is running (By engine hours) or calendar-based (By days), you can schedule the frequency of maintenance based on the vehicle's odometer, or the hours the engine is running, or based on days.
In the By odometer option, we enter the mileage your vehicle had at the last service. In the odometer interval, we enter the interval between services.
In the With engine hours option we enter the hours the engine had at the last service. In the Engine hours option we enter the interval of hours between services.
In the With days option we enter the date when the last service was performed on our vehicle. In Next Service we enter the date the next service will be performed.
You can choose to perform a Renew last service.
The Renew last service button renews the service by making a new one as soon as the previous one expires. This is to automate the creation of maintenance and is aimed at users who do their maintenance without delay.
You can also make it save the new maintenance to the maintenance book (Save to Maintenance Book, described in detail in the Maintenance Book menu).
Depending on how we have scheduled our maintenance (odometer, hours of operation, date), we can set a notification for our upcoming maintenance. If we have scheduled maintenance based on mileage, we click on the Odometer Balance (km) button and in the field below we put the mileage we want the platform to notify us before the maintenance time comes. E.g. 500 km before the maintenance mileage limit.
Similarly, if our scheduling is with hours of operation, we click on the Remaining hours of operation (h) button and enter as many hours as we want to be notified before maintenance. E.g. 10 hours before.
The same for scheduling with specific dates. We click on the Notification Date button and set the date we want.
Important note: At the bottom of the screen the current odometer and current engine hours come filled in. Whenever you schedule or perform maintenance you should update these fields with their correct values within your vehicle tab.
Once you have filled in the fields of interest, click on the disk ![]() at the top of the screen to enter the maintenance. Once saved and if you have selected the Save to Maintenance Book menu, the Maintenance Book Properties tab will automatically open. (described in detail in the Maintenance Book menu).
at the top of the screen to enter the maintenance. Once saved and if you have selected the Save to Maintenance Book menu, the Maintenance Book Properties tab will automatically open. (described in detail in the Maintenance Book menu).
In order to be able to have notification of maintenance entered into the system, you must create a Maintenance Event from the Events menu (described in detail in the Events menu).

The maintenance book gives you a summary of the maintenance for each vehicle.

In the Devices button you select the devices whose maintenance you wish to view, and next to it you set the time interval you are interested in.

Through this menu, you can see at a glance how many maintenance tasks are overdue, how many are due to expire soon, how many are open and how many have been completed for your vehicles.
Below and to the right of this information are the Reload button , which shows you the maintenance of all vehicles regardless of the time interval and the plus button which allows you to add a new maintenance which will open a new tab.

In the Plate field we will see our default vehicle or choose one from the list. In the Workshop field we can enter the name of the workshop where the maintenance will be performed. In the Date, Hours and Odometer fields we enter the necessary data for our maintenance respectively. In the Maintenance Description field we will see the default name of the maintenance, the Spare Parts Description field will find the default spare part and you can add other spare parts. If we want we put a short description or some comments. After we have finished, we click on the save icon.
The Excel Template button ![]() displays a menu to save the maintenance of our vehicles in an Excel file. If we want we can delete the maintenance, with the Delete button if we have selected it.
displays a menu to save the maintenance of our vehicles in an Excel file. If we want we can delete the maintenance, with the Delete button if we have selected it.
In this menu, you can view and edit the reports you have created.


This menu is divided into two tabs, Default and Created.

In Default you can view the reports you have created and edit them (from the pencil button  ), create and save them (create button
 ![]() ), view them (eye button
), view them (eye button ![]() ) and delete them (bucket button
) and delete them (bucket button  ).
).
At the top right of the tab, there is the Reload Reports button, the plus button for creating a new report (discussed in detail in the New Report menu) and the bin button for deleting the reports you have selected from the box to their left.
On the Created tab, you can see all those reports that the program has automatically created based on the reports you have made and the frequency with which you set to receive them.

At the top of the menu you again find the Reload and Delete button . At the bottom you find information about the reports that were created.
More specifically, you see the exact date and time they were created, their name, their type, their format, how many devices are included in the particular report, how many zones and sensors. In the last column, there are buttons to save the created report to your PC ![]() and to delete it.
and to delete it.
With the bucket button to delete reports, you must have checked the box to the left of them.
In this menu you can get a new report on the operation of your vehicles.

You meet the tabs Central, Time, Schedule and Create.

In the Central tab, you can name the report in the Name field, In the Format field you select the format of the report (HTML file or Excel file).

In the report options, you can select the report type from the Type field's pop-up menu, the devices it will apply to (you can select just one, multiple or all of them) from the Devices field, and the zones from the Zones field's menu. You must have created Zones for options to be available.
The Events, Sensors and Transaction Categories fields become active depending on the type of report you have selected, the sensors and the transaction categories (depending on what the type of report you select requires). In the Displayed Fields, you can select the columns you want to display in your report from the Data Columns menu , whether the results will be displayed in Aggregate, whether addresses (Show Address), coordinates (Show Coordinates) or zones instead of addresses (Zones instead of Addresses) will be displayed.
At the bottom of the tab is the Supplementary options category, which are displayed depending on the type of report.

In the Time tab, you can edit the time period for which you want to get a report. If you only want to get a report for some days of the week, then select them in the first section of the tab (Days of the week). If you are also interested in specific times within each day, then you activate the Time of day option in the second part of the tab, activate the days you are interested in using the corresponding buttons and set the time interval you are interested in for each selected day.

In the Schedule tab, you can set the frequency of sending the report. After entering your email, you can choose to have the GPRS platform send you the report you created daily, weekly or monthly.
In the Create tab, you can immediately view the report you set up with the time limits you want, without waiting for the platform to send it to you at the set time.

Above the tabs, there are the Create ![]() button which allows you to save the report to your computer, the View
button which allows you to save the report to your computer, the View ![]() button which allows you to view the report on your screen without saving, and the Save
button which allows you to view the report on your screen without saving, and the Save ![]() button to save the report settings to the GPRS platform.
button to save the report settings to the GPRS platform.
Clicking X closes the reports window.
This menu contains the ecological statistics of your fleet.

In the top left part of the menu you can select the devices/vehicles for which you want to get statistics.

In the upper central part you can set chronological filters (Today, Yesterday, Week, Month, Past month).

The results are based on the data you have entered for each of your vehicles. Such as Date of first license, Engine Type, Vehicle Type, Fuel Type, Average Fuel Consumption.
First you will find pie charts for all your vehicles regardless of whether you have selected only one or a group of your vehicles.
The Vehicle Type graph, shows you statistics for your vehicle types. The Fleet Age graph shows data on the age of your fleets. The Fuel Type graph shows you how many of your vehicles use each fuel type. The Engine Type graph shows you what type of anti-pollution technology your vehicles are using and in what quantities.
Hovering the mouse over the results of each graph brings up the quantity of each category.

Just below are eight statistics listed of which our Average Age of Fleet Vehicles shows the average age of all our vehicles even if we select only one or a group of your vehicles from the Devices menu.
The stats are Average Daily Distance per Vehicle, Average Age of Fleet Vehicles, Average Fleet Fuel Consumption, Average Daily Fleet CO2 Emissions, Total Fleet Route, Total Fleet Movement, Total Fuel Consumption, and Total CO2 Emissions.
The following graphs follow:
The Distance by Type graph shows us how many miles each type has been driven by our vehicles.
The Hours by Age Group graph shows us engine operating hours by vehicle age group.
The Fuel Consumption by Fuel Type graph shows the amount of fuel consumed by our selection of vehicles in the given time period in liters.
The Emissions by Engine Type graph shows us the total amount of CO2 emissions by engine type in kilograms.

Below we find the Fleet Emissions Data graph. On the vertical axis we have the measurements (kilometers, liters, kilograms) and below on the horizontal axis we have the name(s) of the selected vehicles.

Above we will see in different colours the categories we see in the graph. Distance in light green (in km),Fuel in light blue (in litres) and CO2 emissions in purple (in kg).

Tachographs record information on driving time, speed and distance. This information is stored on smart cards to be checked later.


Clicking on the Tachographs menu opens a tab in which we enter the name of the new tachograph report we want to save in the Name field. In the Format field we select whether we want the report to be in HTML file format or Excel file format. In the Devices field we select the devices for which we want to generate the report. It can be just one or multiple. In the From Time - To Time fields we select the time interval of the report with detailed date in day, hour and minutes. Otherwise we can set the time interval by selecting multiple dates in the calendar by holding down the left mouse button.
After defining the necessary fields for our report, we click on the Create button ![]() . This will open a new window for us to be able to save the tachograph report to our PC.
. This will open a new window for us to be able to save the tachograph report to our PC.
The Settings menu contains general settings for your account, your devices and platform management.

This menu shows us the total events that are created under our account.
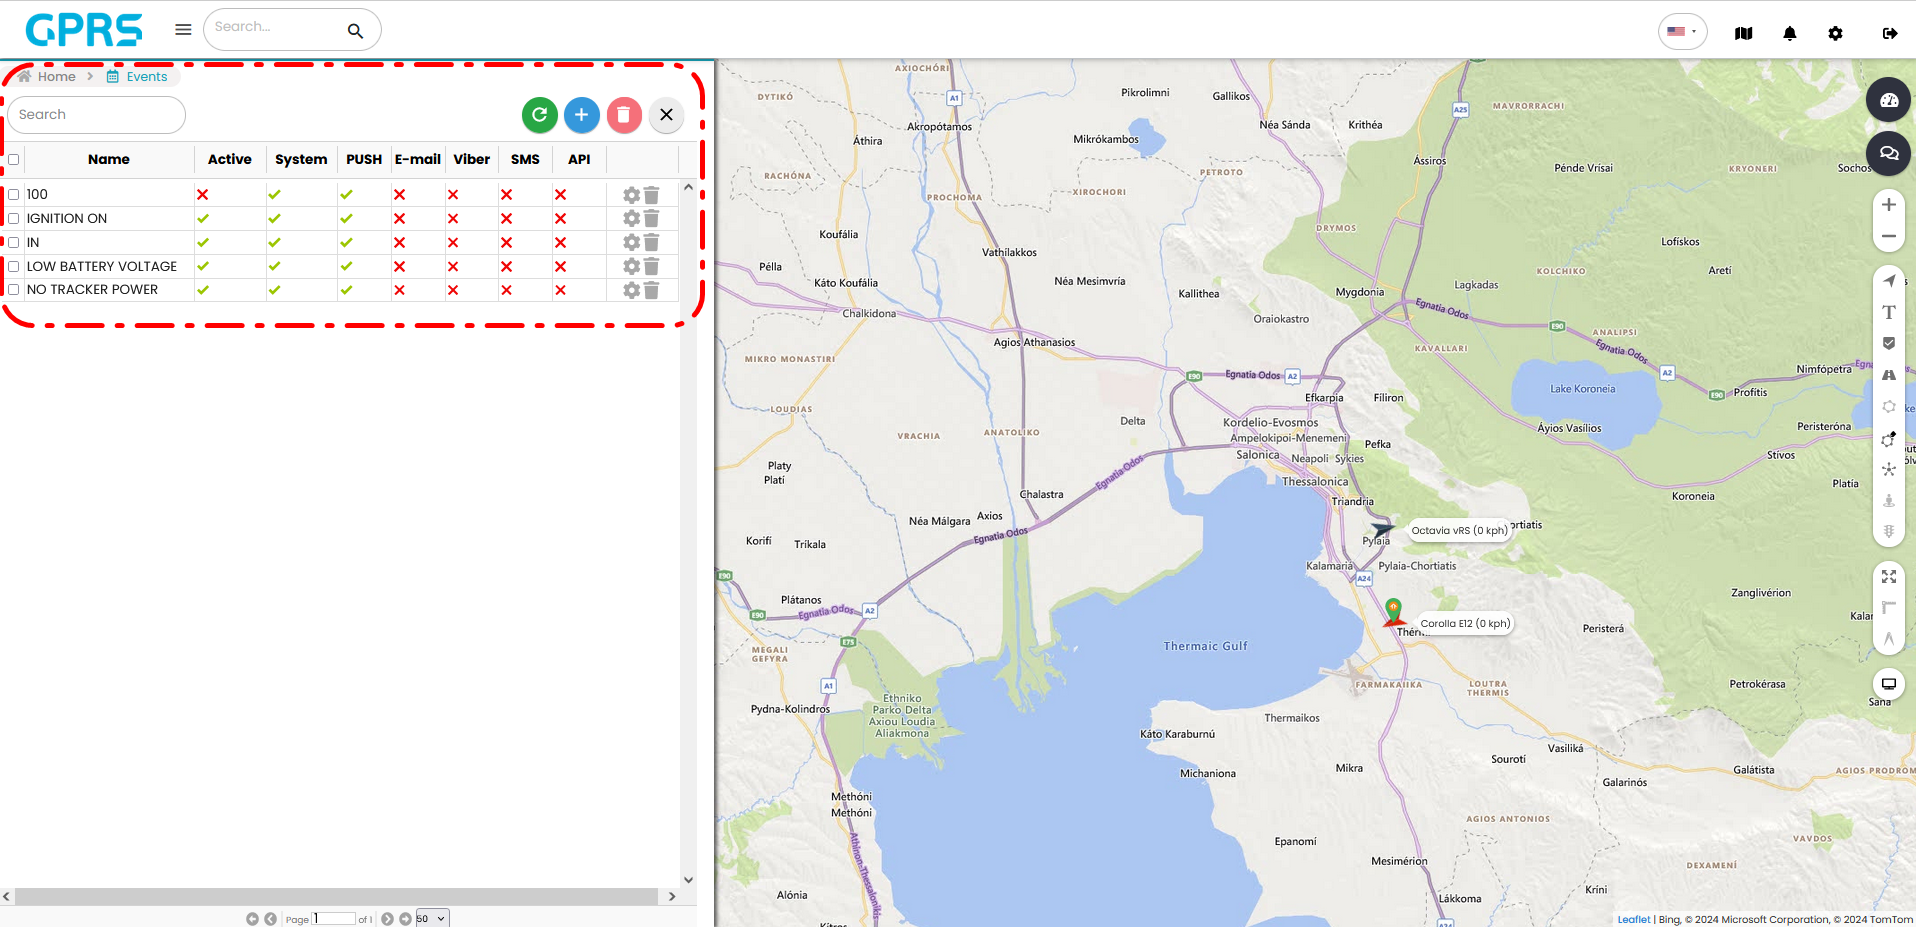
If there are multiple events you can use the search function.
The list shows in one glance the following:
- Event name: The name of the event
- Active status: Activated/deactivated state
- System: Turns on/off the event popup
- Push: Activates/deactivates push notifications in the mobile app
- Email: Activates/deactivates event copies delivered by email
- Viber: Activates/deactivates Viber push notifications (deprecated feature - not in use)
- SMS: Activates/deactivates SMS feature
- API: Activates/deactivates API integration
There's also the option to edit an event with the edit button ![]() and also delete it with the delete
and also delete it with the delete ![]() button.
button.
The reload icon ![]() will refresh the event list.
will refresh the event list.
The ![]() button will open the event creation submenu and is consisted of the following tabs.
button will open the event creation submenu and is consisted of the following tabs.
- Main
- Time
- Notifications
- Object control
Main
The main tab allows you to perform the following actions.
Name: Renam
In this menu we see the forms we've created
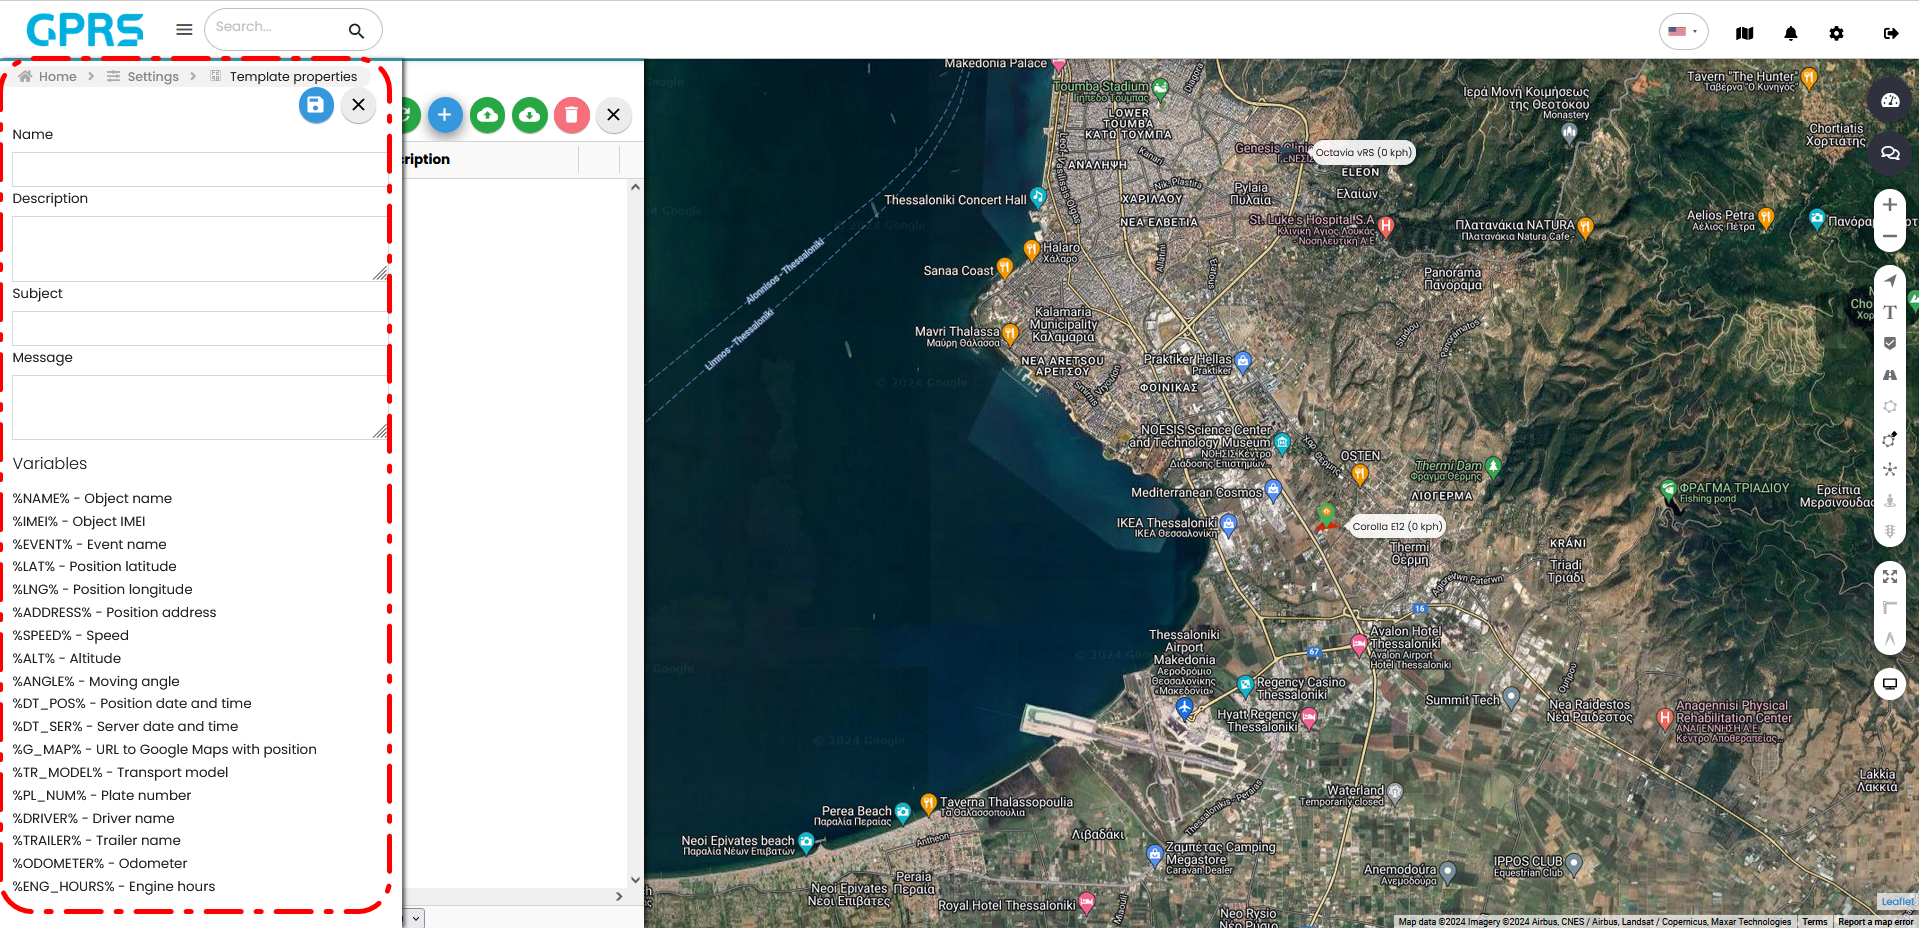
Forms are associated with the events and what data you want each notification you receive to contain. For example, if you have an event for a speeding alert on your vehicle and you have chosen to be emailed about the event, in the form field you can add a personalized message which you can set to contain information about the device such as:
- Vehicle speed
- Location timestamp
- Location provided by Google maps URL
You can select one or multiple variables from the 15 available to tailor the message depending on the alert. The variables are as follows:
- %NAME% - Object name
- %IMEI% - Item IMEI
- %EVENT% - Event name
- %LAT% - Latitude of location
- %LNG% - Longitude of position
- %ADDRESS% - Location address
- %SPEED% - Speed
- %ALT% - Altitude
- %ANGLE% - Angle when moving
- %DT_POS% - Position date and time
- %DT_SER% - Server date and time
- %G_MAP% - URL to Google Maps with location
- %TR_MODEL% - Model
- %PL_NUM% - License plate number
- %DRIVER% - Driver name
- %TRAILER% - Trailer name
- %ODOMETER% - Odometer
- %ENG_HOURS% - Engine hours
If you have several forms you can search for them by the name you have given them through the Search field. A new tab opens for adding a form. It is recommended that all relevant fields be filled in.
- Name: The name of the form
- Description: A brief description of the form
- Subject: The subject of the form (and the email we will receive)
- Message: The personalized message that the form will have and we will receive in our email.
Example: Excessive speed at speed %SPEED%, on day and time %DT_POS%. Look at the map here %G_MAP%
What we will see in the email we will receive will have the form: Excessive speeding at a speed of 86kph, on the date and time 20/12/2023 12:32. See the map here https://goo.gl/maps/tEbSfHk5UAMPC2Mm6
Once we have finished entering the information in the fields, click Save to save our form.
The GPRS platform enables us to receive notifications from an external signal receiving centre. (Private security company)
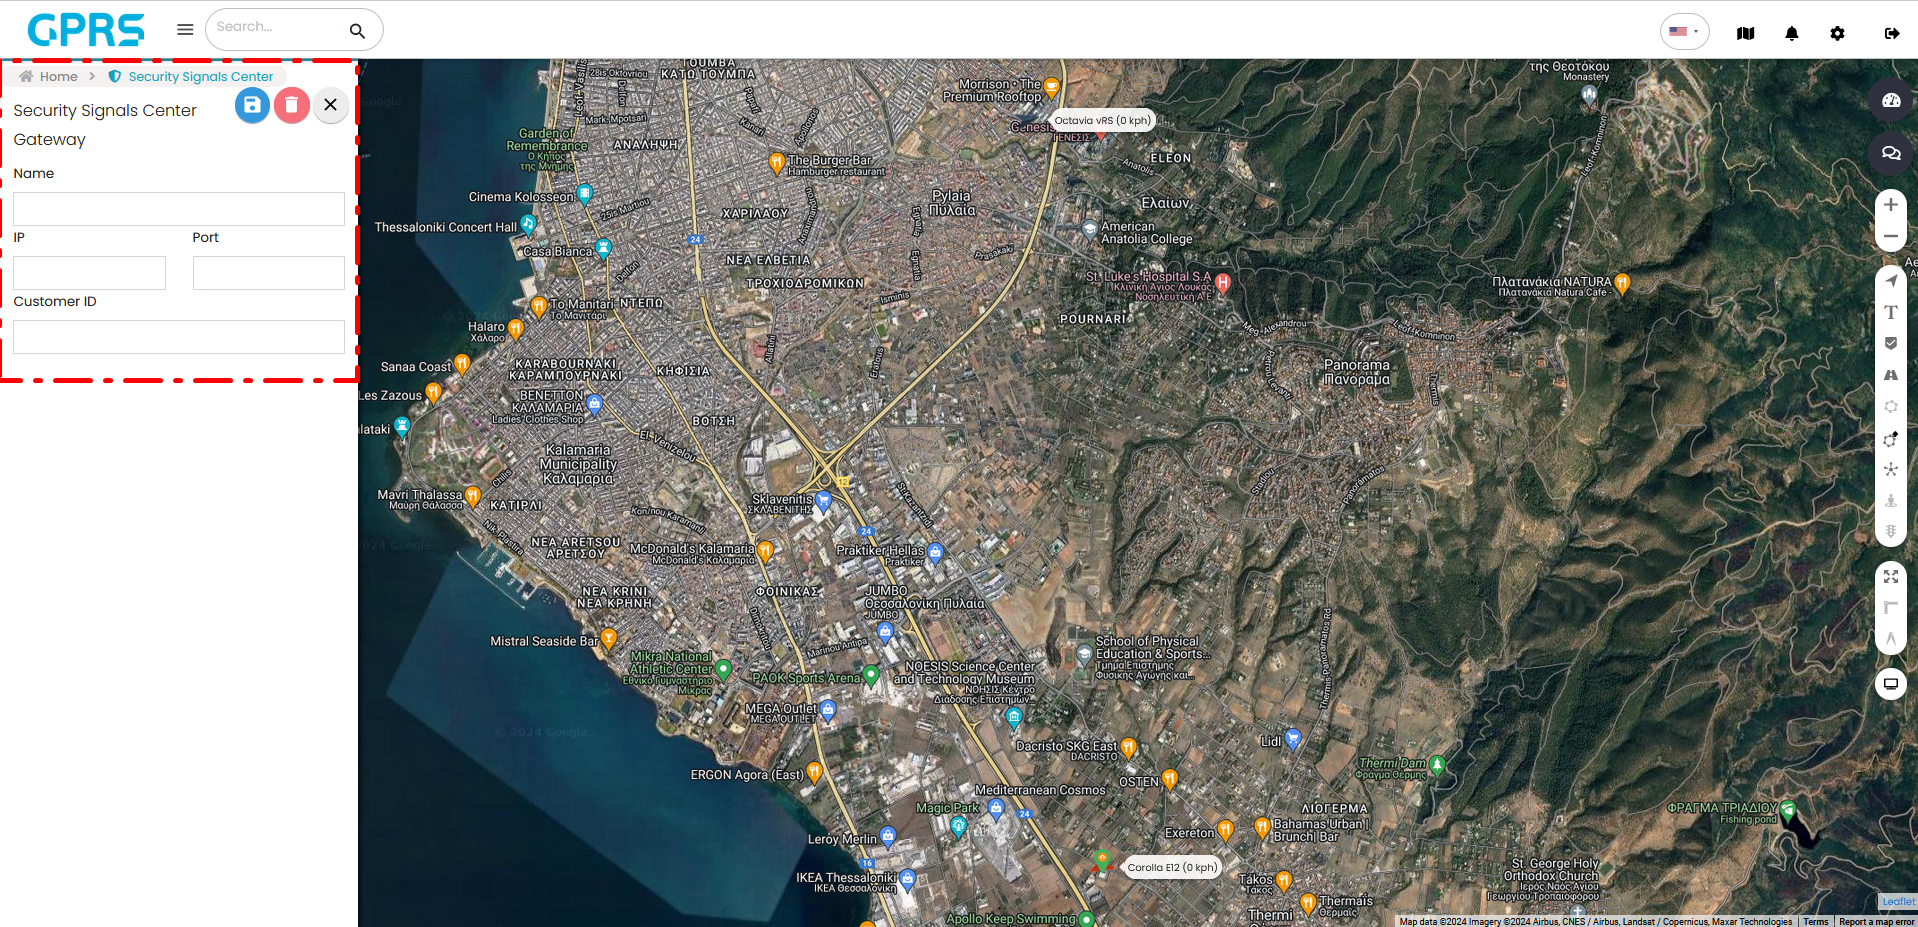
The following fields should be filled in.
Name: Gateway name
IP: Gateway IP address
Port: Port number
Customer ID: Unique identifier provided by the company
To save the information press the Save button ![]()
To delete your entries press the delete button. ![]()
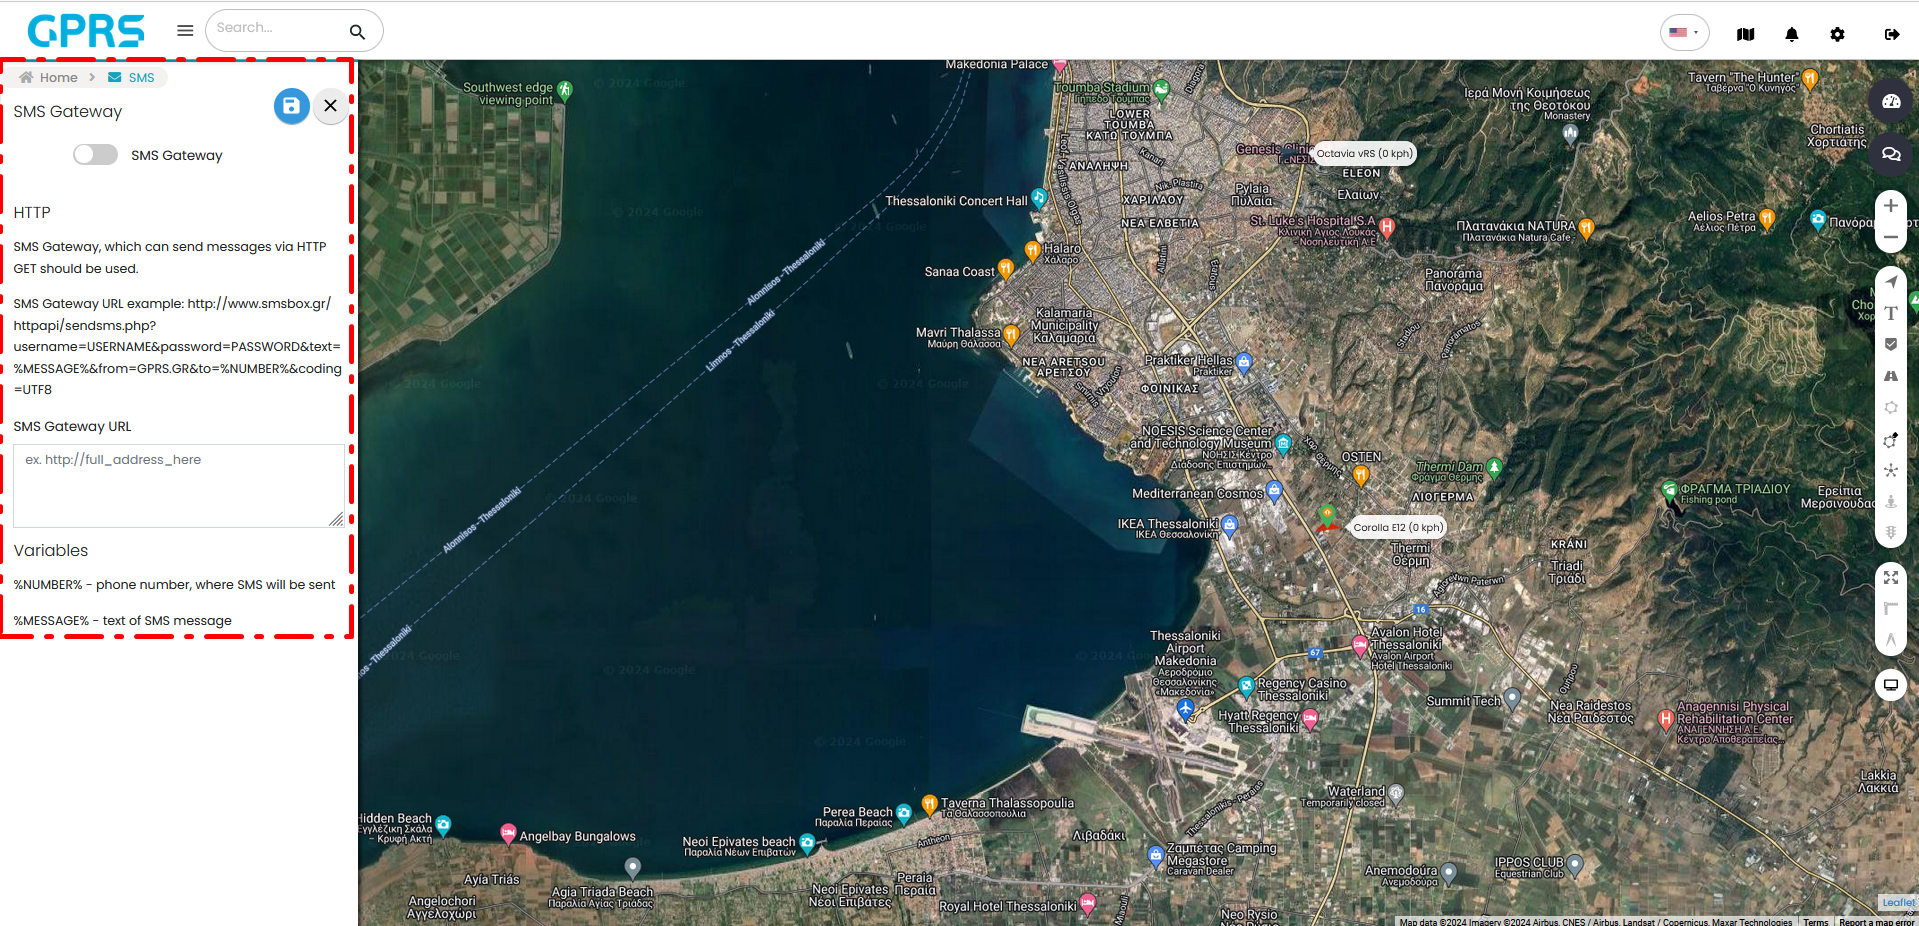
The SMS platform allows you to receive SMS notifications for events, on your mobile phone. First you need to activate the service by clicking on the corresponding button at the top of the menu.
The platform gives you detailed instructions on how to register an SMS platform website.
For example a SMS platform is www.SMSbox.gr. You can register for their service, buy a pack (number) of messages and with the Username and Password you set you will be able to use the GPRS messaging service.
In the SMS Platform Website field, you must enter the link as indicated in the SMS Platform Website Example, except that where the words USERNAME and PASSWORD are in upper case you must respectively enter your own passwords. In the link, 2 variables are also mentioned. Where it says %MESSAGE% you should write the message you want. It is the text of the message.
Where it says %NUMBER% you should write the phone number you want the SMS to be sent to.
Once you have completed your selections you click the Save icon ![]() at the top of the menu to save.
at the top of the menu to save.
This menu includes settings related to the Graphical User Interface of the GPRS platform, as well as other general settings.
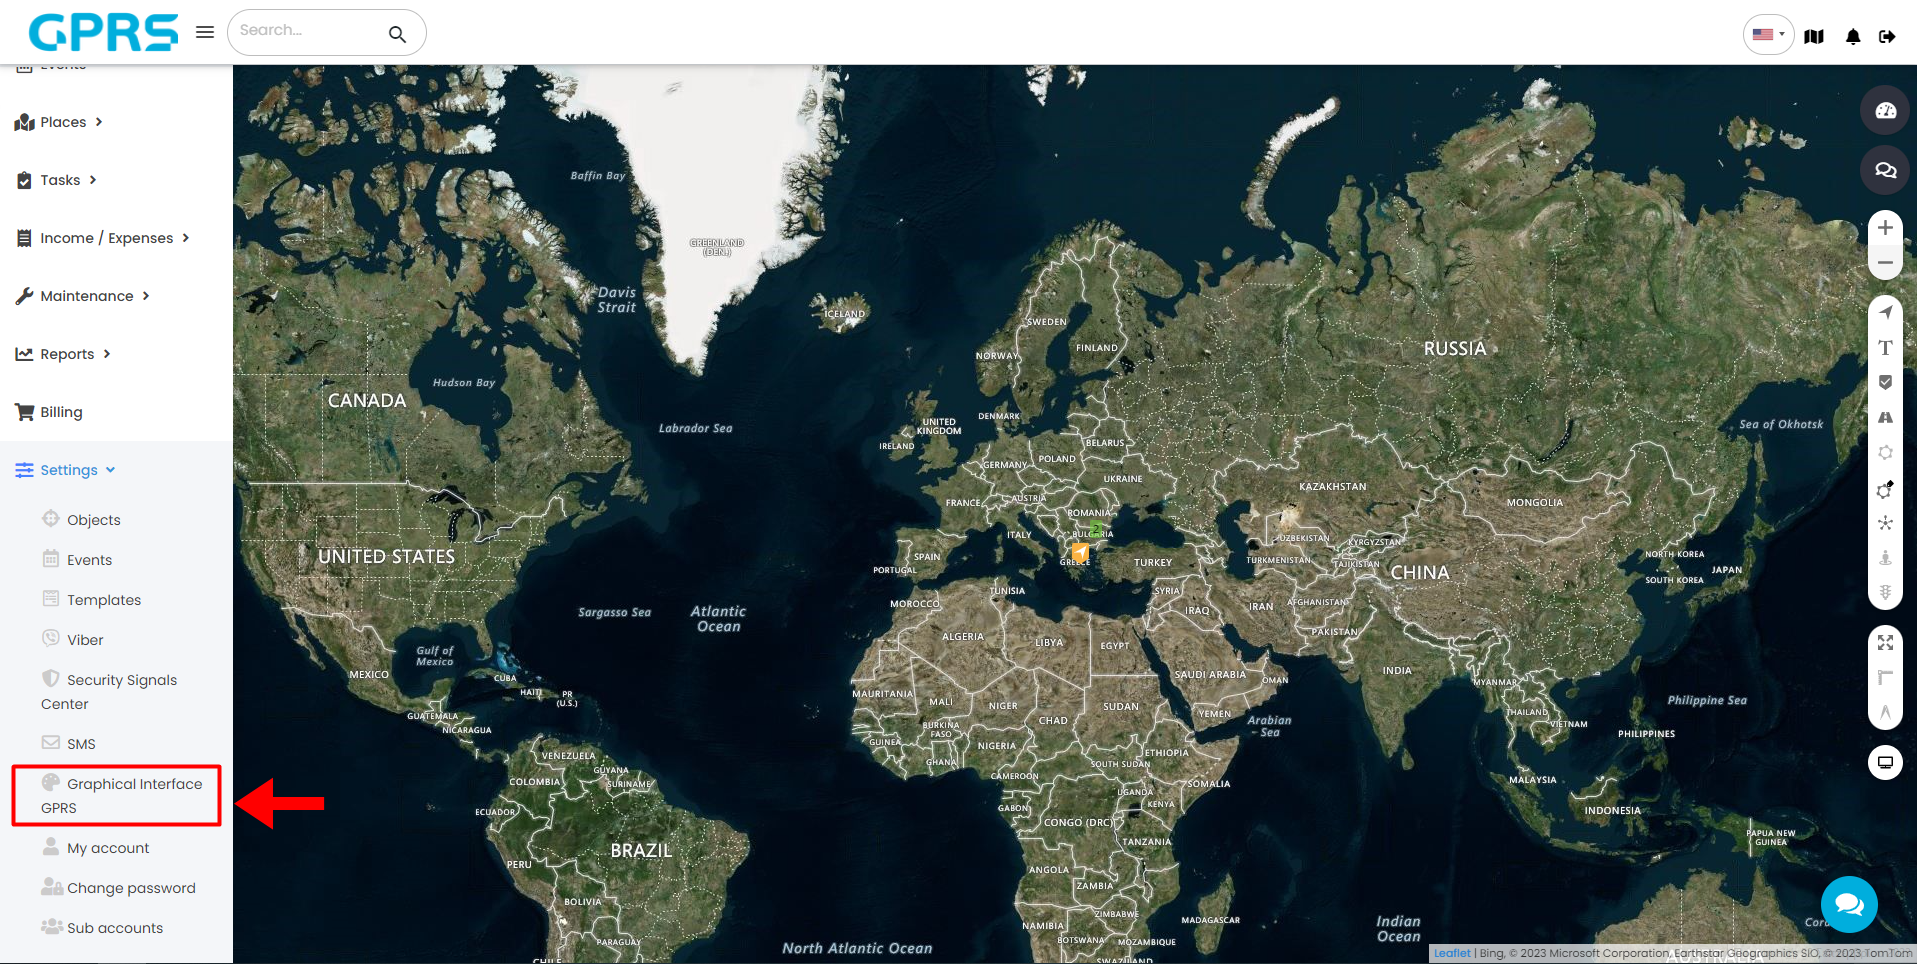
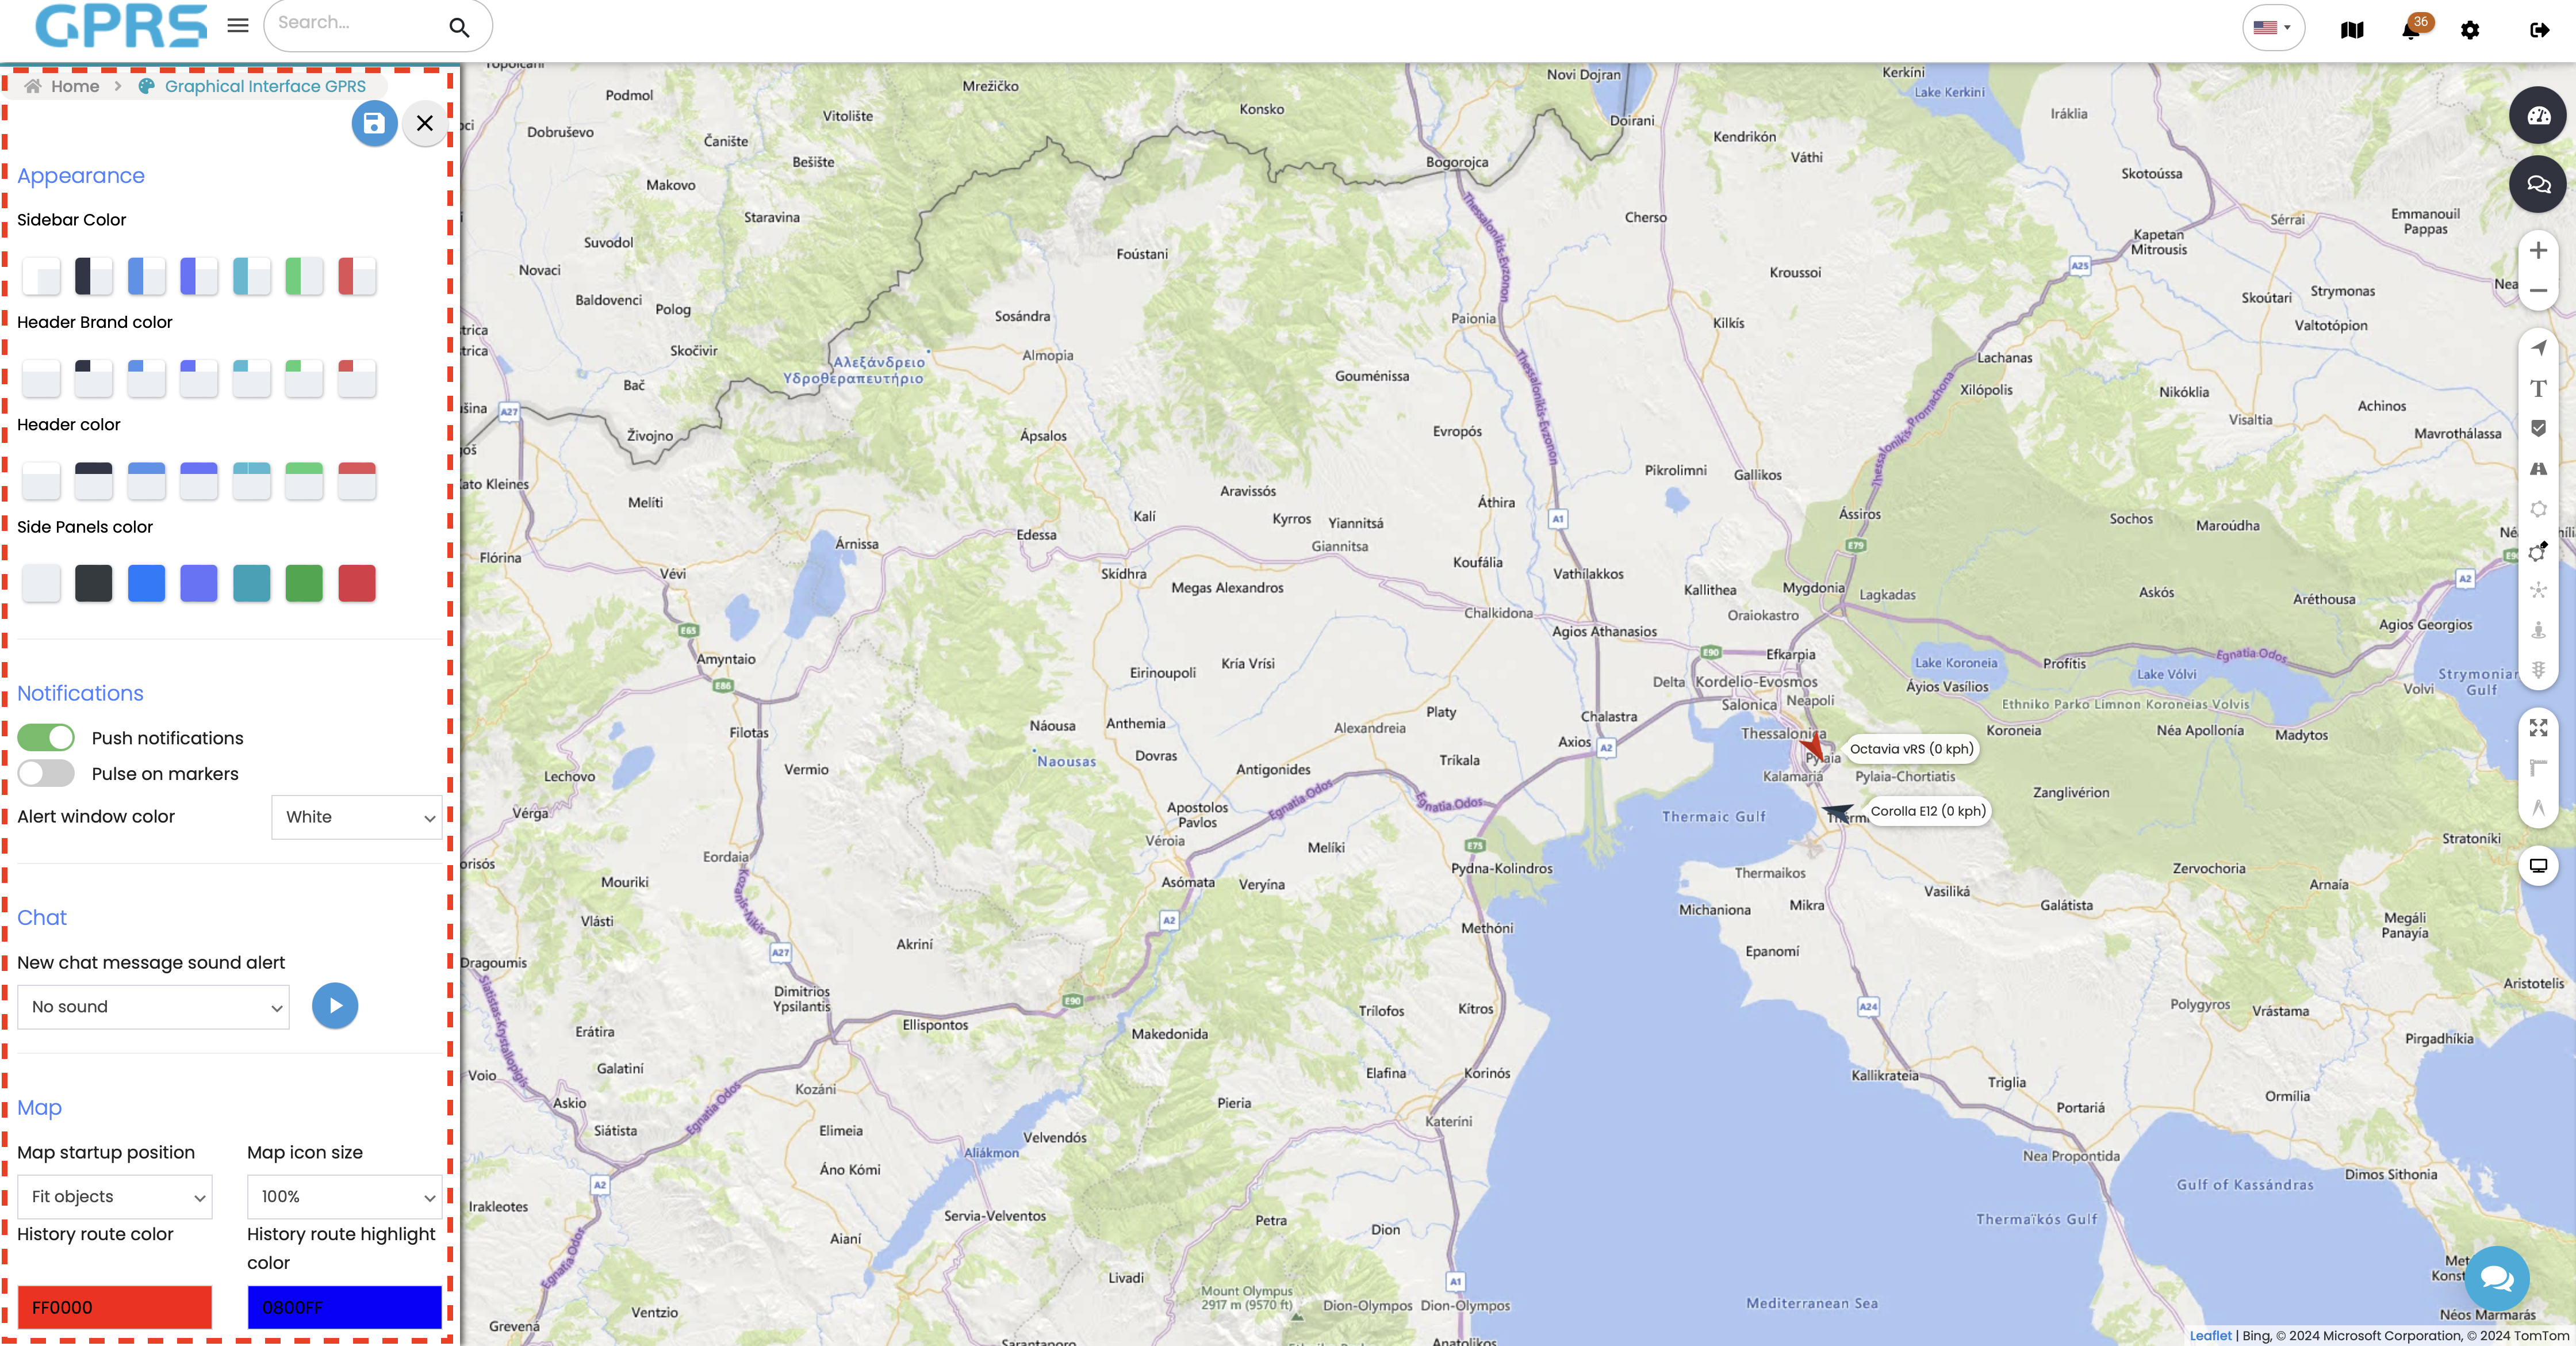
General appearance:
There are options to change:
- Sidebar Color
- Header Brand Color
- Header Color
- Side Panels Color
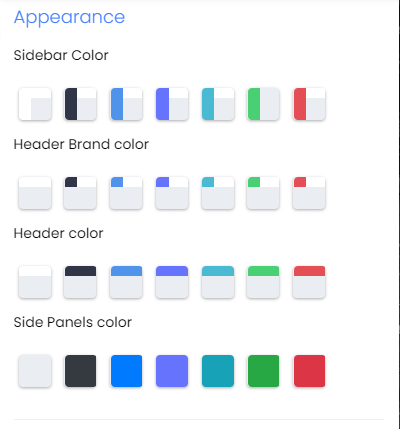
Notifications
Enables/disables push notifications.
Map
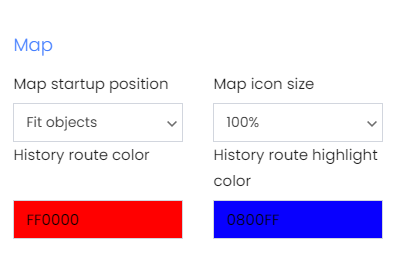
The following can be configured
- Map startup position
- Fit objects (Fits all objects in the map, the zoom level depends on the distance between objects)
- Remember last (Remembers last option)
- Default (Will zoom out the entire map)
Map Icon size
It is possible to change the icon size for better viewing. The available sizes are:
- 100%
- 125%
- 150%
- 175%
- 200%
History route colour
This changes the history path colour, when a vehicle's history is viewed. The default colour is red.
History route highlight color
This changes the history route highlight color. The default color is blue.
Groups
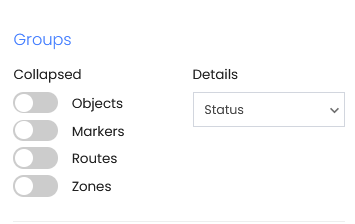
The options above affect device groups, if available and they will either collapse or expand:
- Object groups
- Marker groups
- Route groups
- Zone groups
The Details option groups the devices based on Status, Position time or Server time.
Object list
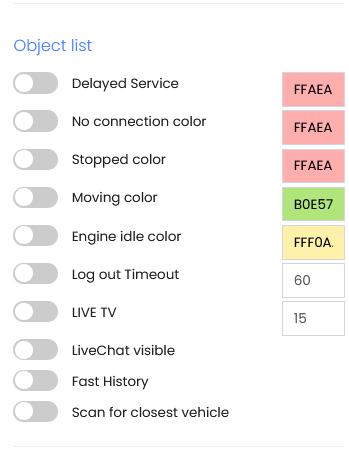
This section highlights devices in the 'Objects' section that satisfy parameters such as
- Delayed service
- No connection
- Stopped
- Moving
- Engine idle
The following can also be adjusted:
Logout timeout: This affects the idle time required for automatic logout from your account.
Live TV: This affects the idle time required in order to engage the Live TV mode
Livechat visible: Shows/hides the live chat button
Fast history: Enables/disables automatic daily history viewing when a vehicle is selected.
Scan for closest vehicle: Will show which is the closest vehicle to the vehicle we've selected.
Other settings
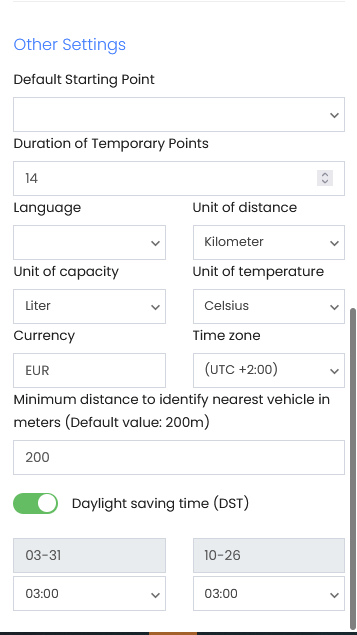
A category consinsting of miscellaneous options that don't fall in any category above.
- Default starting point: Assigns a Point of Interest (if available) as a default starting point.
- Duration of temporary points: This number affects the visible points a moving vehicle will leave on the map.
- Language: Your account's language
- Unit of distance: Default distance unit (KMH/MPH/KN)
- Unit of capacity: Default capacity unit (Litres/Gallons)
- Unit of temperature: Default temperature unit
- Currency: Displayed currency unit
- Time zone: Account time zone
- Minimum distance to identify nearest vehicle in meters:Minimum distance required to identify nearest vehicle
- Daylight savings time: Activation/deactivation of DST
In this menu, you can fill in your contact details.
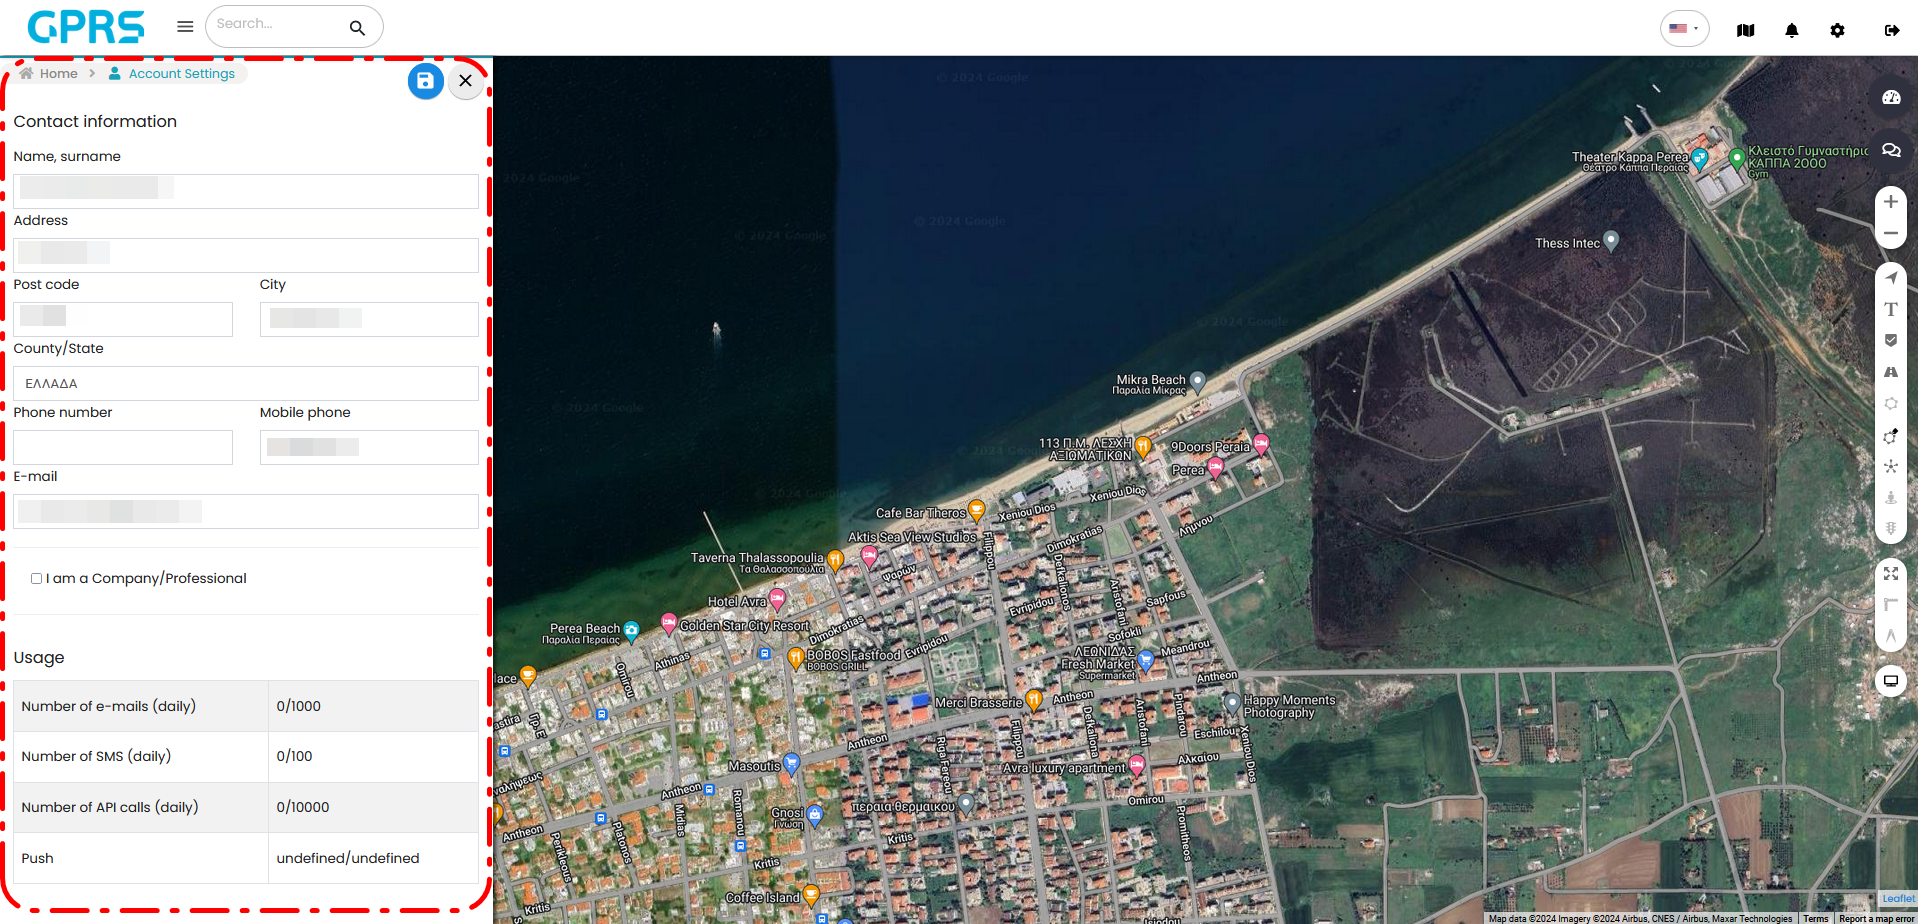
The available fields are the following:
- Name & Surname
- Address
- Post code
- City
- Country/State
- Phone number
- Mobile phone number
The details are used by Skytrack for automated invoice issuing. Therefore, all details should be correct. If the invoices will be used for businerss purposes, to claim tax relief etc. you can click on the "I am a Company/Professional" button.
The platform will display additional fields that you will need to fill in, such as:
- Company Name
- VAT NUMBER
- Local Tax Authority
- Profession
To finalize your changes click Save
To close the menu click the button ![]()
To successfully change your password, you will need to confirm your old password first. Then, it's required to enter your new password twice.
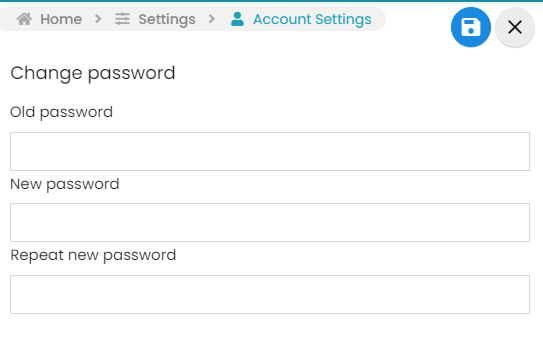
Press the 'Save' button![]() to confirm the changes.
to confirm the changes.
To close the menu, press the X button
To see the relevant video, click below.
If you're having issues with the reset process, please contact us either by phone at +302310 365067 or via email at support[at]skytrack.gr
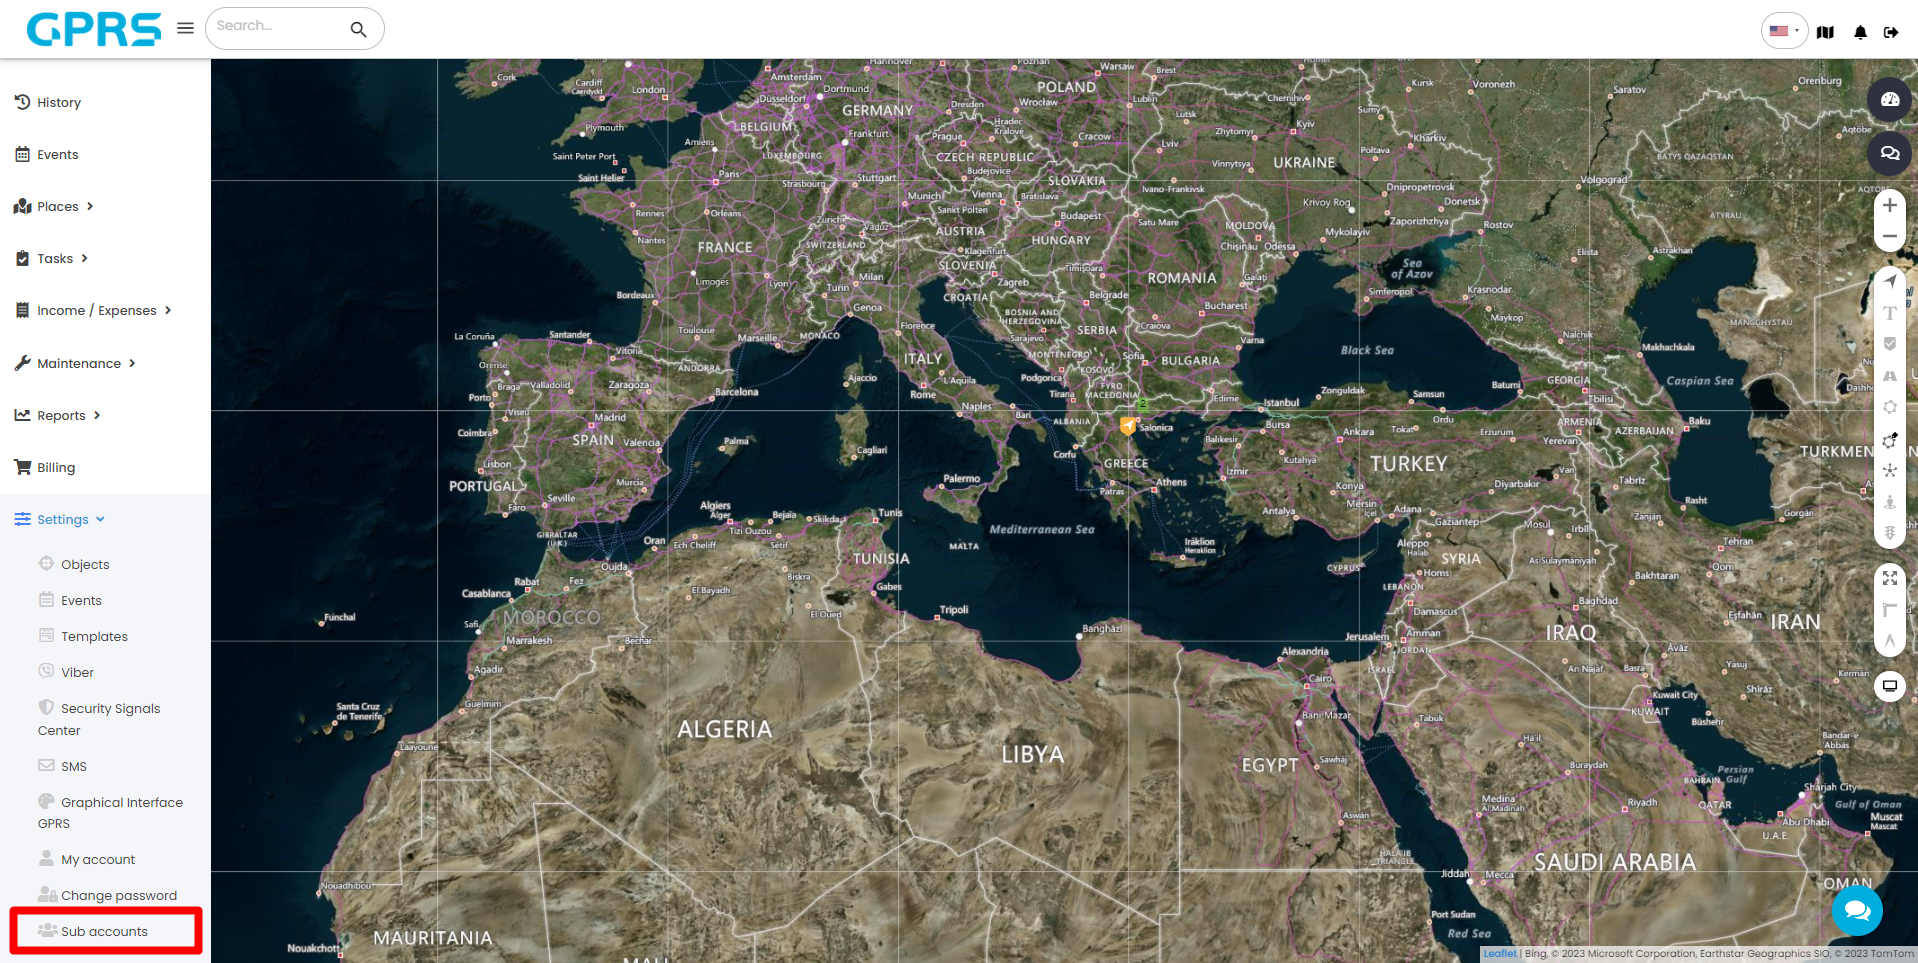
Sub users can be limited to accessing specific vehicles, zones, objects, or simply monitoring, having access at specific times/days etc. Clicking this will load the following screen.
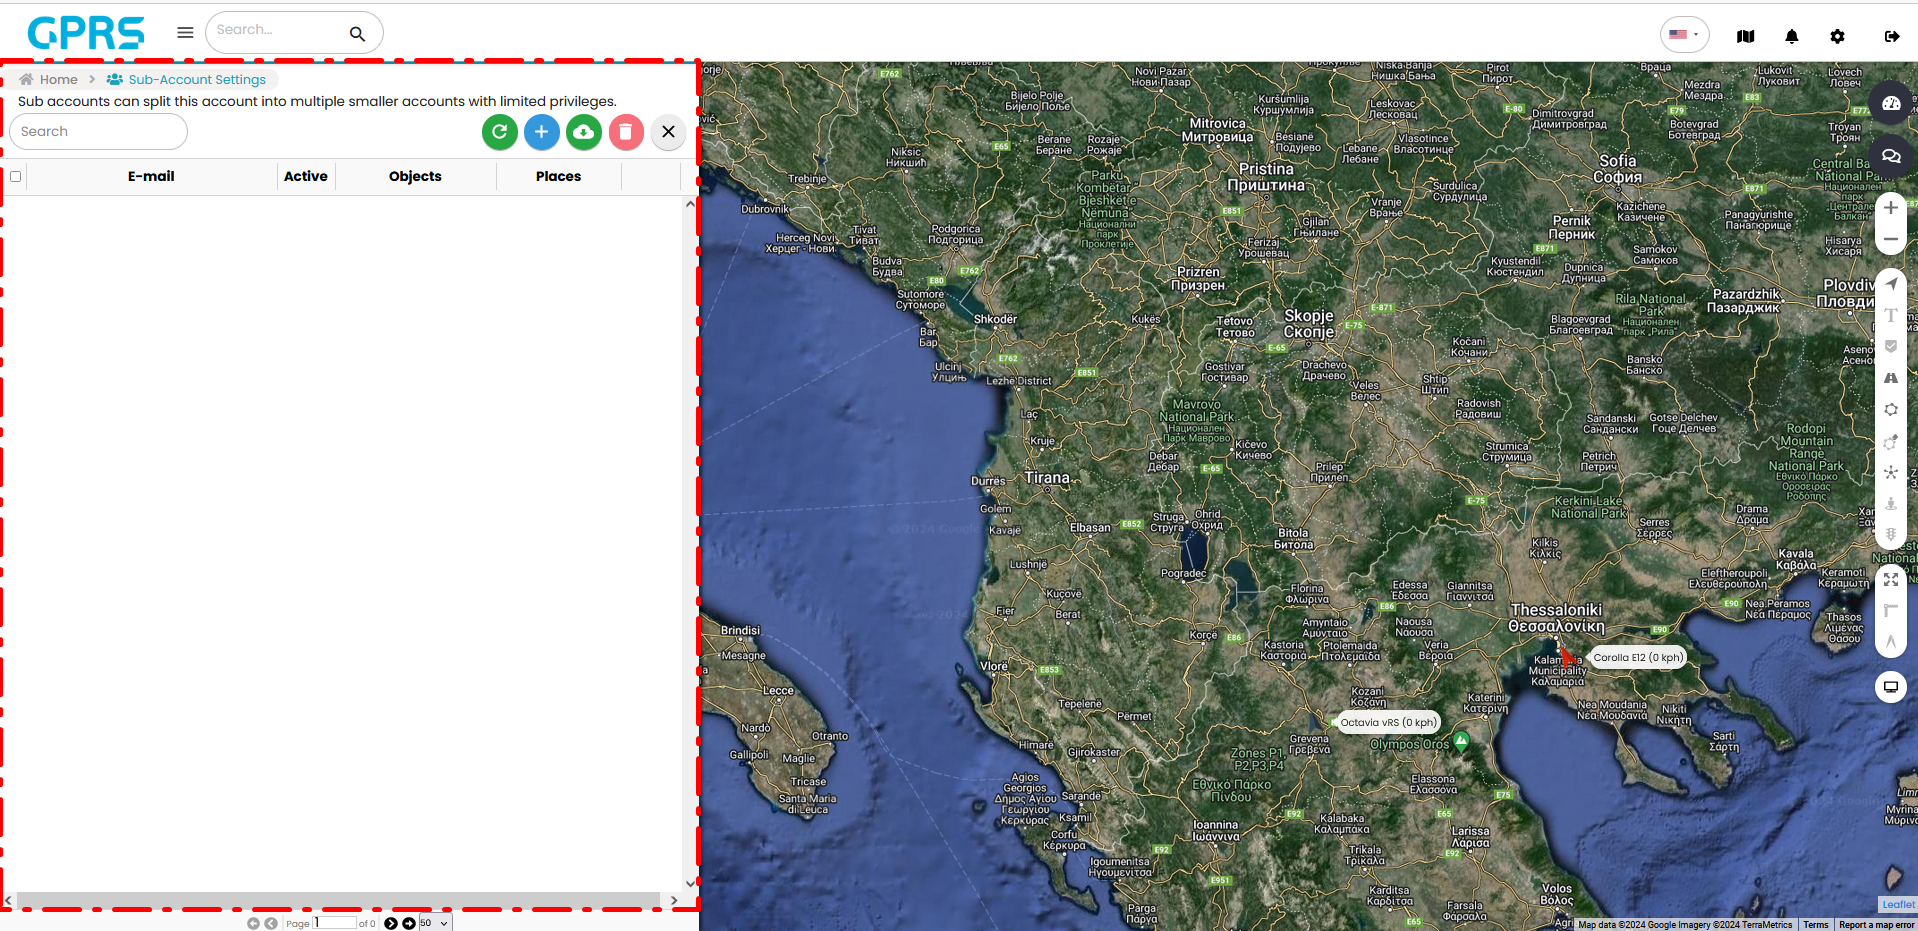
The following options are available on the top.
![]() will refresh the subaccount list
will refresh the subaccount list
![]() will add a new subaccount
will add a new subaccount
![]() exports the selected sub-accounts (if any) in an Excel format file on our computer.
exports the selected sub-accounts (if any) in an Excel format file on our computer.
Adding a new sub account will load the following screen.
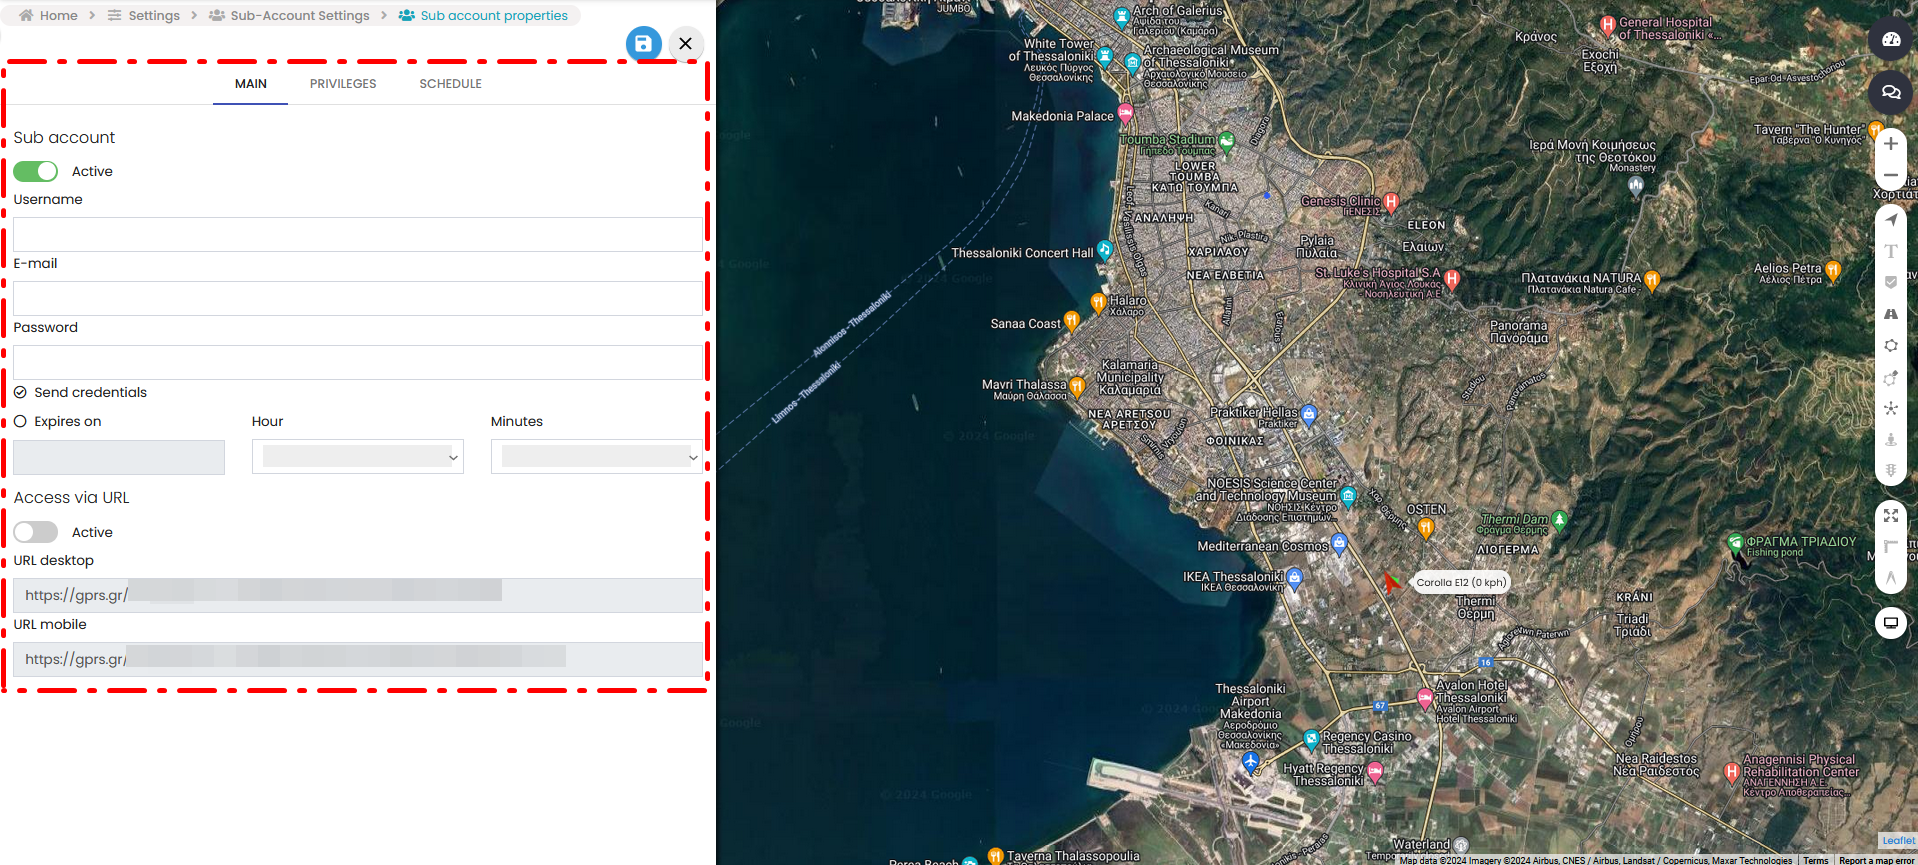
Username: The subaccount's username. Can be different from the email address associated. Will be used during to login.
E-mail: The subaccount holder's email where credentials will be sent.
Password: A predefined password for the subaccount. MINIMUM 6 characters.
Send credentials: Clicking it will automatically send the username and password to the user's email.
Expires on: Clicking it will allow us to set an expiration date to the aformentioned account.
Access via URL: Allows direct access to the subaccount via token without loging in.
Desktop & mobile versions are available to view via browser.
PRIVILEGES
This tab allows us to manage the rights of the subaccount which are simply activated or deactivated.
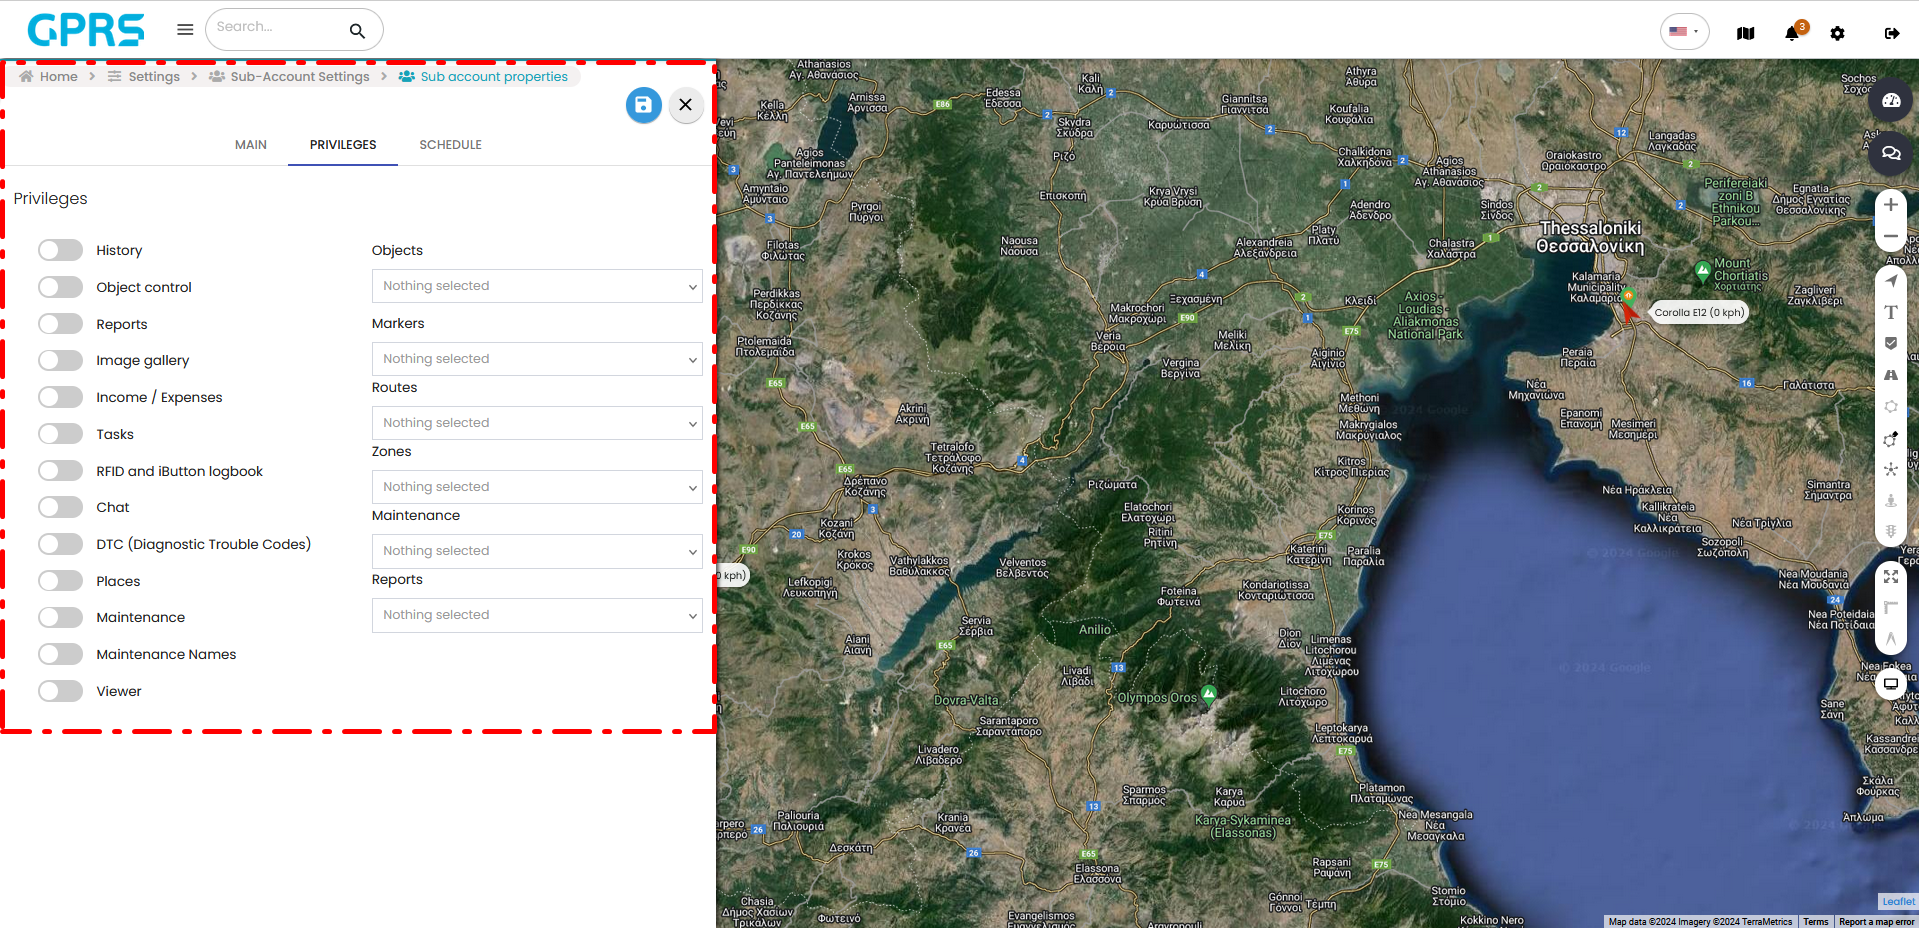
- History: Enables/disables access to a vehicle's history
- Object control: Enables/disables access to object control (GPRS commands)
- Reports: Enables/disables access to reports (viewing/generating)
- Image gallery: Enables/disables access to the image gallery
- Income/Expenses: Enables/disables access to the income/expense system
- Tasks: Enables/disables access to the tasking system
- RFID and iButton logbook: Enables/disables access to the RFID and iButton logbook
- Chat: Enables/disables access to the chat
- DTC: Enables/disables access to the DTC section
- Places: Enables/disables access to Places (Points of Interest)
- Maintenance: Enables/disables access to anything maintenance related
- Maintenance Names: Enables/disables access to the names of the mainenance jobs
- Viewer: Toggles rights on/off. The viewer option is only for monitoring.
The following list loads all parameters available in the parent account.
- Objects: Loads all objects
- Markers: Loads all markers
- Routes: Loads all routes
- Zones: Loads all zones
- Maintenance: Loads all mainenance jobs
- Reports: Loads all reports
SCHEDULE 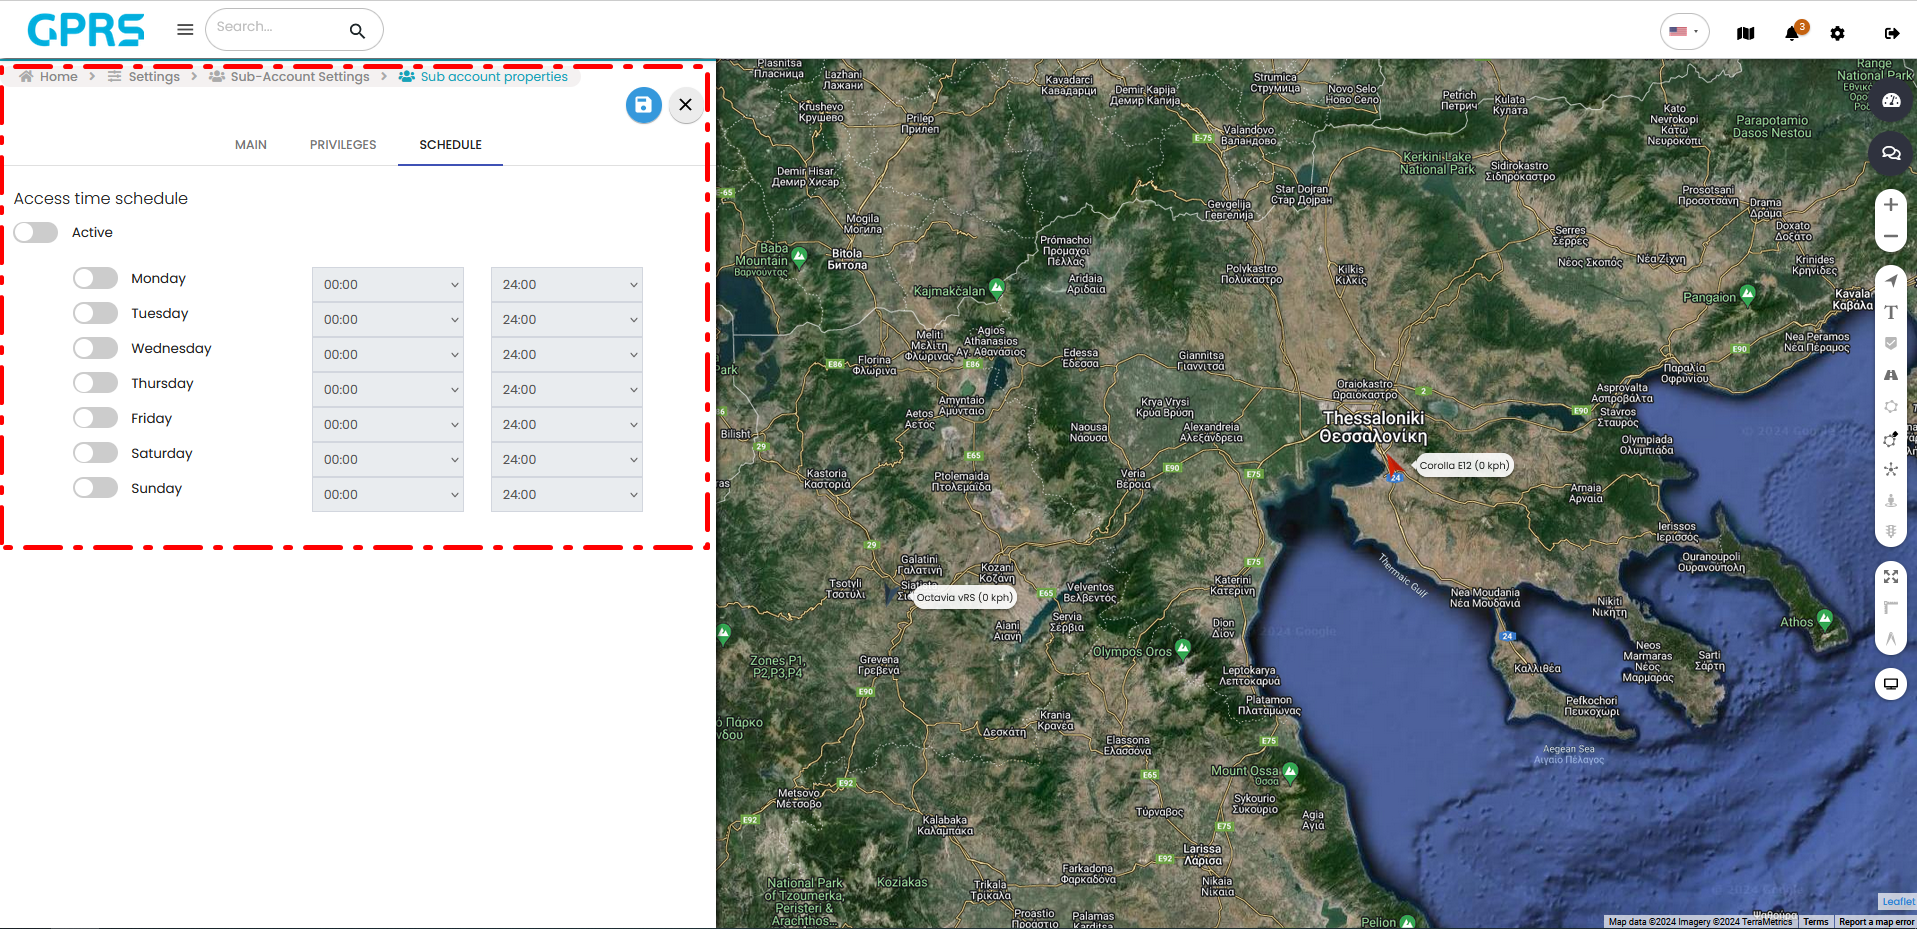
This tab activates time restrictions on the subaccount. This denies access out of those specific hours. The left panel is the day panel, the right side is the time FROM - TO. (e.g. 09:00 - 17:00) etc.